Gleap offers a seamless way to create inquiries by email, allowing you to centralize and efficiently manage support emails. This guide will walk you through the process of forwarding emails from your Gmail account to your Gleap inbound email address, as well as forwarding emails to specific team inboxes.
Log in to your Gleap account and navigate to Settings -> Emails -> Email forwarding.
In the Gleap dashboard, find your unique inbound email address for creating inquiries
In the Gleap dashboard, find your unique inbound email address for creating inquiries.
Open your Gmail account.
Go to the settings (gear icon) and select "See all settings."
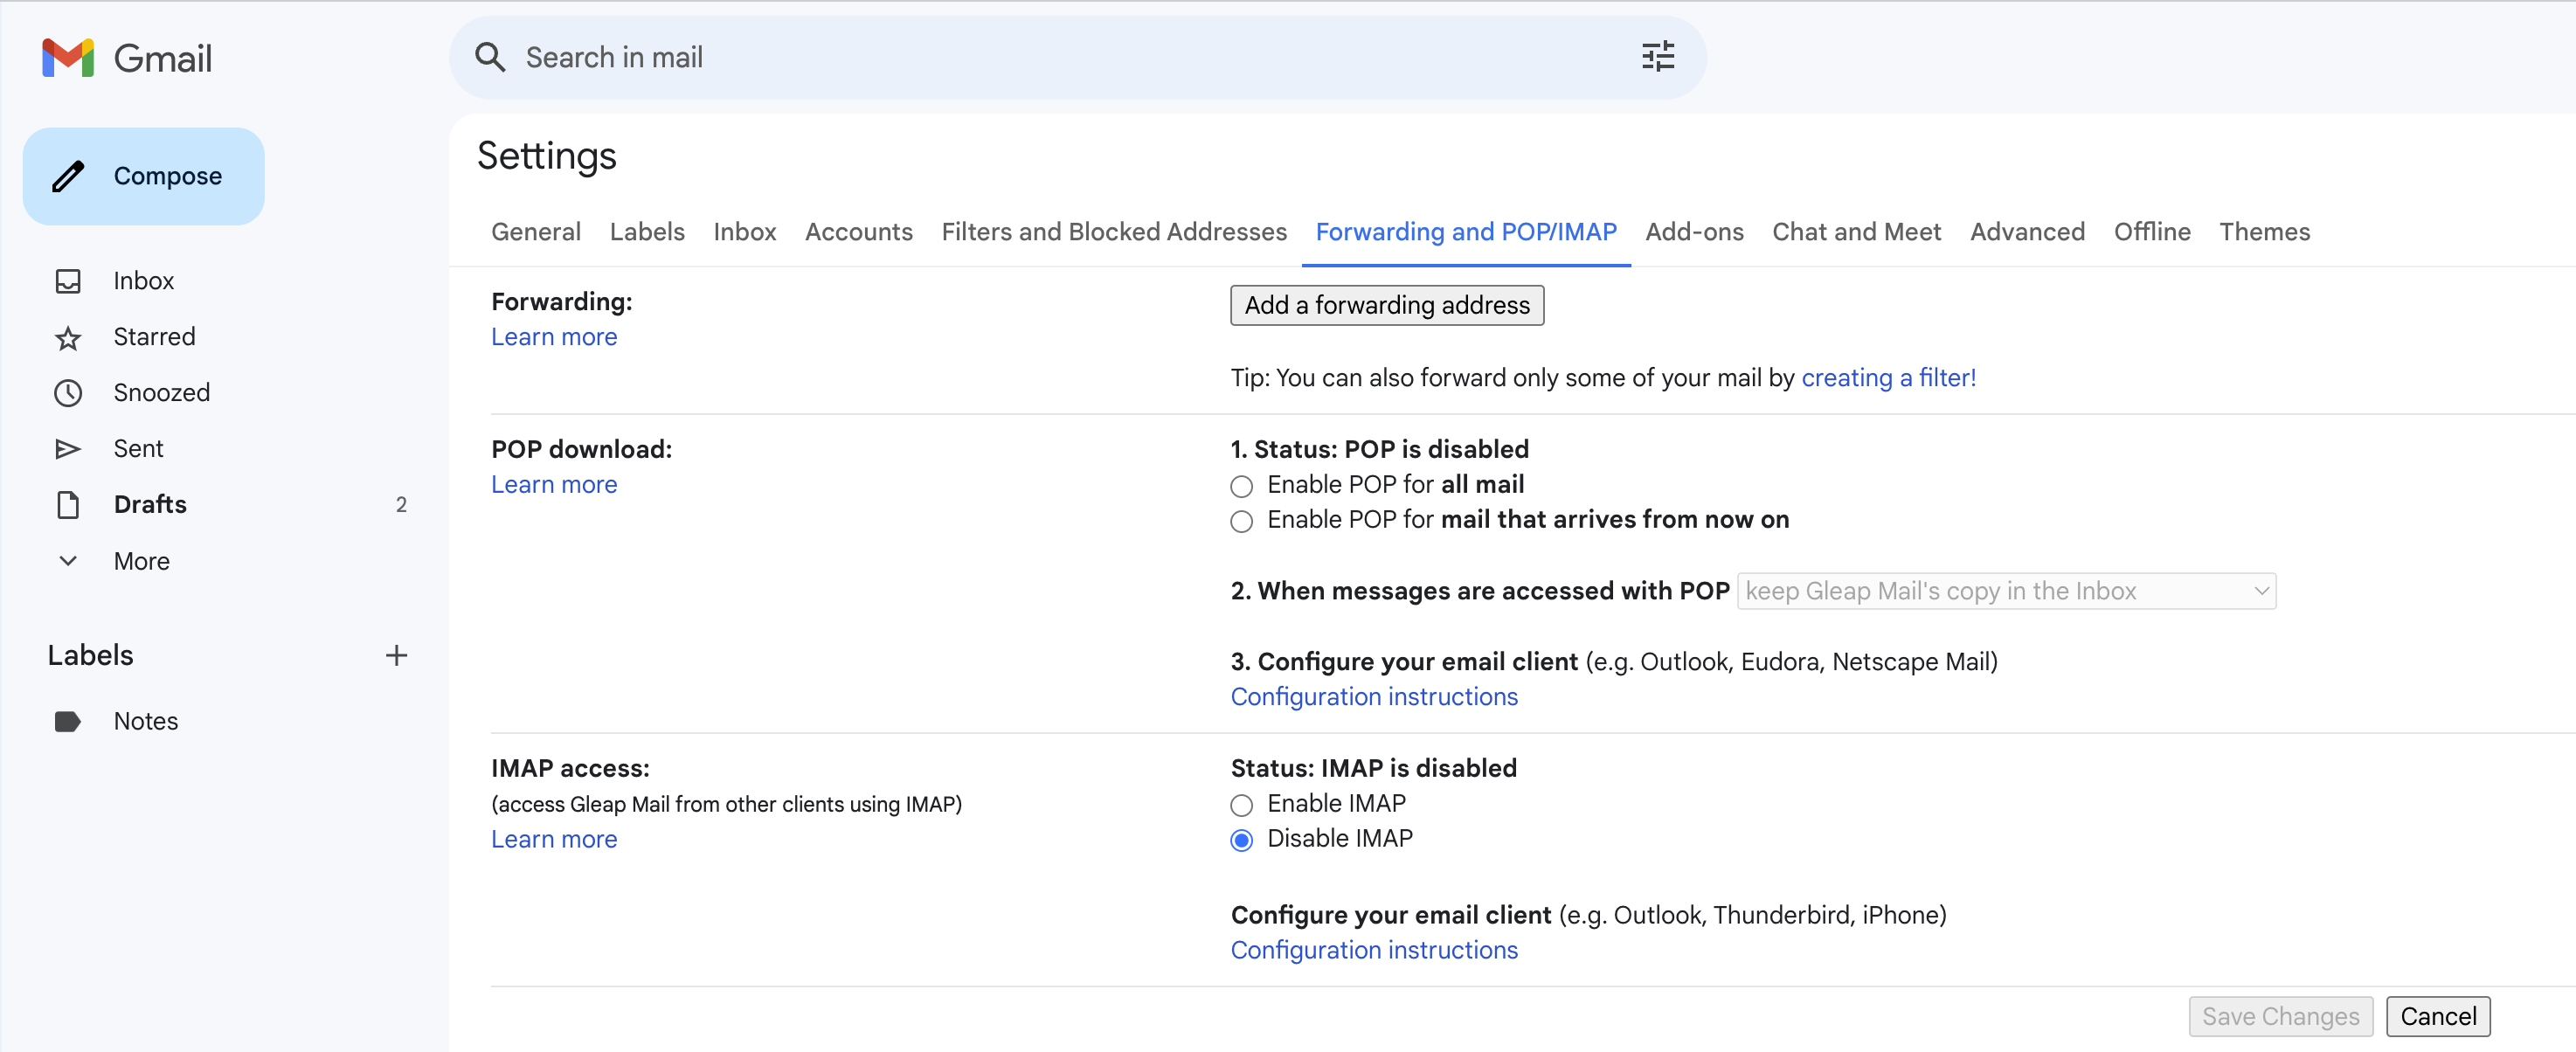
Navigate to the "Forwarding and POP/IMAP" tab.
Click on "Add a forwarding address" and enter your Gleap inbound email address.
Follow the verification process to confirm the forwarding.
Pro tip:
Directly forward your support emails to your Gleap inbound email address for centralized handling of all inquiries in one place.
Pro Tips:
Use filters in Gmail to automate the forwarding process based on criteria such as subject, sender, or keywords.
Set up labels in Gmail to categorize and organize forwarded emails for efficient team inbox management.
By configuring Gleap inbound email with Gmail, you ensure a streamlined process for creating inquiries and forwarding support emails. This centralized approach enhances efficiency and simplifies the management of inquiries, providing a more organized support workflow.