When responding to a customer query through a ticket, Gleap prioritizes real-time communication. Here's how it works:
Initially, Gleap sends your reply as a chat message via the widget. This approach aims to provide an immediate response if the customer is currently online.
Gleap then waits for 3 minutes before considering an alternative delivery method. This delay allows the customer ample time to notice and read your chat message.
If the customer reads the chat message within this period, Gleap will not send an email, thus avoiding duplicate communication.
However, if the customer is offline or hasn't read the message within the 3-minute window, Gleap automatically dispatches the message as an email. This ensures that your response reaches the customer even if they're not actively using the chat.
This article guides you on personalizing the email template used for such communications.
Editing the default template
Go to Project -> Settings -> Email -> Email templates. Gleap comes with a few default email templates, ready for you to be customized.
The default email template for support replies is named "Message reply". Click on it to get started.
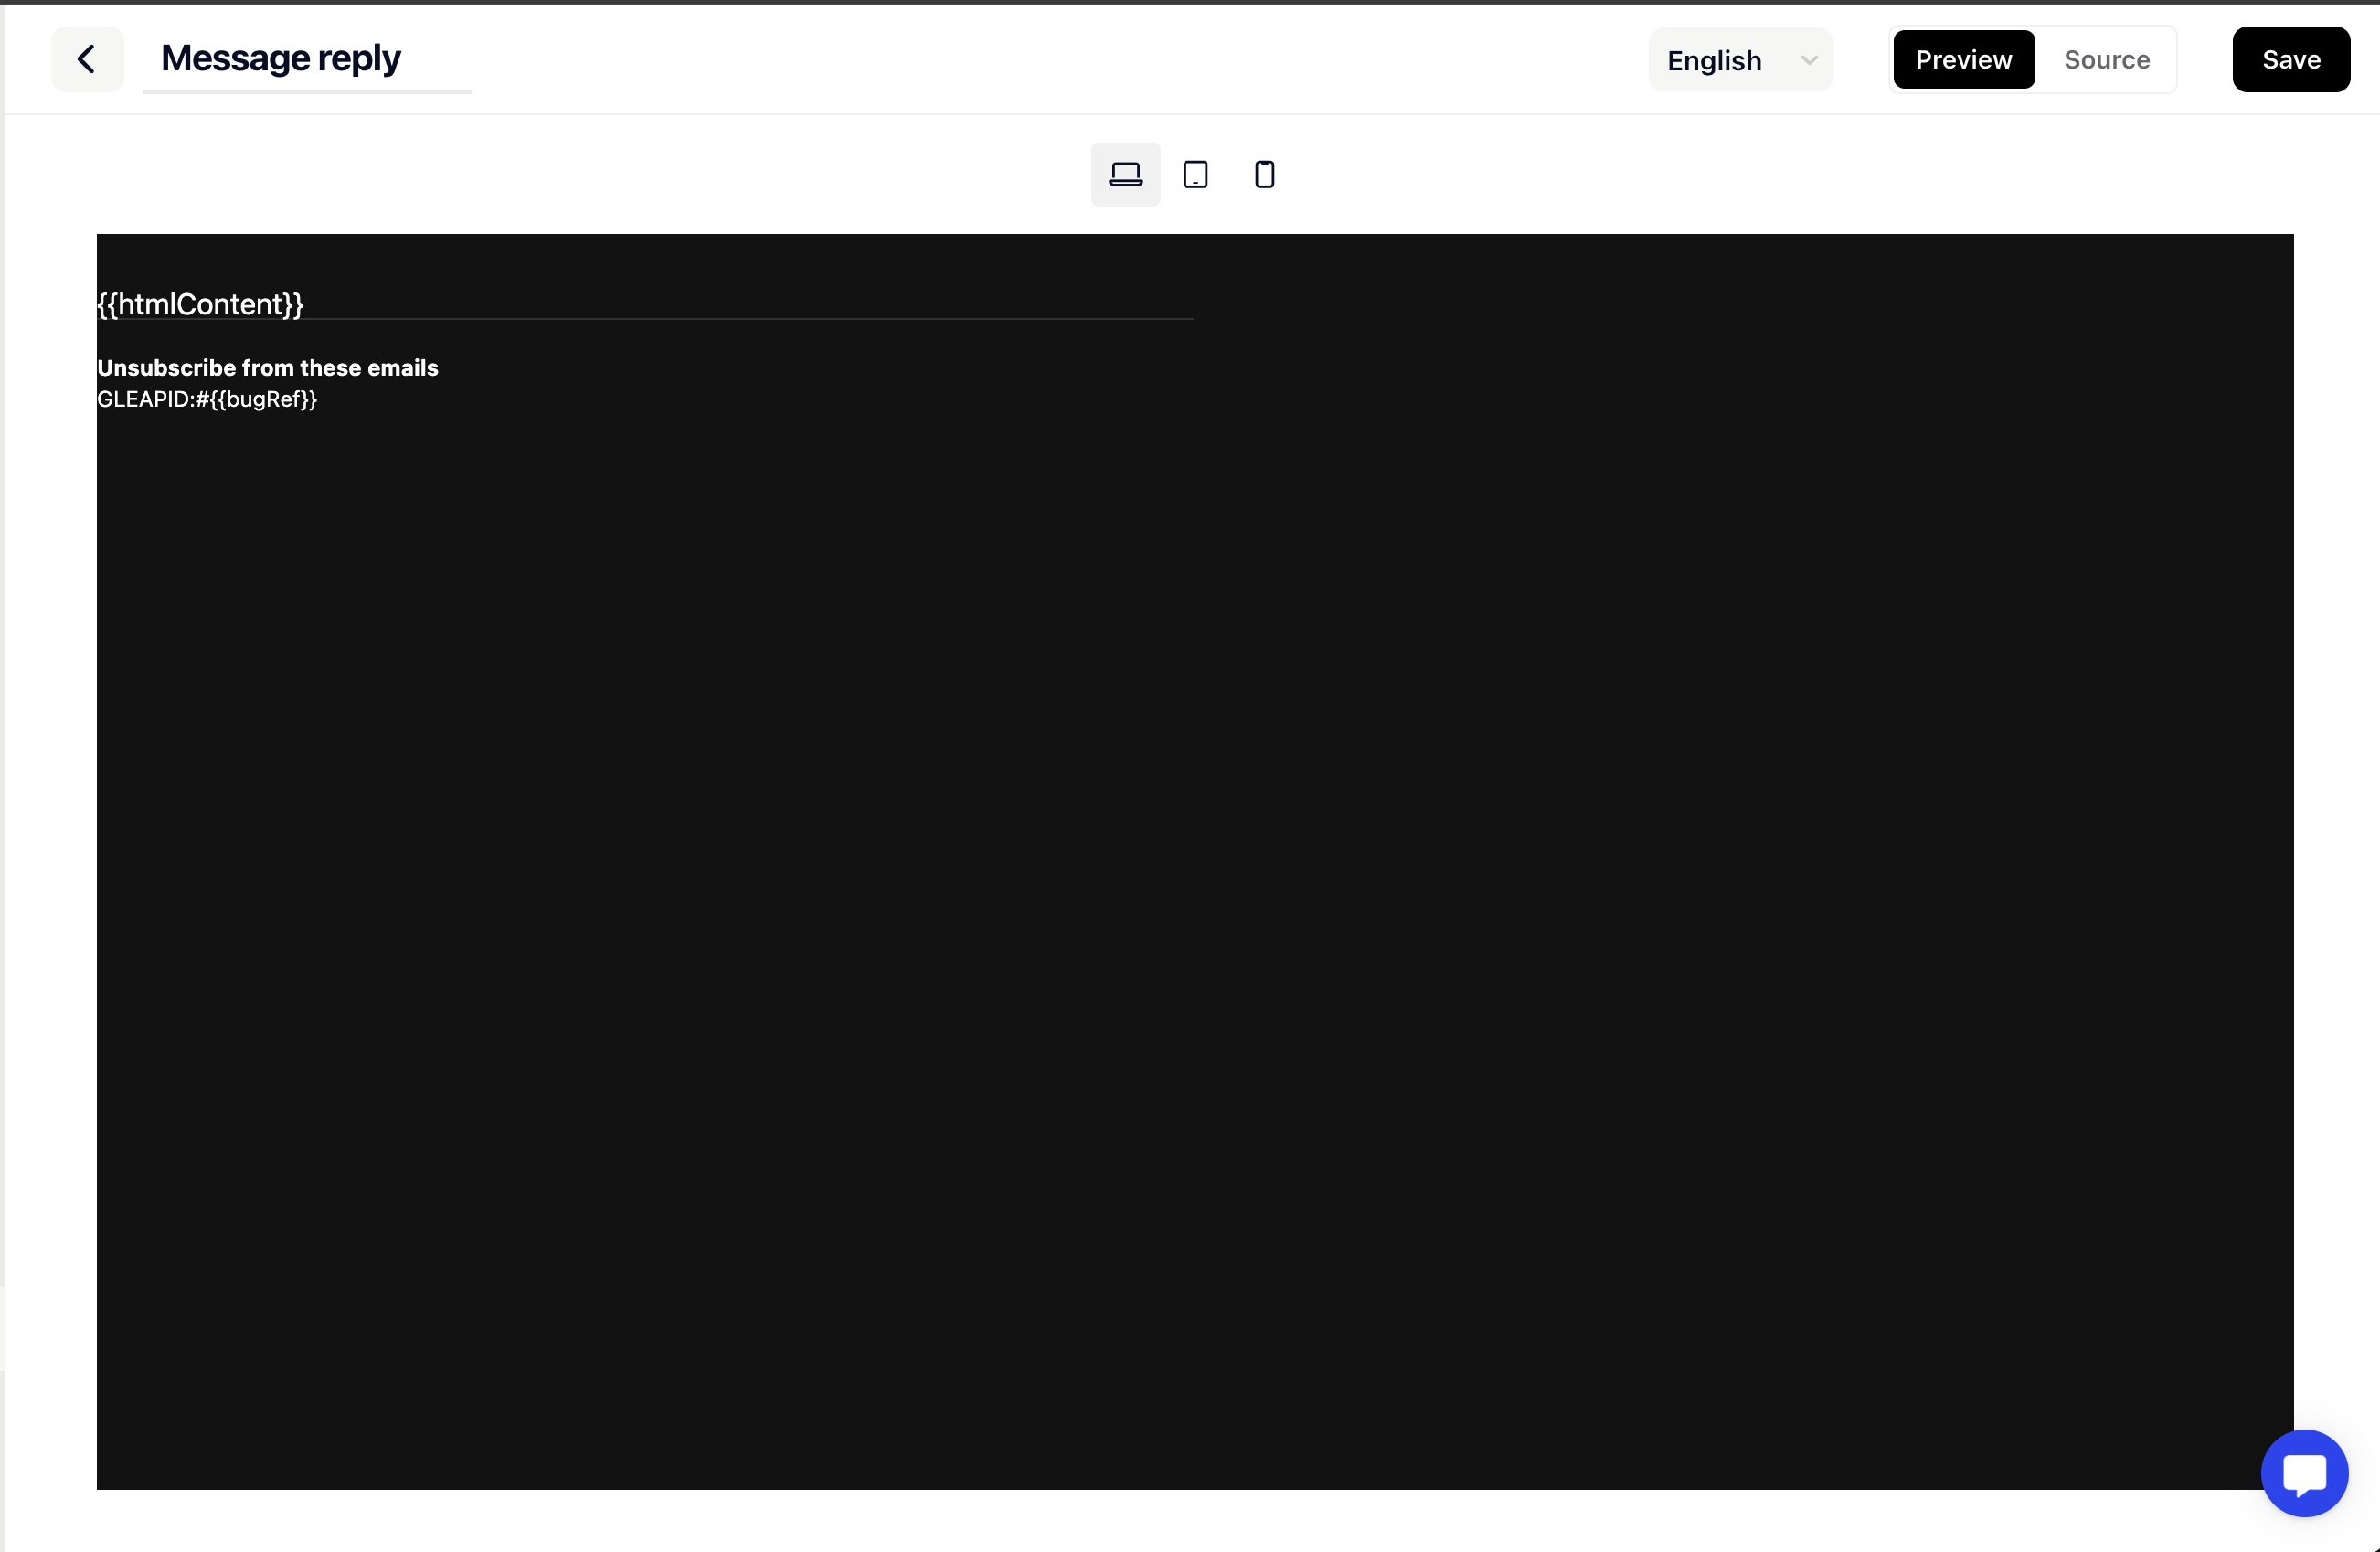
The email editor offers two modes. The preview mode, allowing you to preview the email template and the source mode, which allows you to customize the template.
In order to customize our template you will need to choose the language you want to edit and then click on "Source".
You can now fully customize the HTML of the email template, allowing you to adapt the reply messages to your needs.
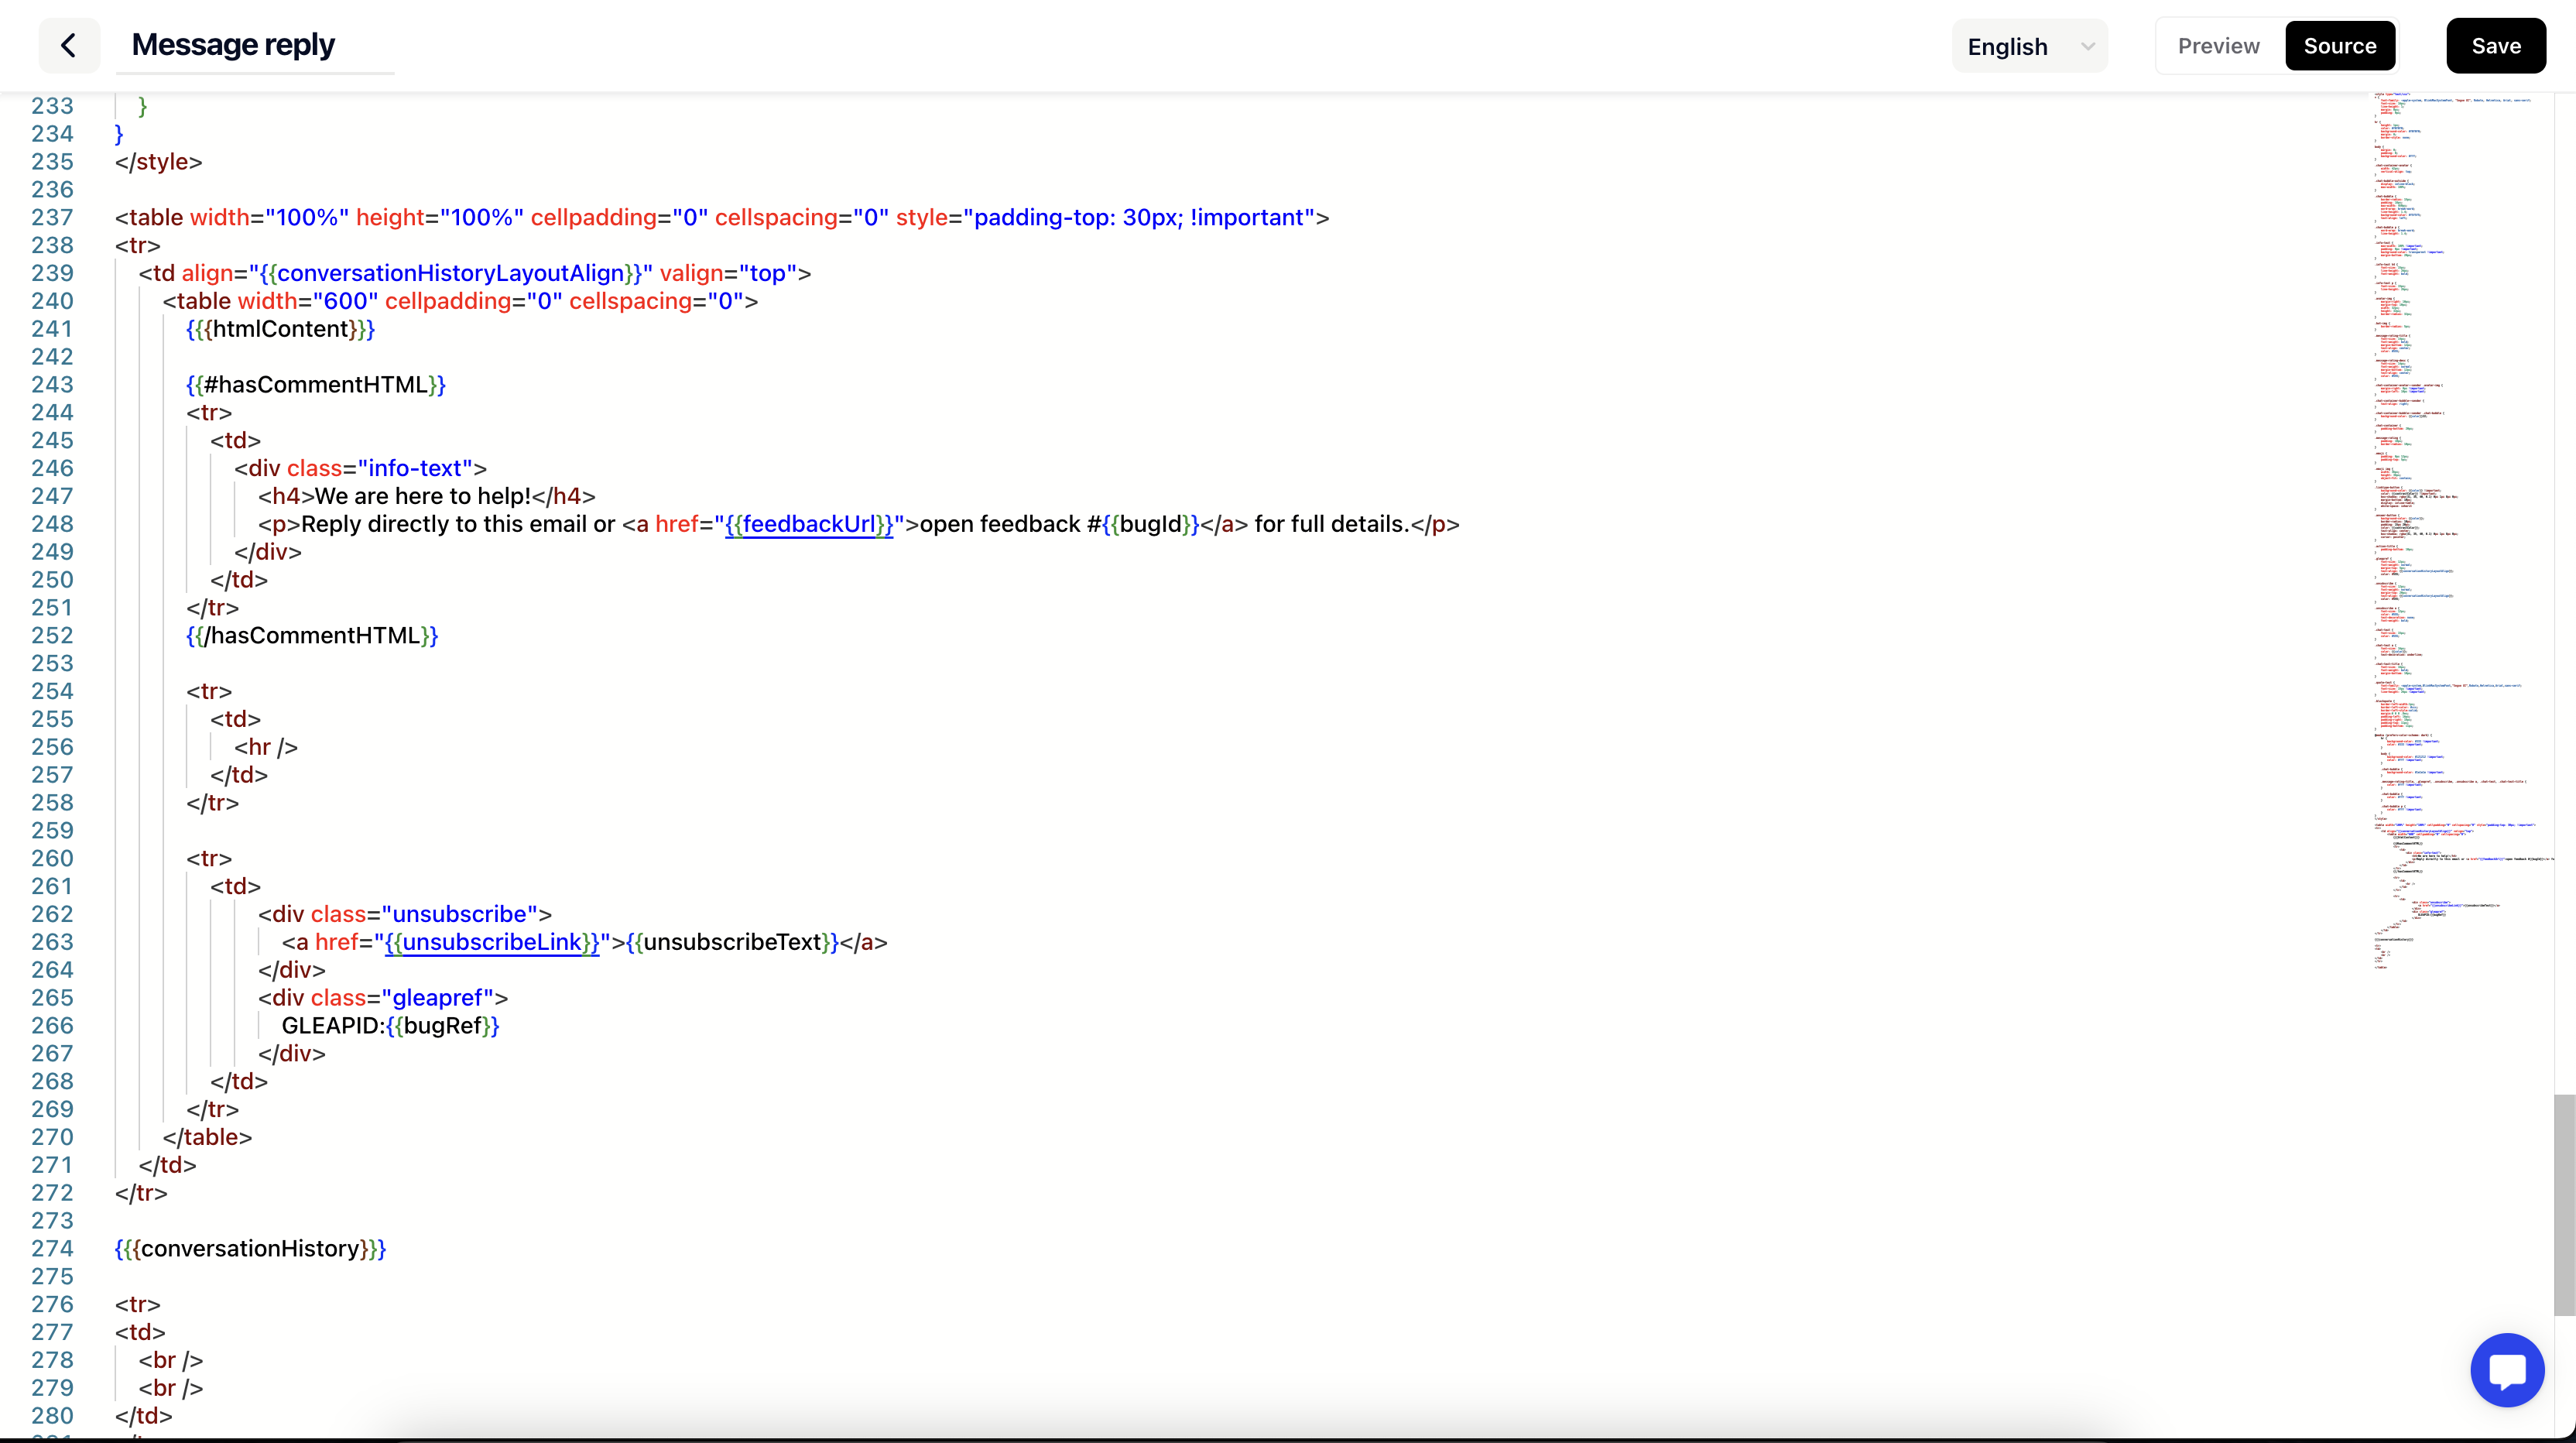
As you can see in the screenshot above, Gleap offers a few variables that you can use to display dynamic content. The following list of variables is available:
{{companyName}} - Company name
{{{htmlContent}}} - This is the place where the actual message gets added. This variable is mandatory.
{{hasCommentHTML}} - Special variable which is used to identify whether or not it's an email from a bot conversation or a real human reply.
{{unsubscribeLink}} - This will add an unsubscribe link. This variable is mandatory.
{{{conversationHistory}}} - This adds the conversation history to the message
{{bugRef}} - This adds the ticket reference to the message.
{{unsubscribeText}} - Unsubscribe text from translations
{{profileImageUrl}} - Image URL from the sender
{{user.name}} - Name of the sender
{{projectName}} - Name of the project
Once you are done with editing your template, hit save.
Create a template from scratch
Creating a new template in Gleap is remarkably similar to editing an existing one, with just a few additional steps. Here's a streamlined guide:
Adding a New Template:
Go to Project -> Settings -> Email -> Email templates.
Click on "+ Add template" to start.
Enter your custom HTML email template. Remember to do this for all the languages you intend to support, ensuring a consistent experience for all users.
Assigning the Template to a Specific Use Case:
After creating your template, you need to specify where Gleap should use it.
Go to the board where you want the template to be applied.
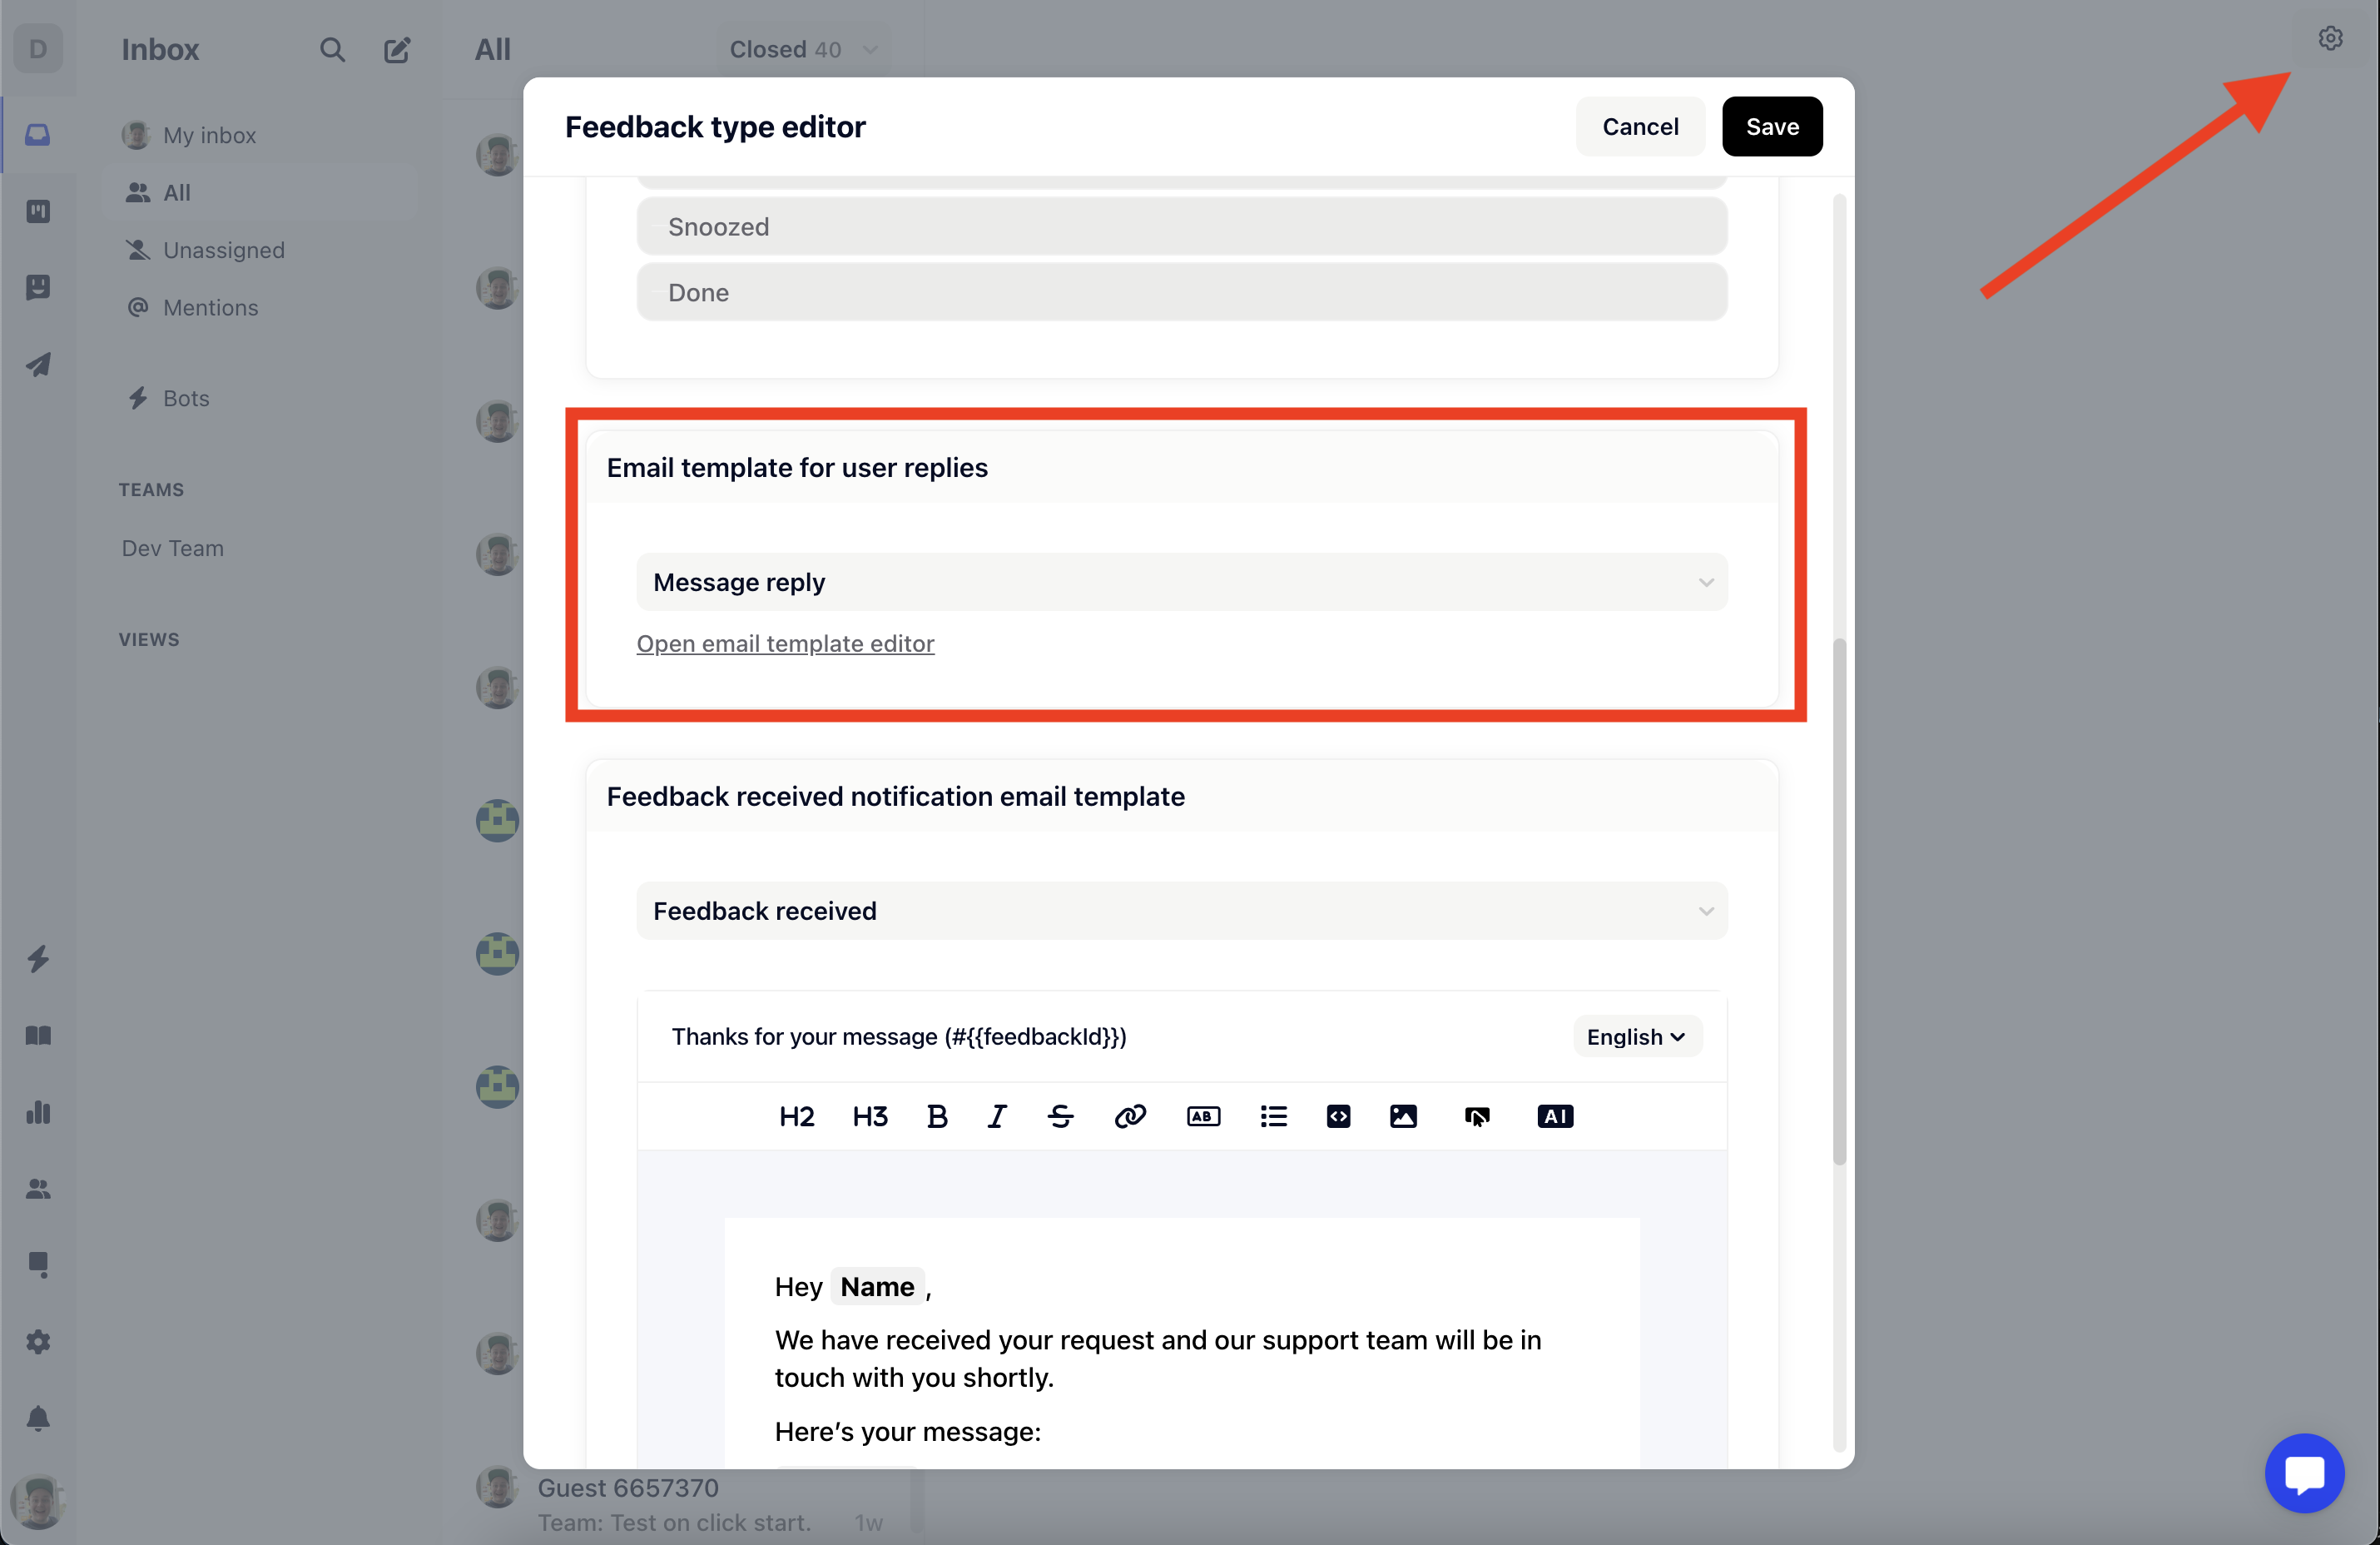
Click on the gear icon located in the top right corner of the board.
Select your new template under "Email template for user replies".
By following these steps, the template you've created will be automatically used for all replies within that particular feedback type. This feature is particularly useful as it allows for different templates to be used for various types of feedback, enabling a more tailored approach to customer communication.