Product tours offers more than just an outstanding first-time experience for your customers; it's also an invaluable tool for introducing new features. With the ability to create interactive in-app messages, you can effectively guide both new and existing customers, showcasing the latest updates and enhancements to your product. This approach ensures that all users, regardless of their familiarity with your product, can quickly discover and utilize its evolving capabilities.
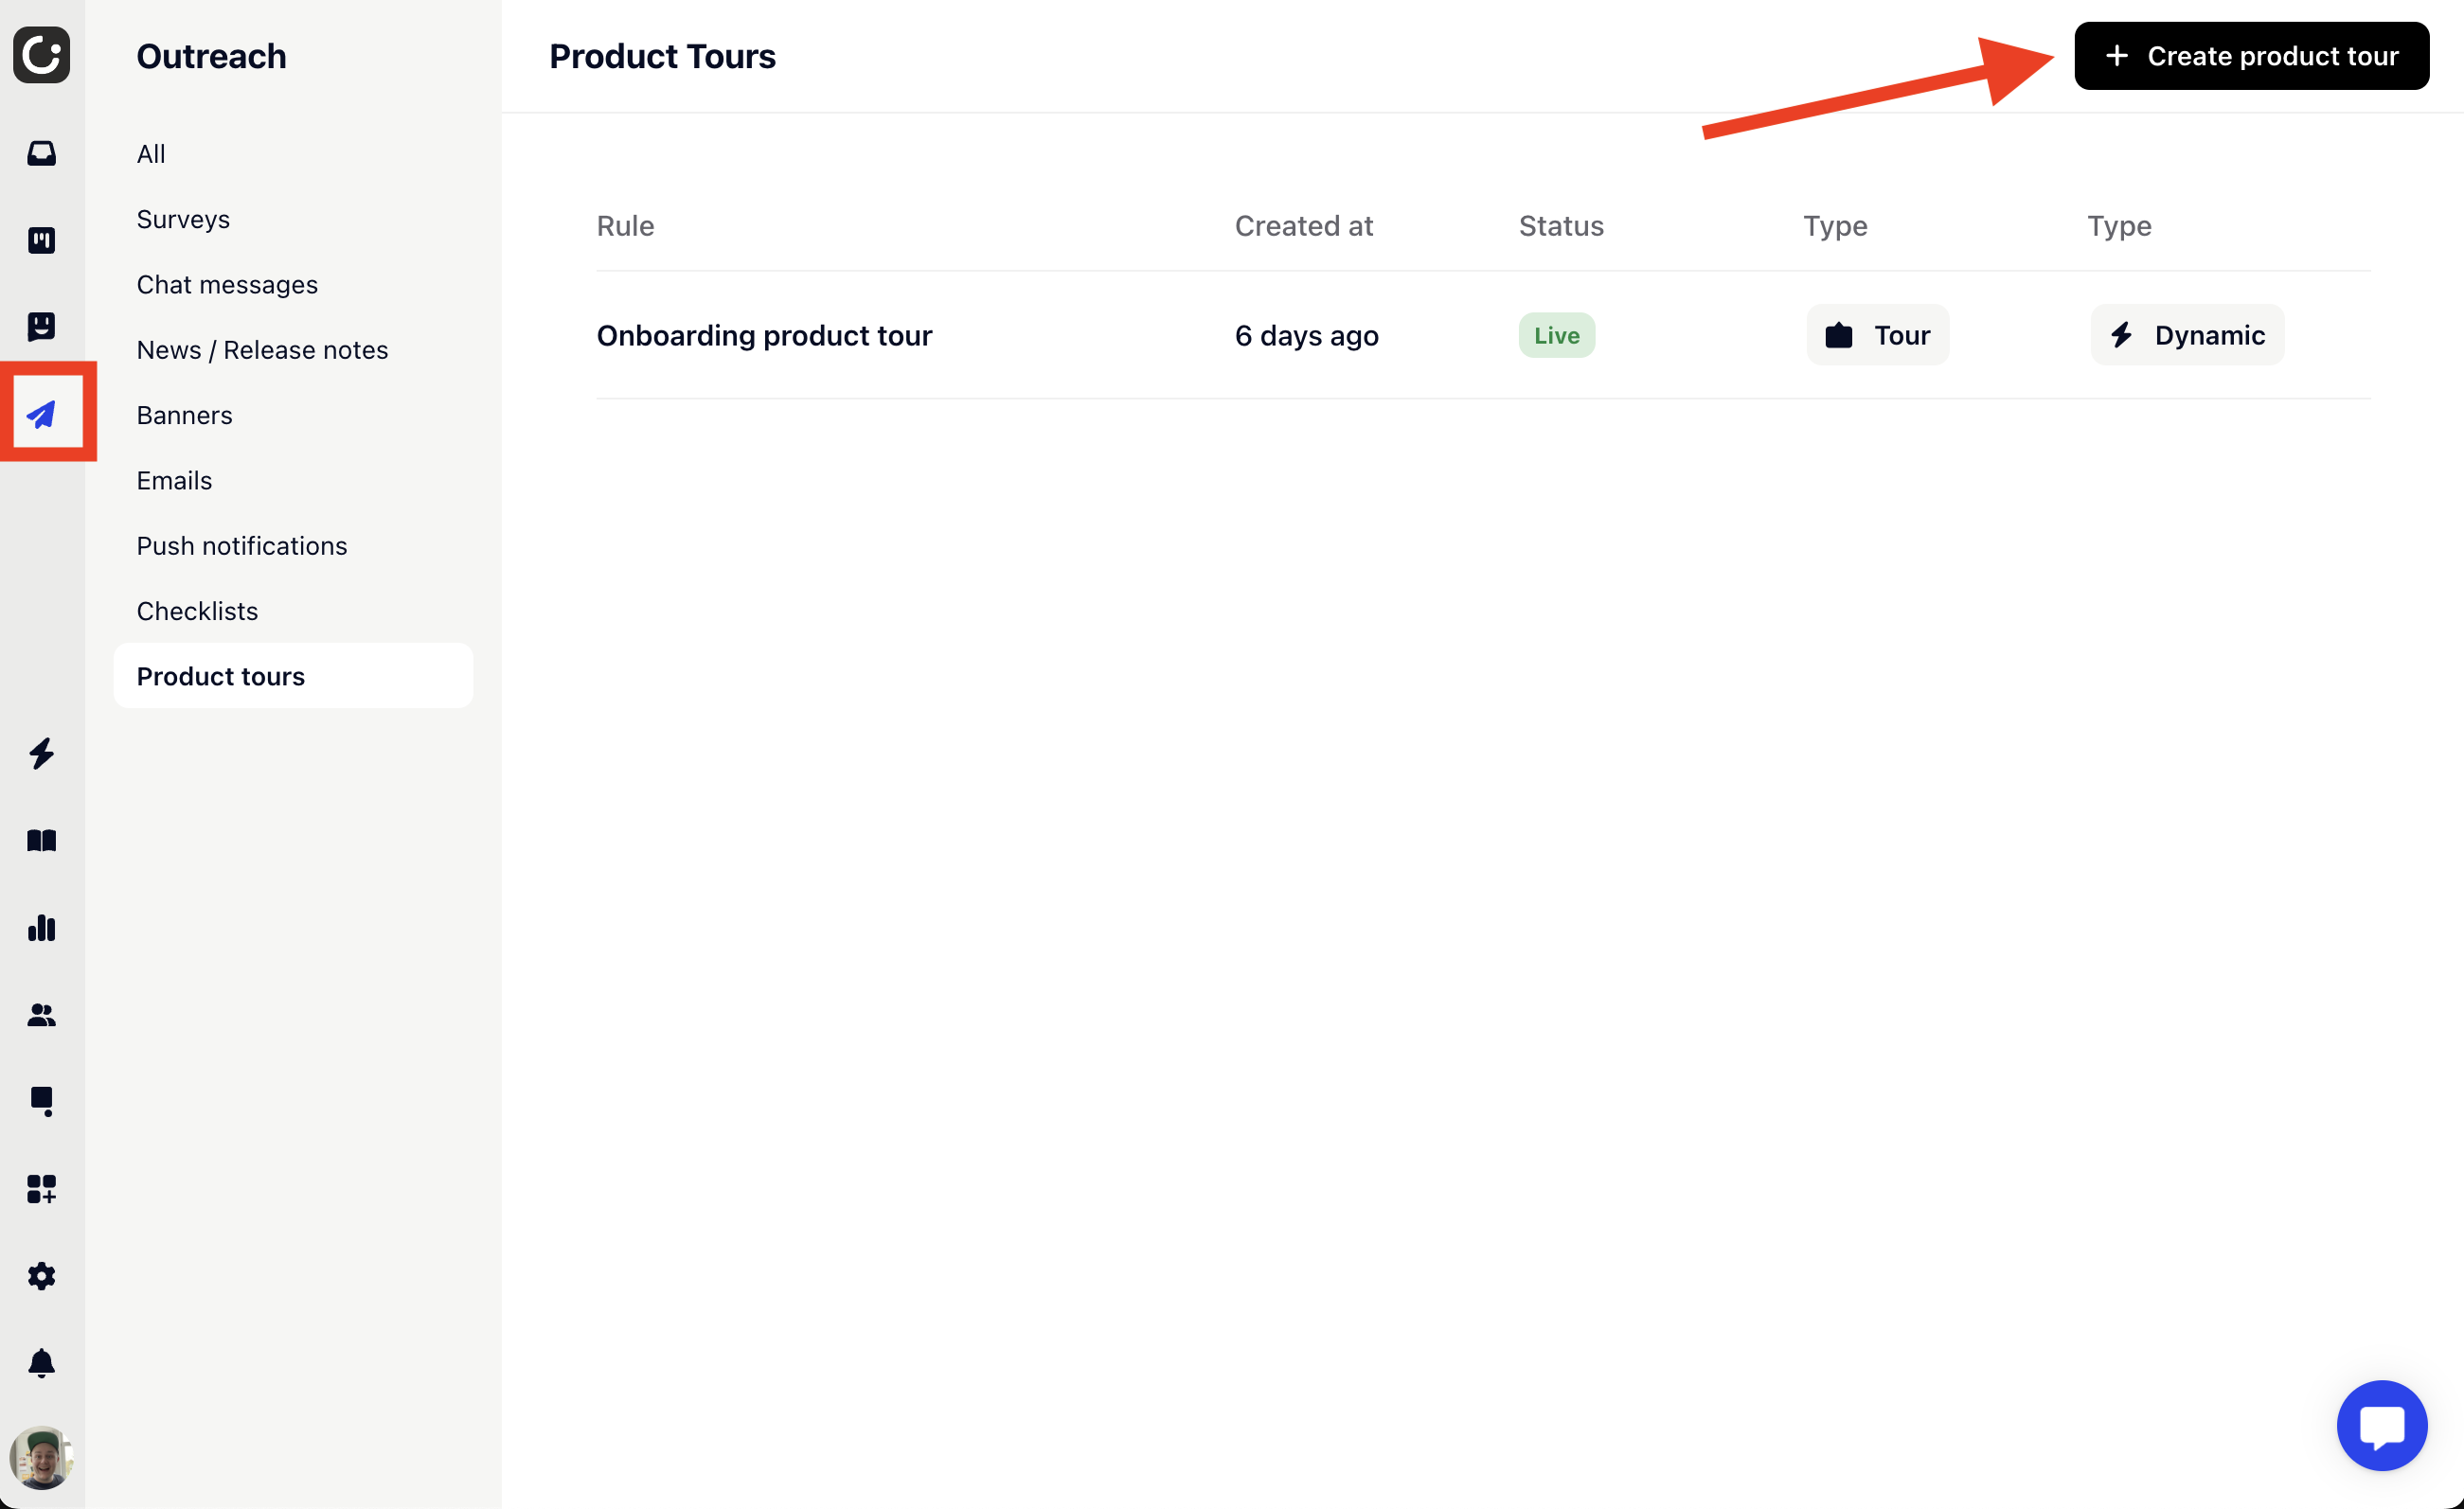
Navigate to Outreach and select Product tours in the sidebar. Now click on "Create product tour".
Once your product tour is created, you will need to design your product tour. Gleap offers a fully visual no-code product tour designer.
Click on "Design your product tour" to open the product tour designer.

The product tour designer opens in a new popup. If it does not open, please check if your browser blocked any popups and allow popups to be opened for app.gleap.io.
You will also find the following options in the "Options" - section.
This option allows you to choose whether or not your customers should be allowed to dismiss the onboarding either by clicking the escape key or by closing it with the close buttons.
For a more personal touch, you can assign a sender to product tours. We will show the profile picture of the sender during the tour.
The product tour designer opens in a new popup. The first step is to enter the URL of the website OR web app where you want to start your product tour on.

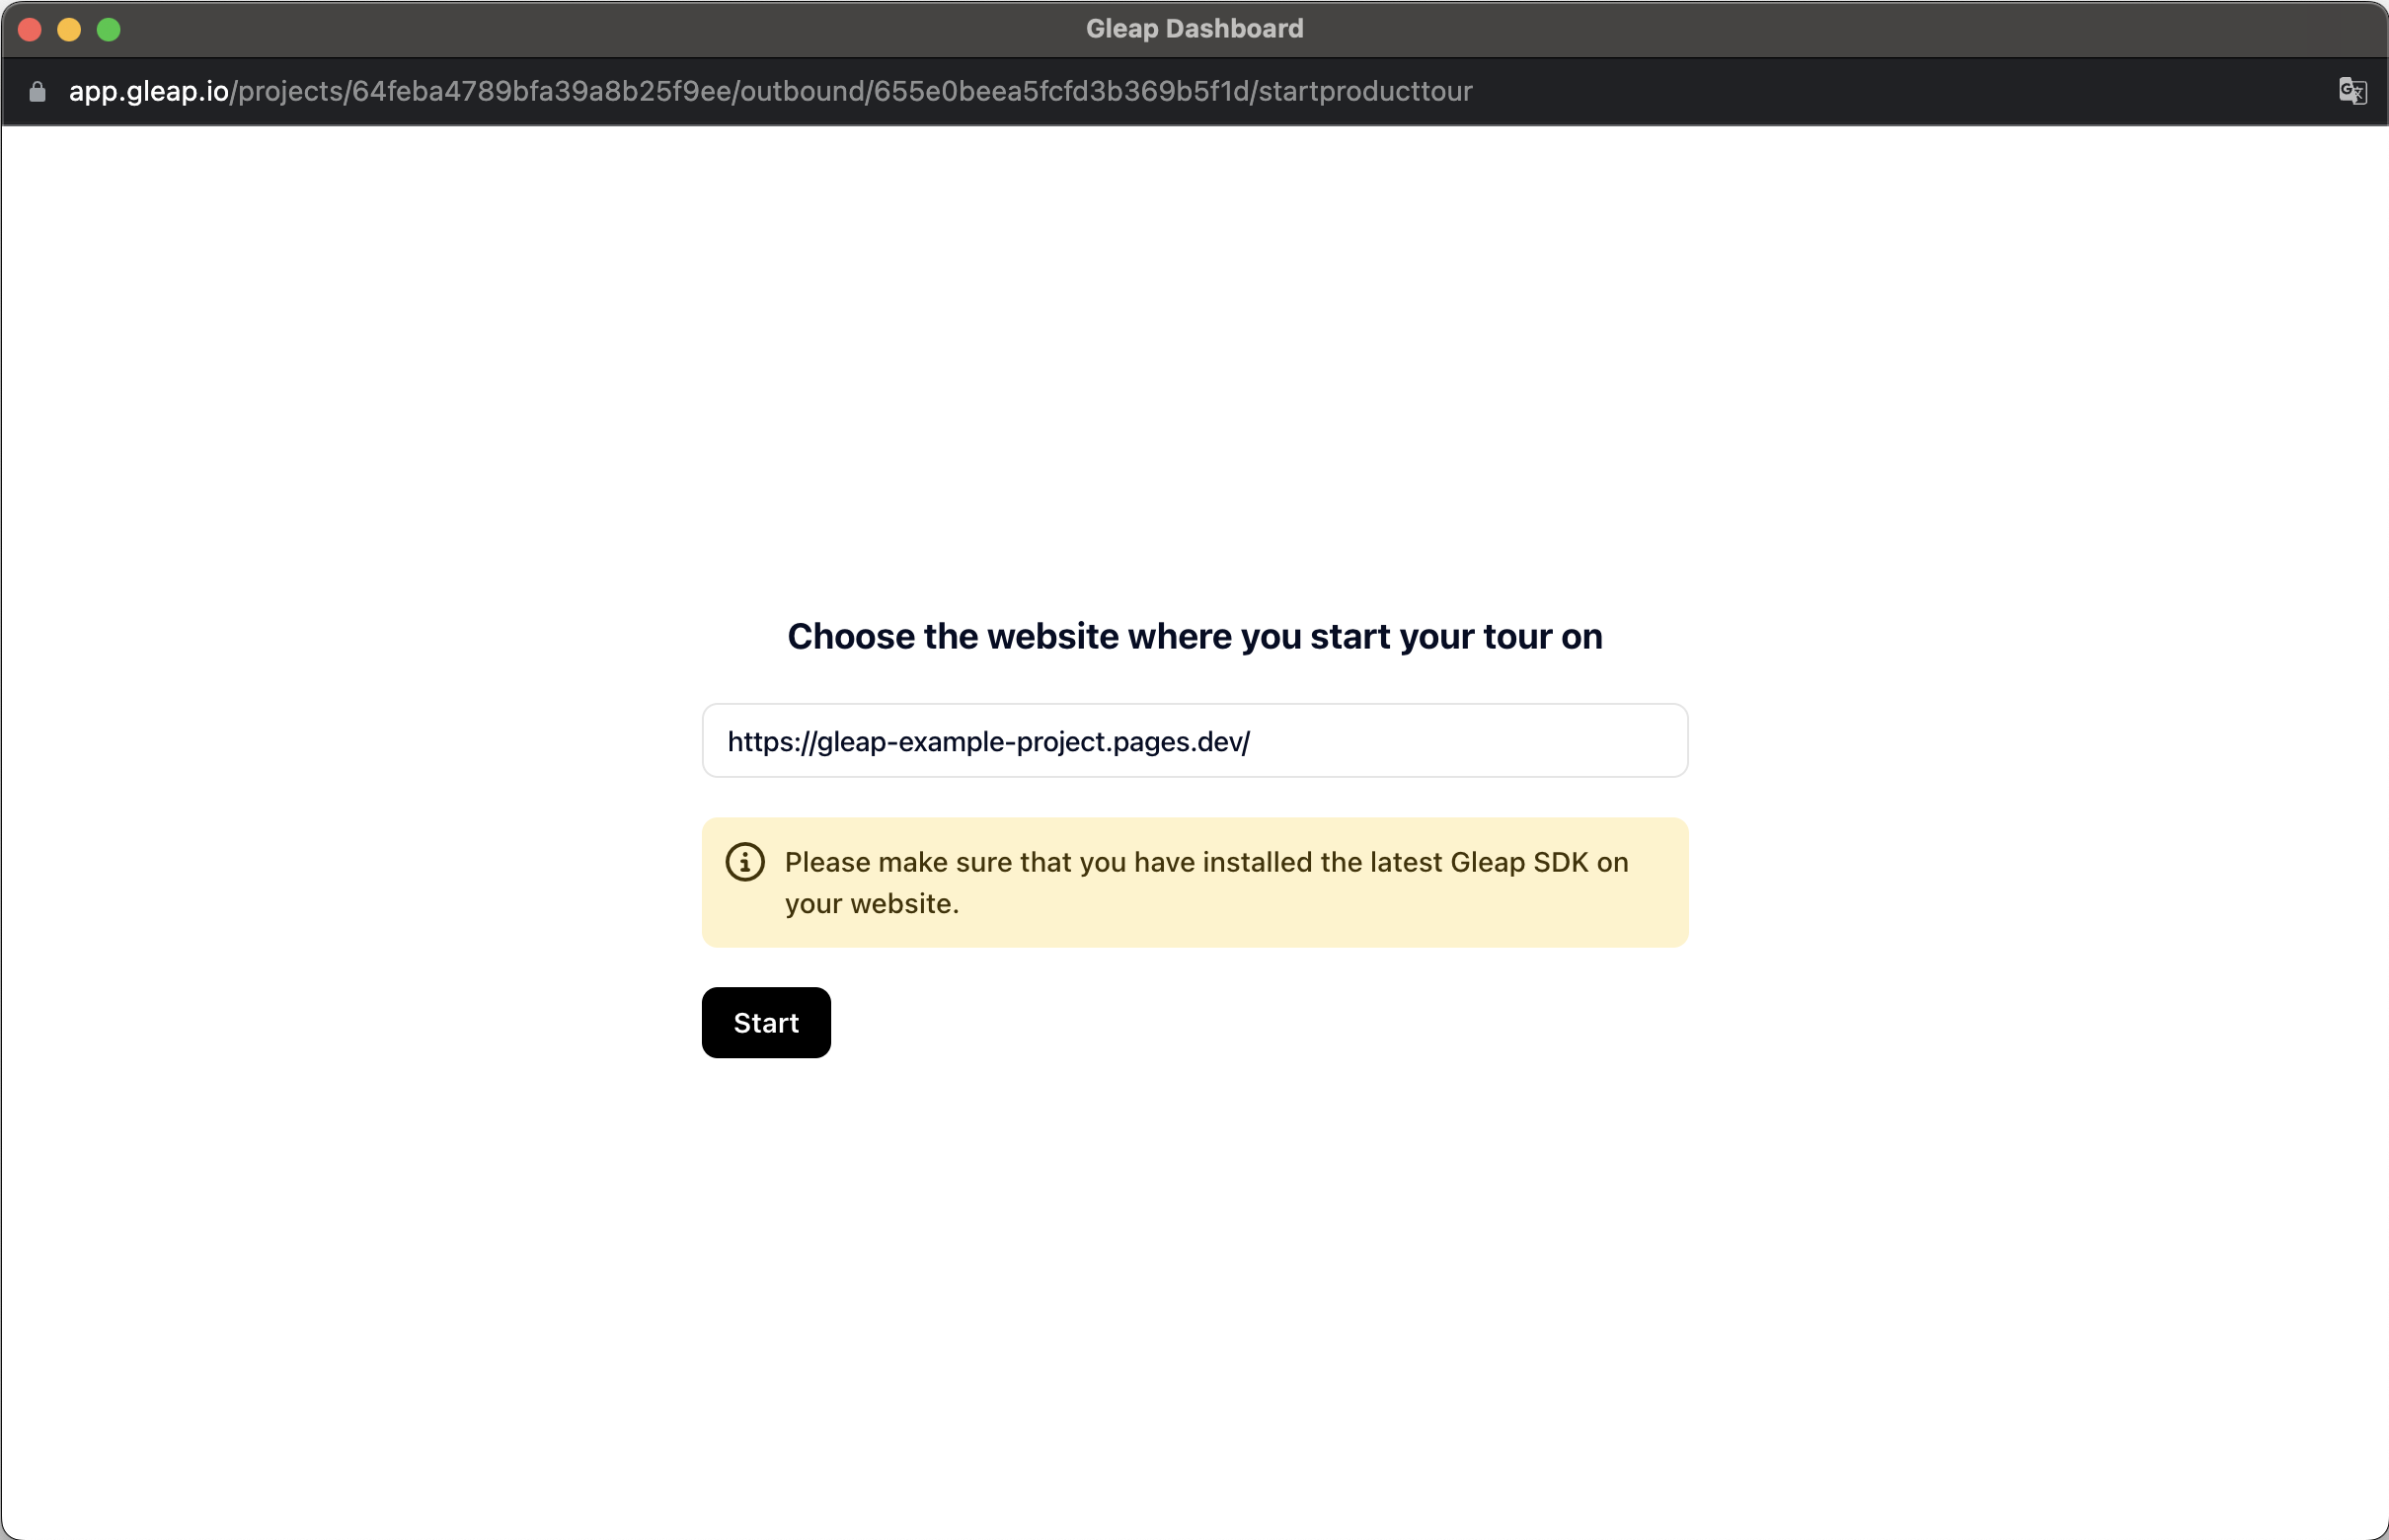
Continue by clicking on "Start". The designer will now load within your page.
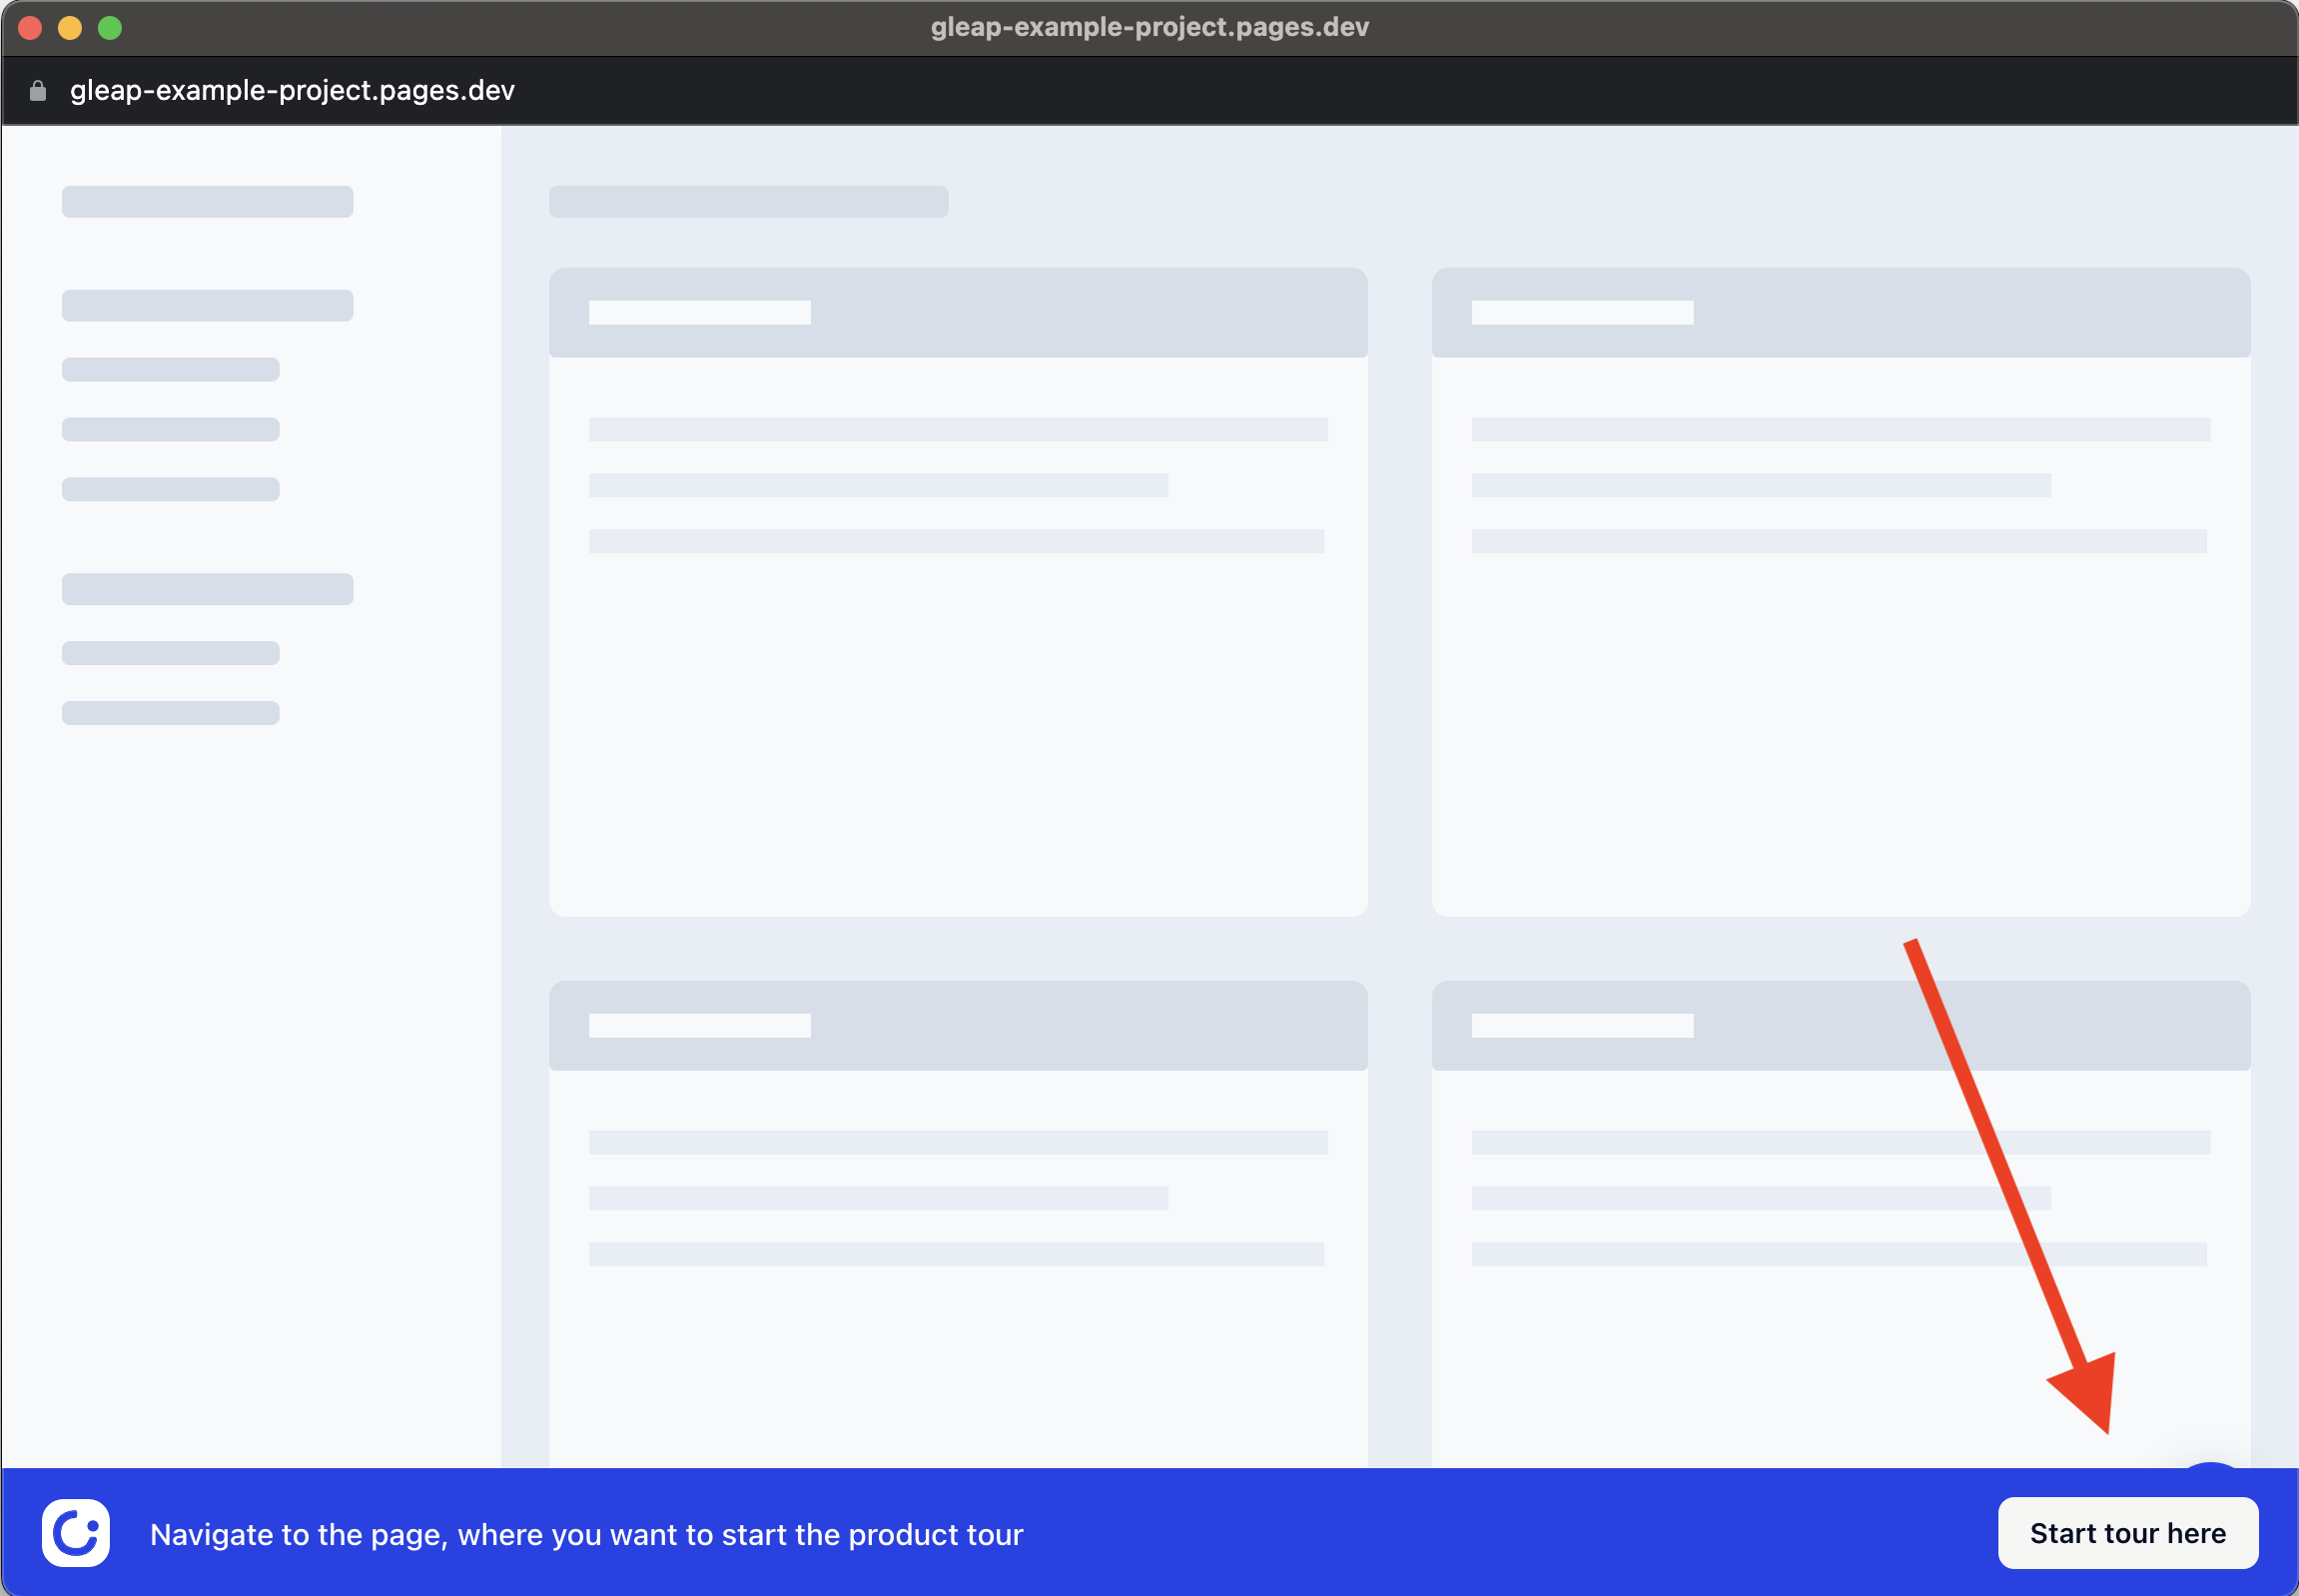
If you are designing product tours for single page applications, please first login / navigate to the page where you want to show your product tour. Once you arrived at the correct page, confirm by clicking on "Start tour here".
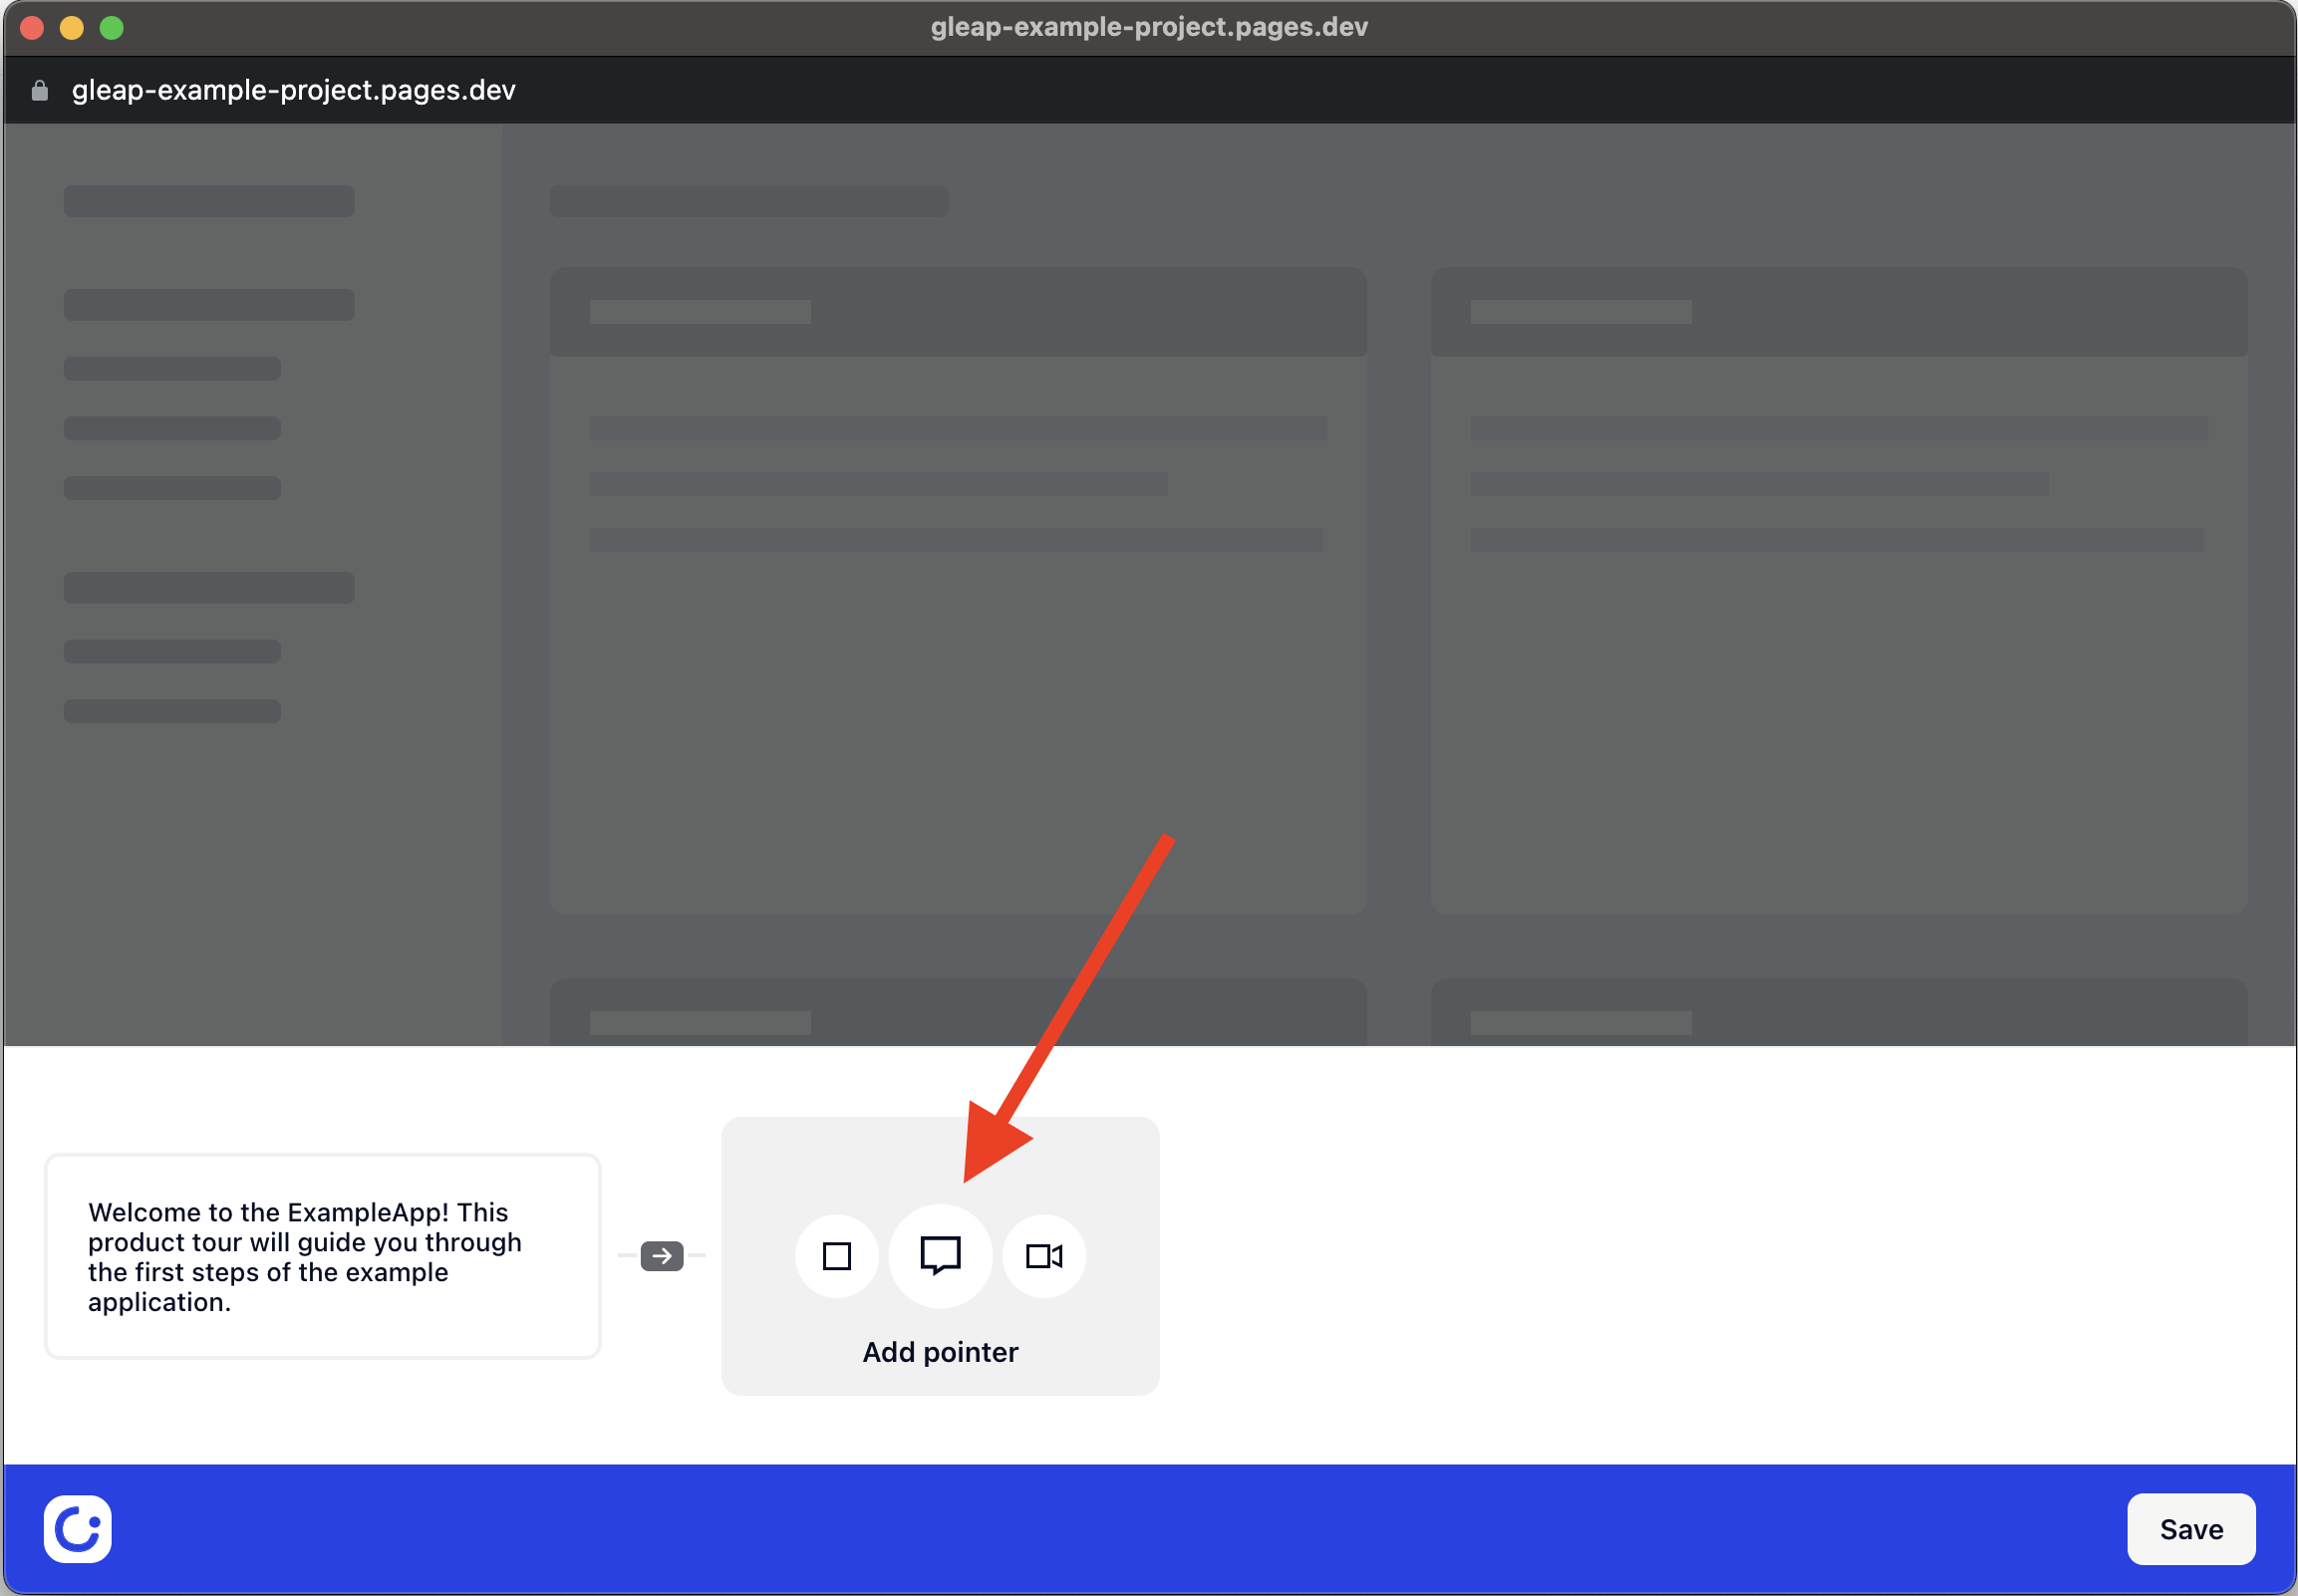
Awesome, it's time to add steps to your product tour. A step can either be a post, pointer or video pointer.
Post's open as modal in the center of your page. Those are great to welcome your users to your product tour.
Pointers are assigned to an element (i.e. a button, card, block, ...) and show a info text callout.
Video pointers are assigned to an element and show a video (i.e. some explanation video for the assigned element).
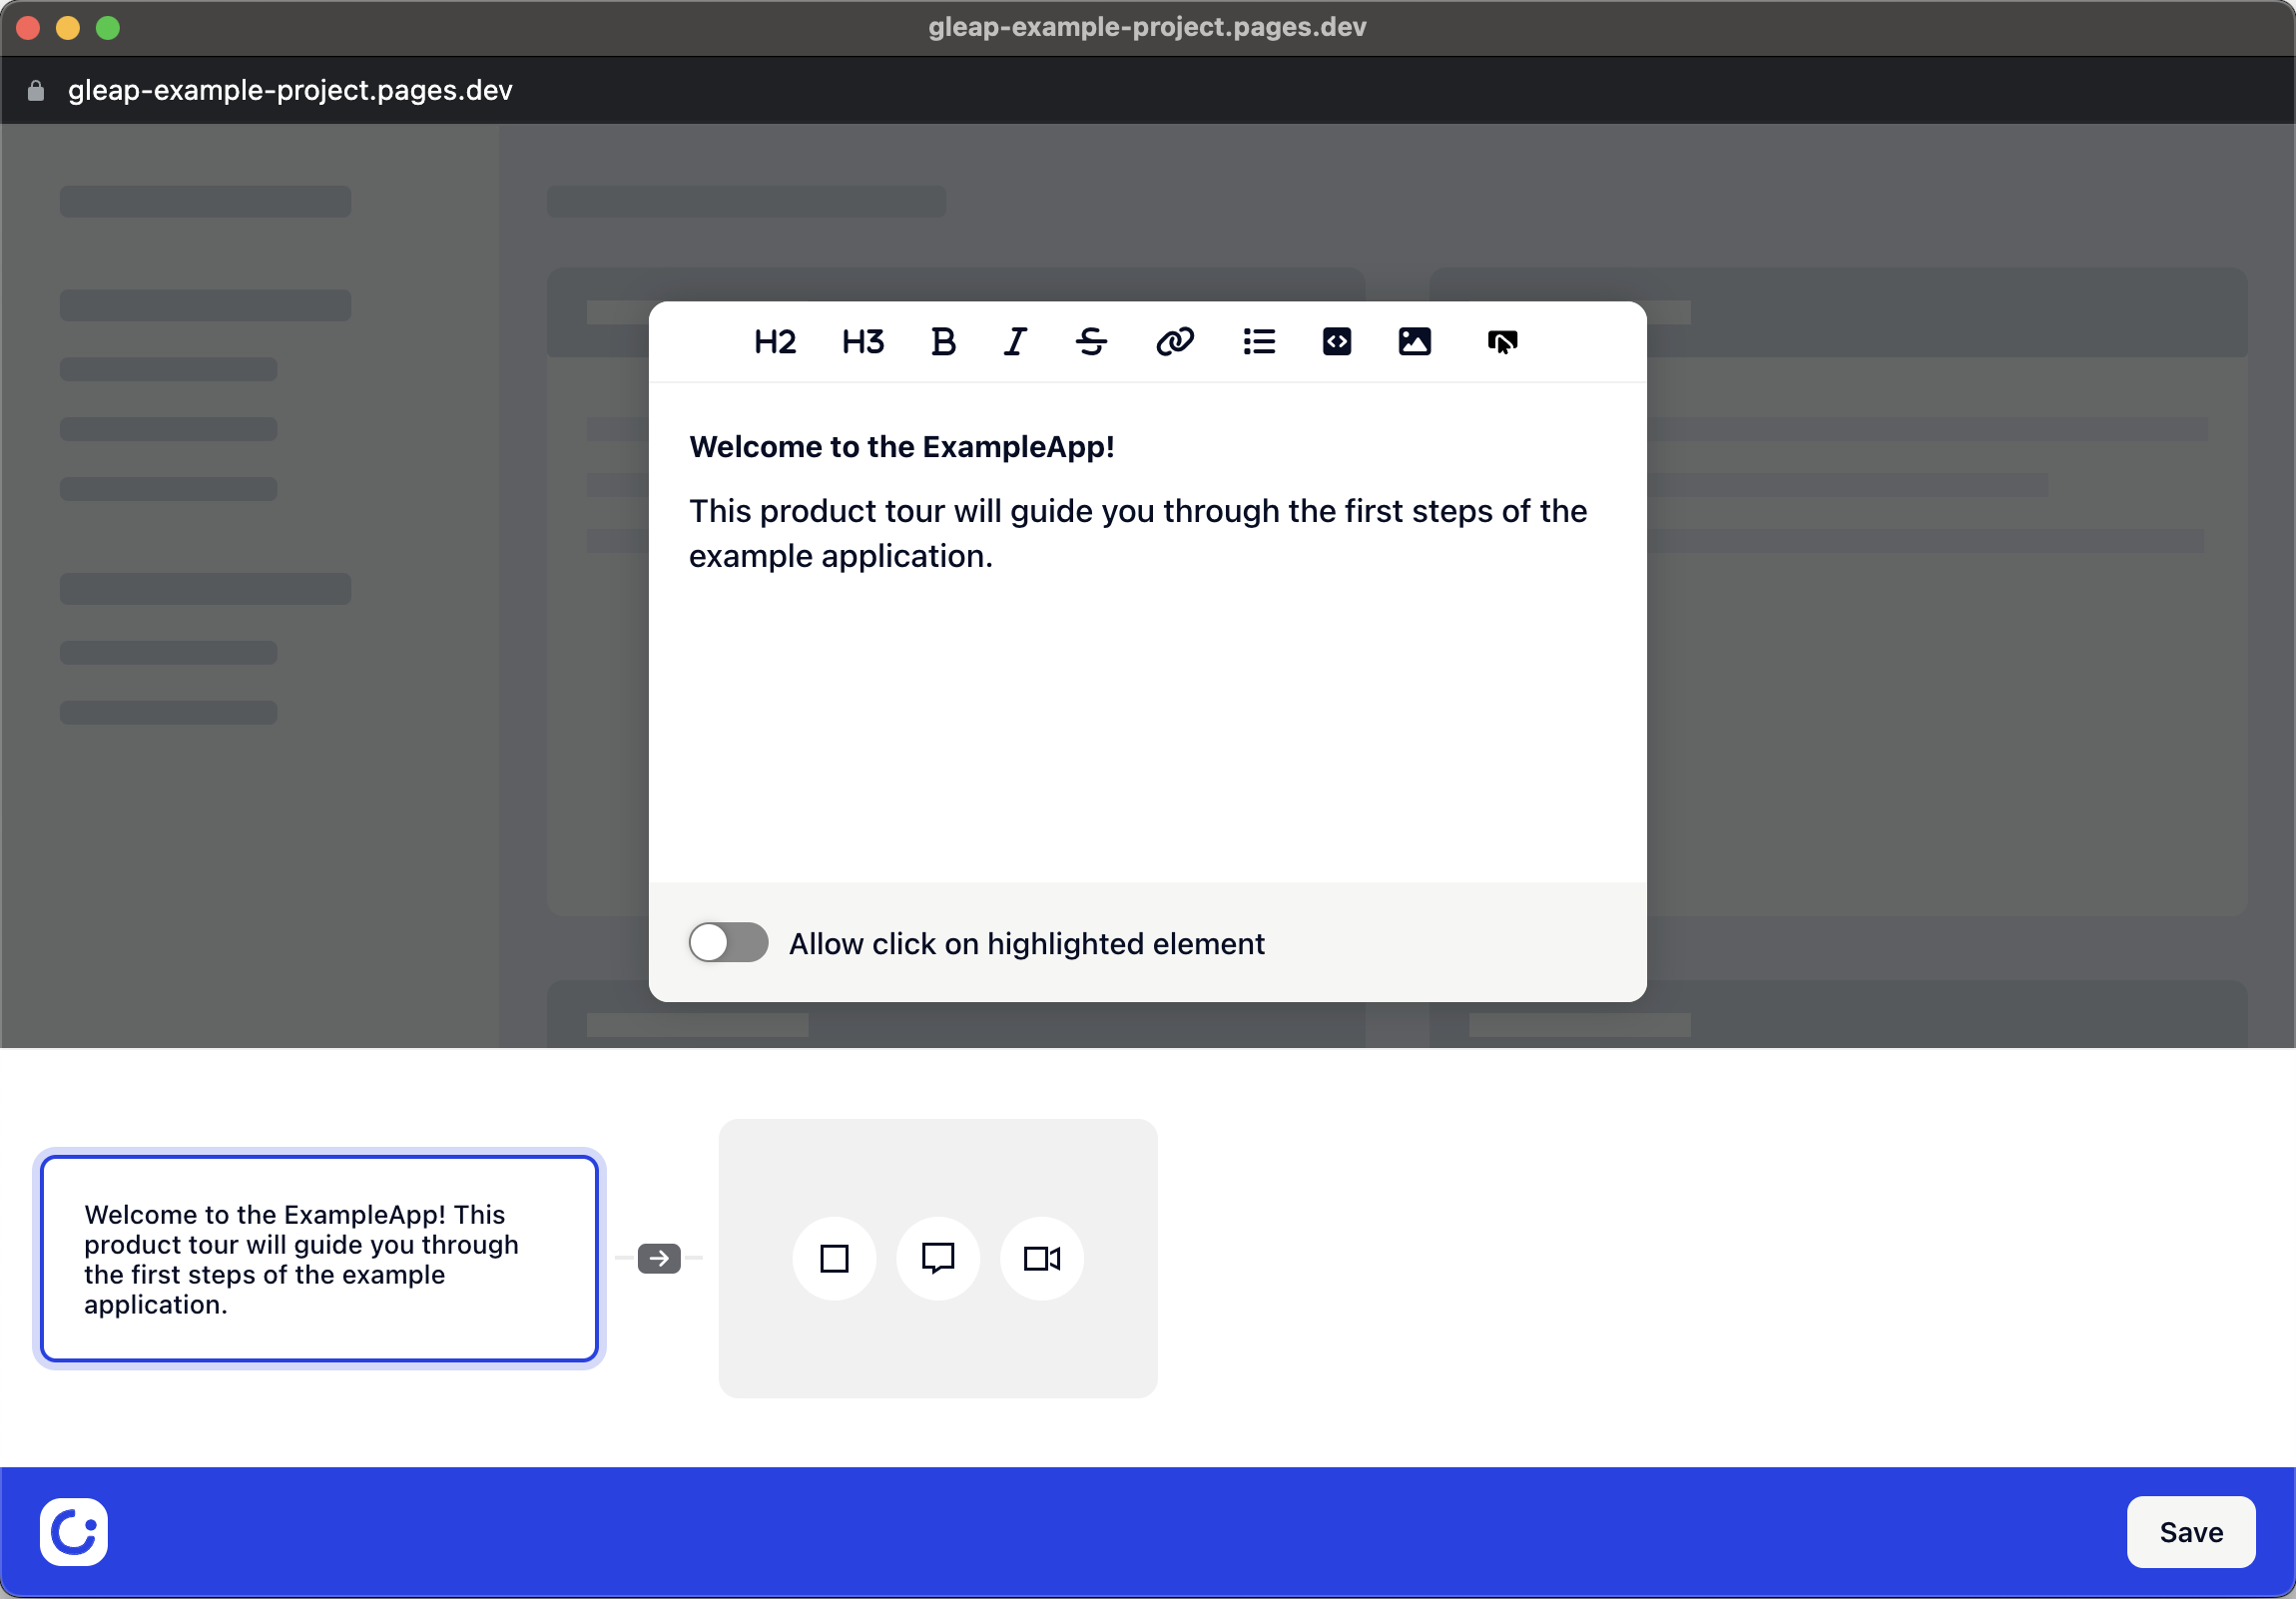
Now let's add a new post to welcome your users.
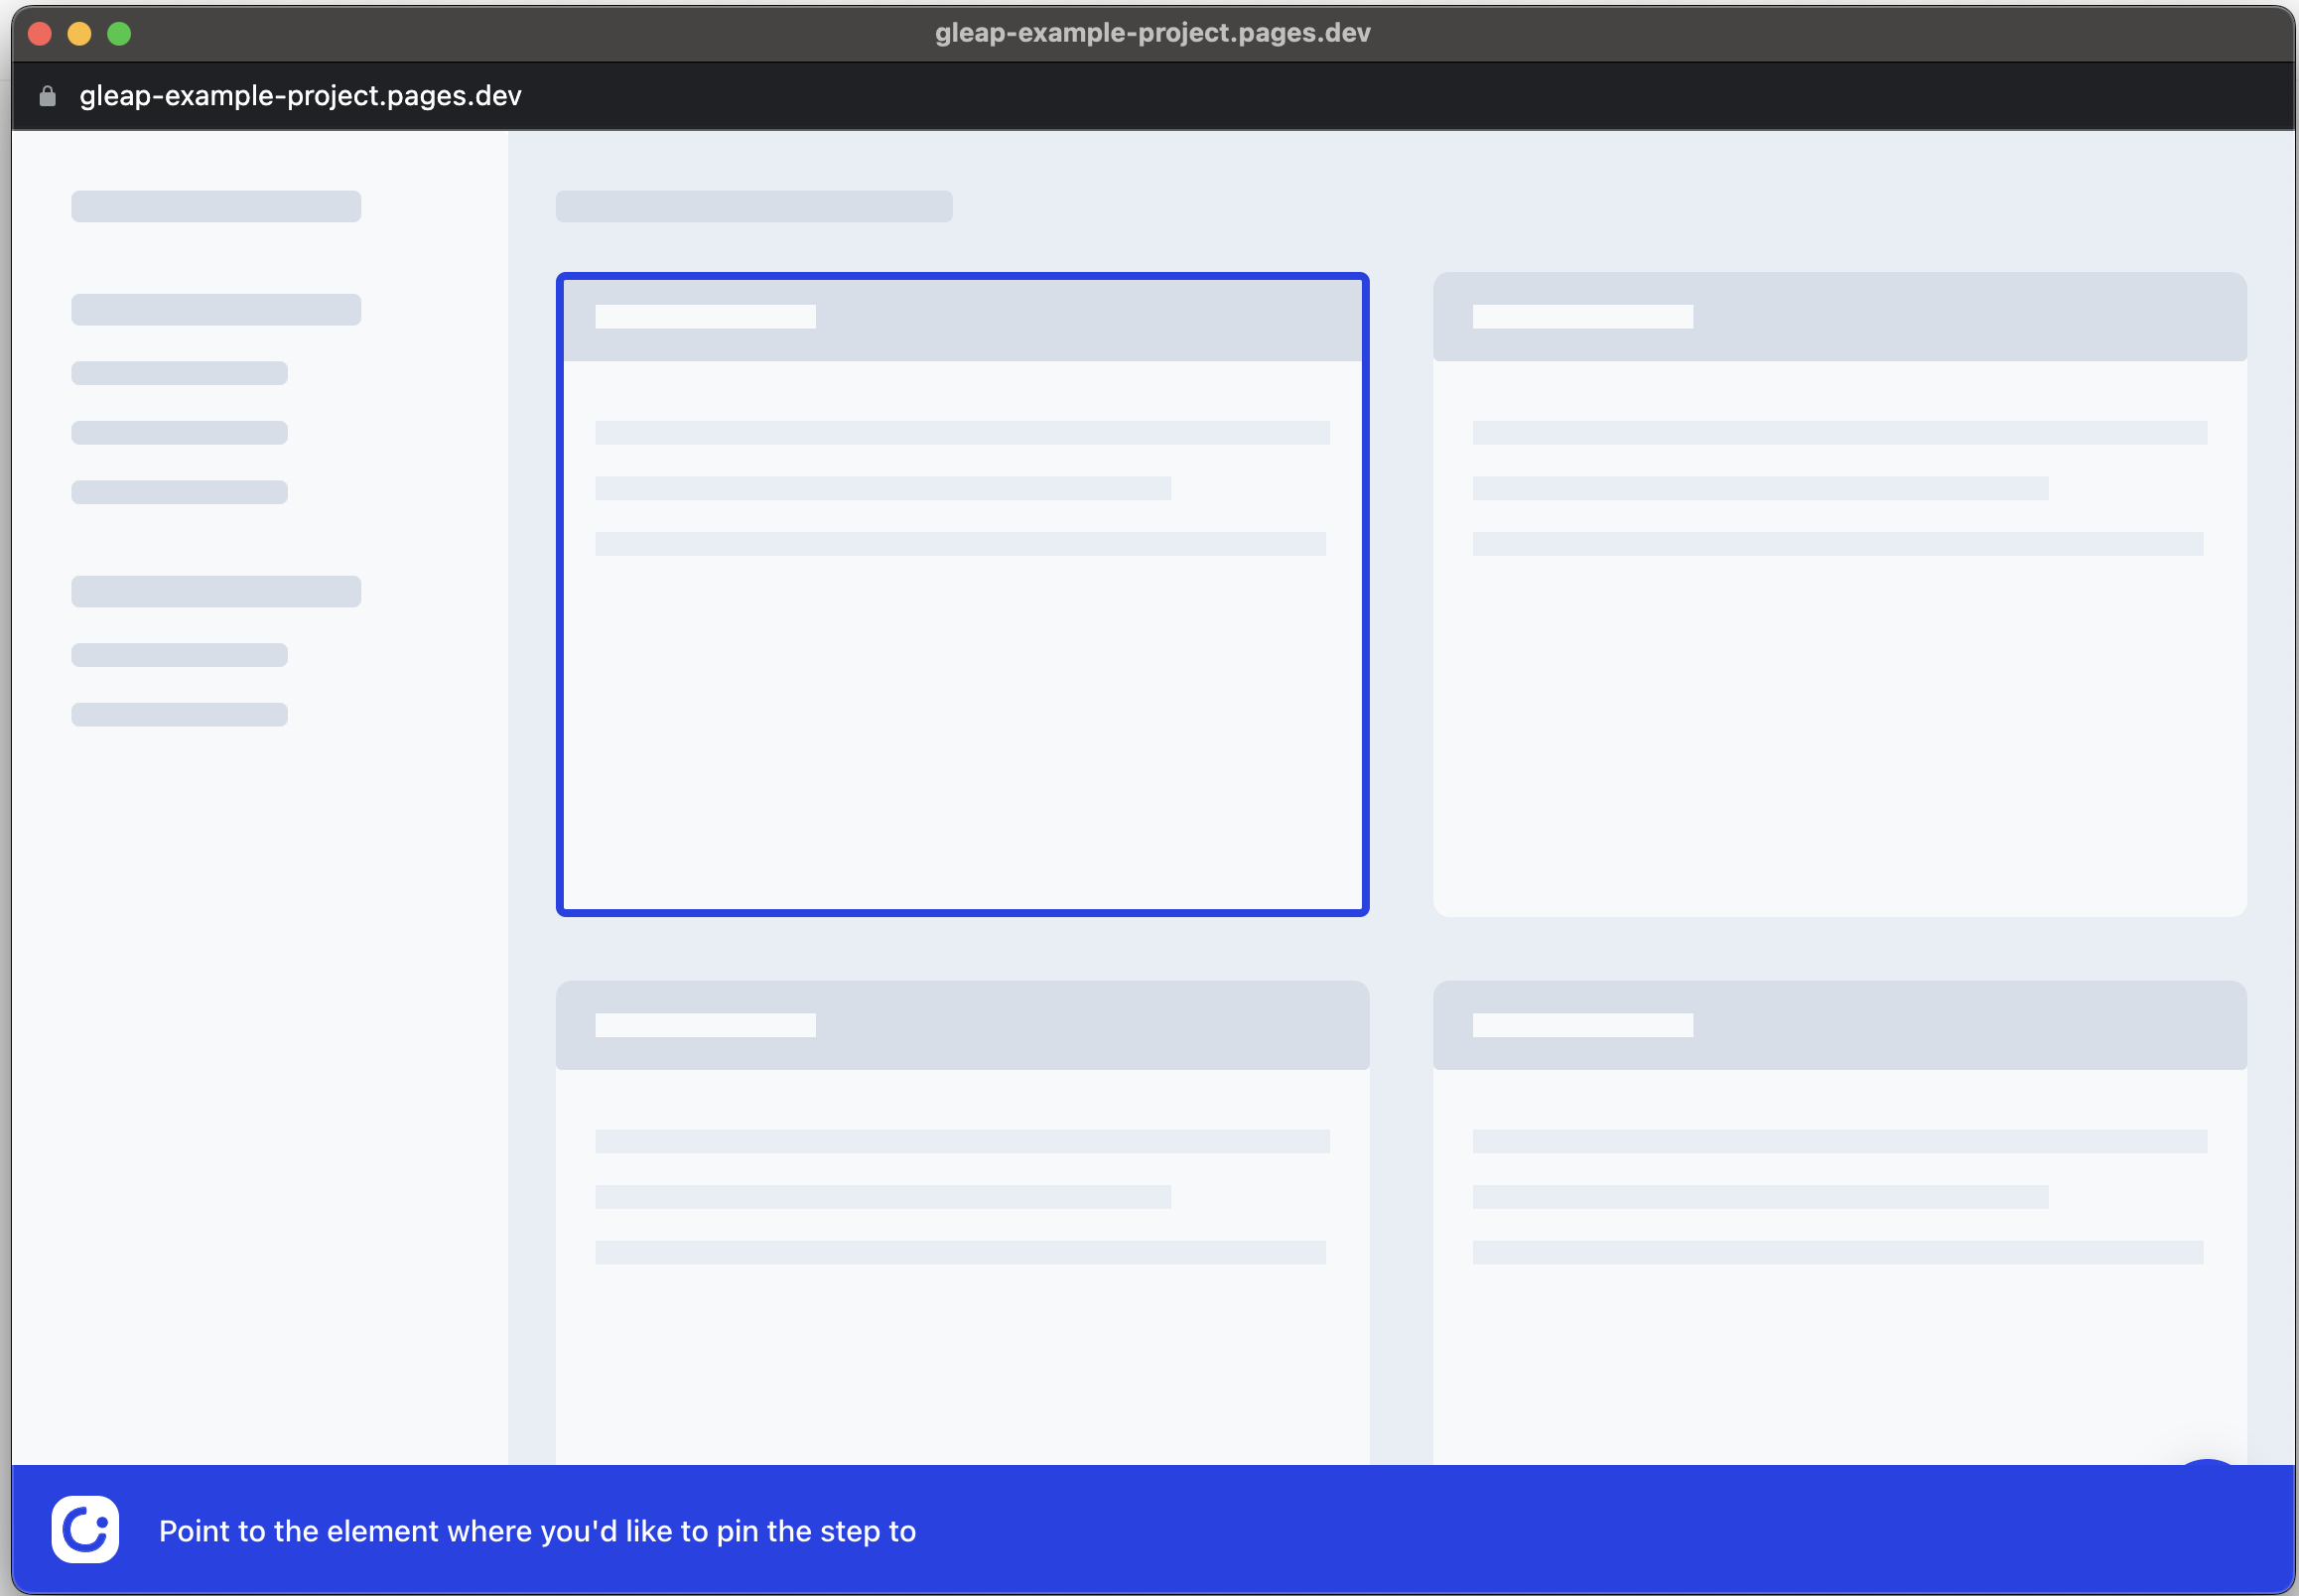
Let's carry on by adding a new pointer.
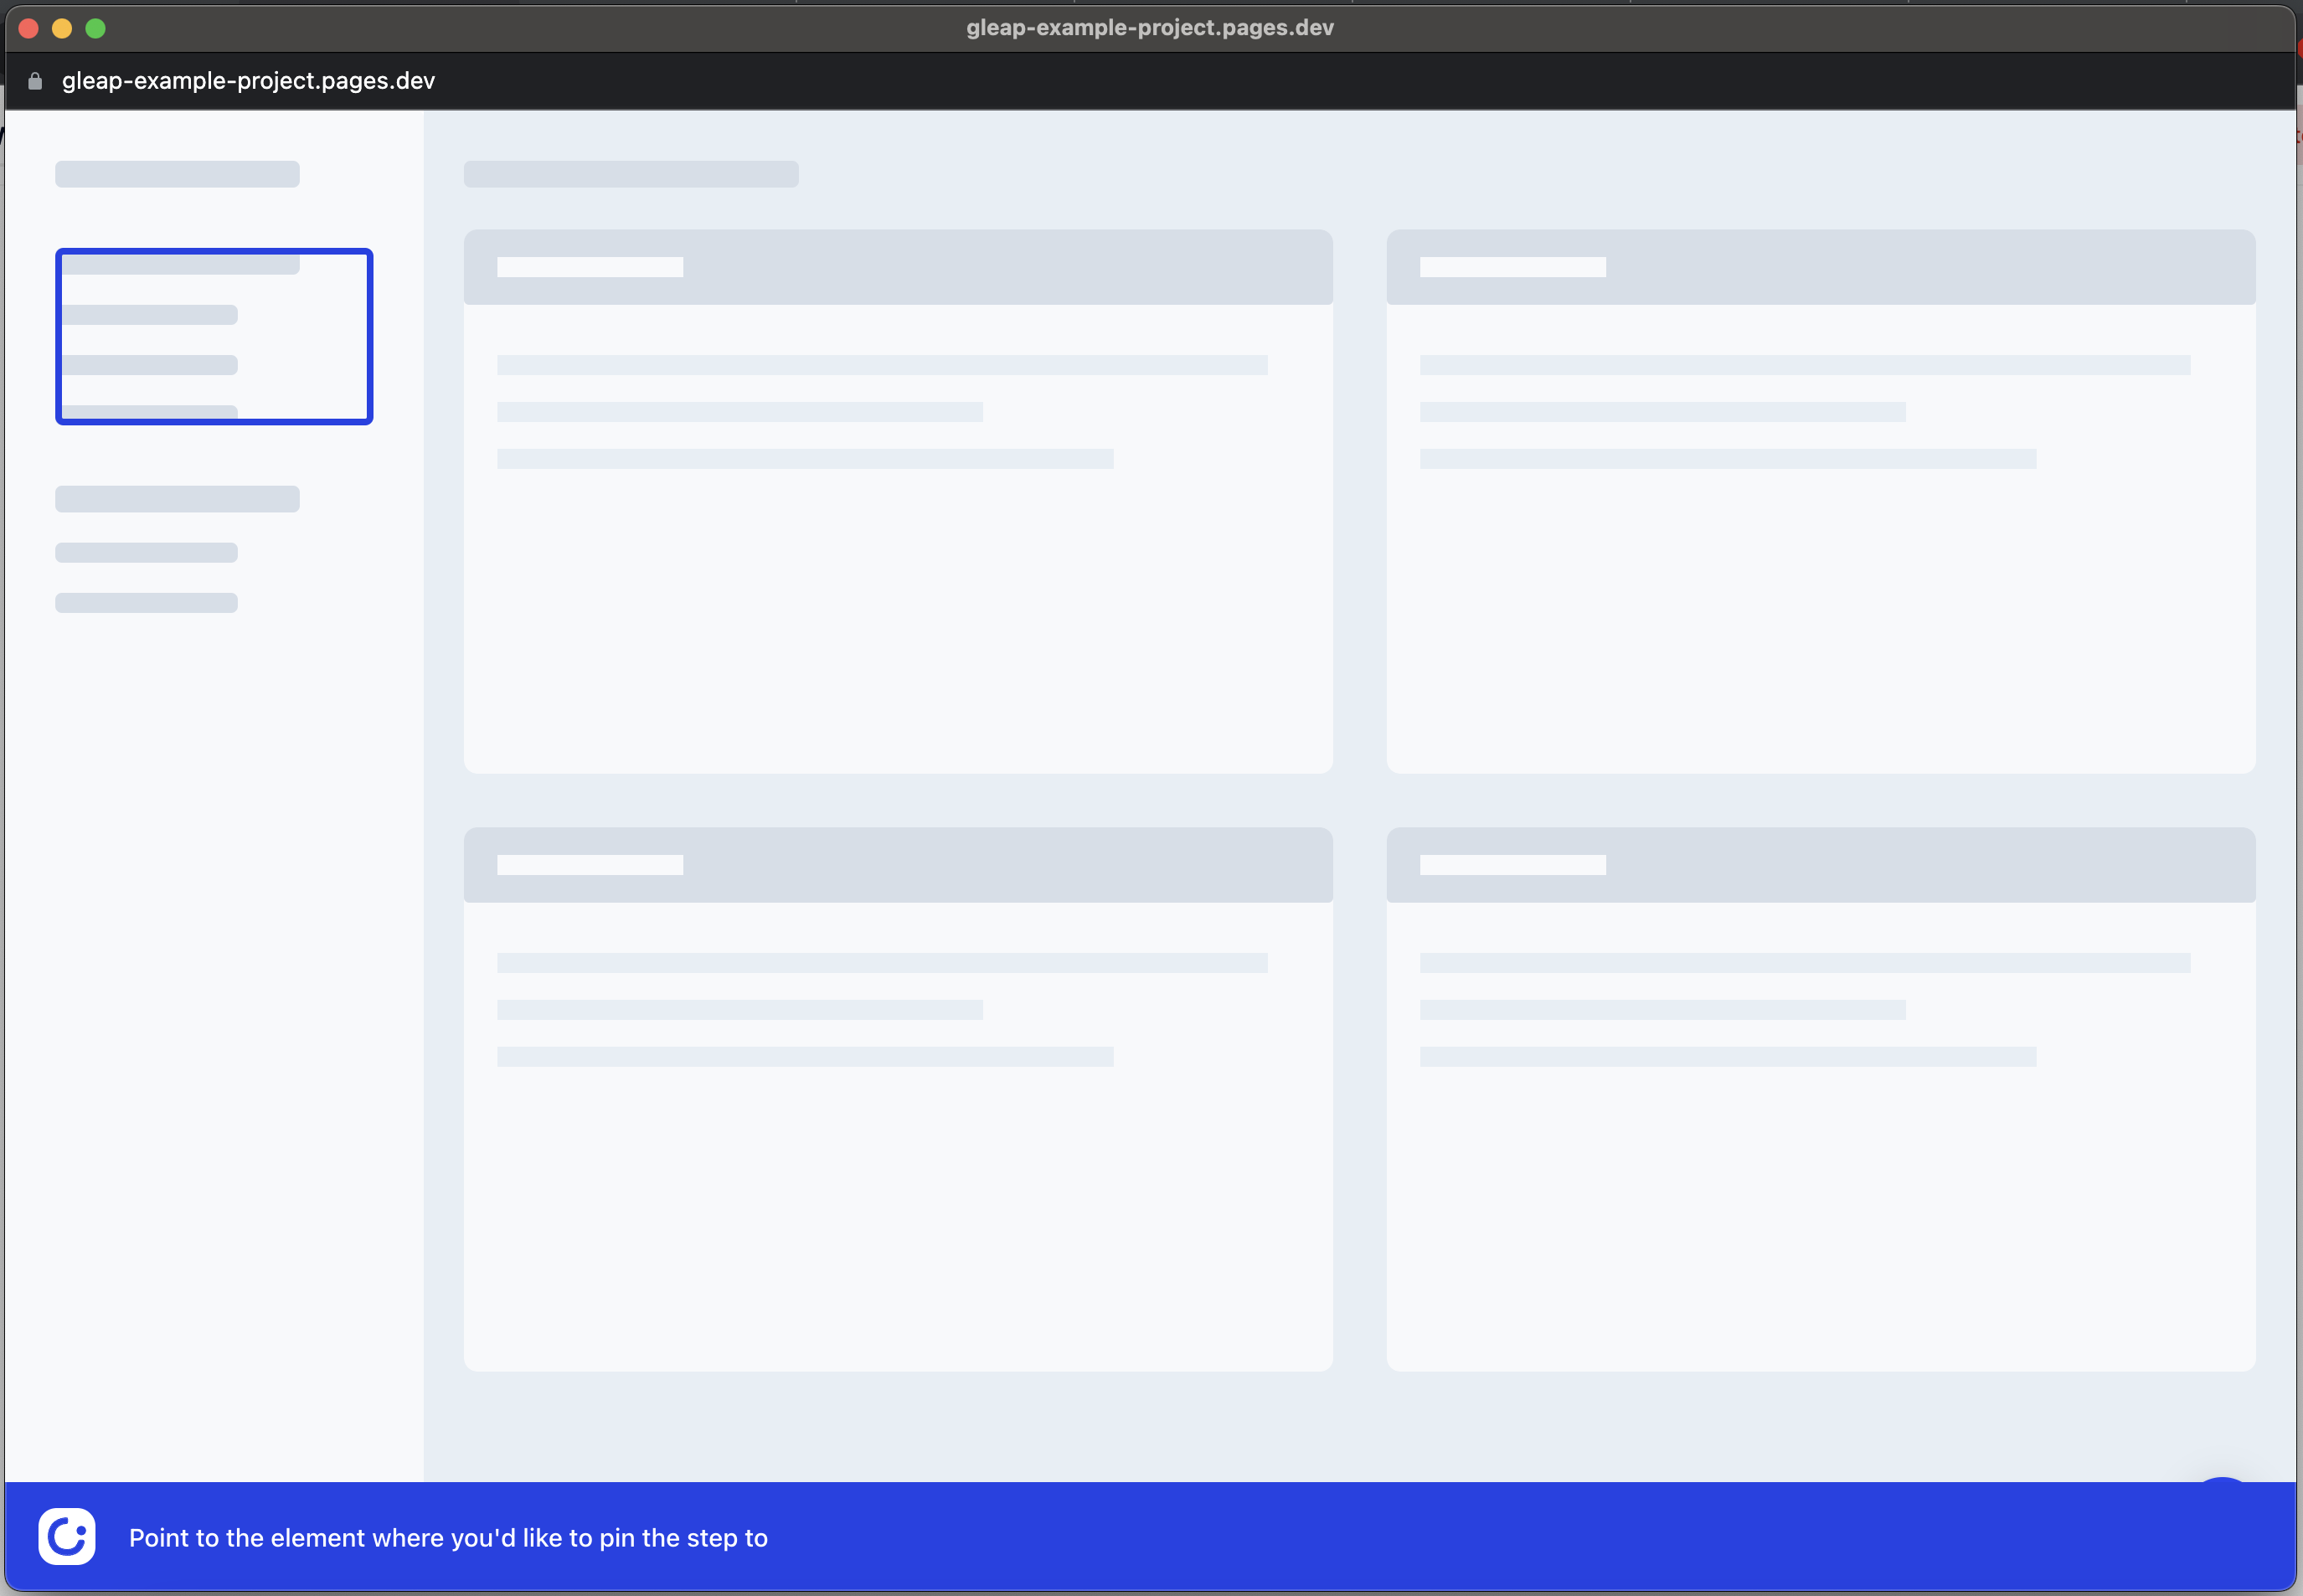
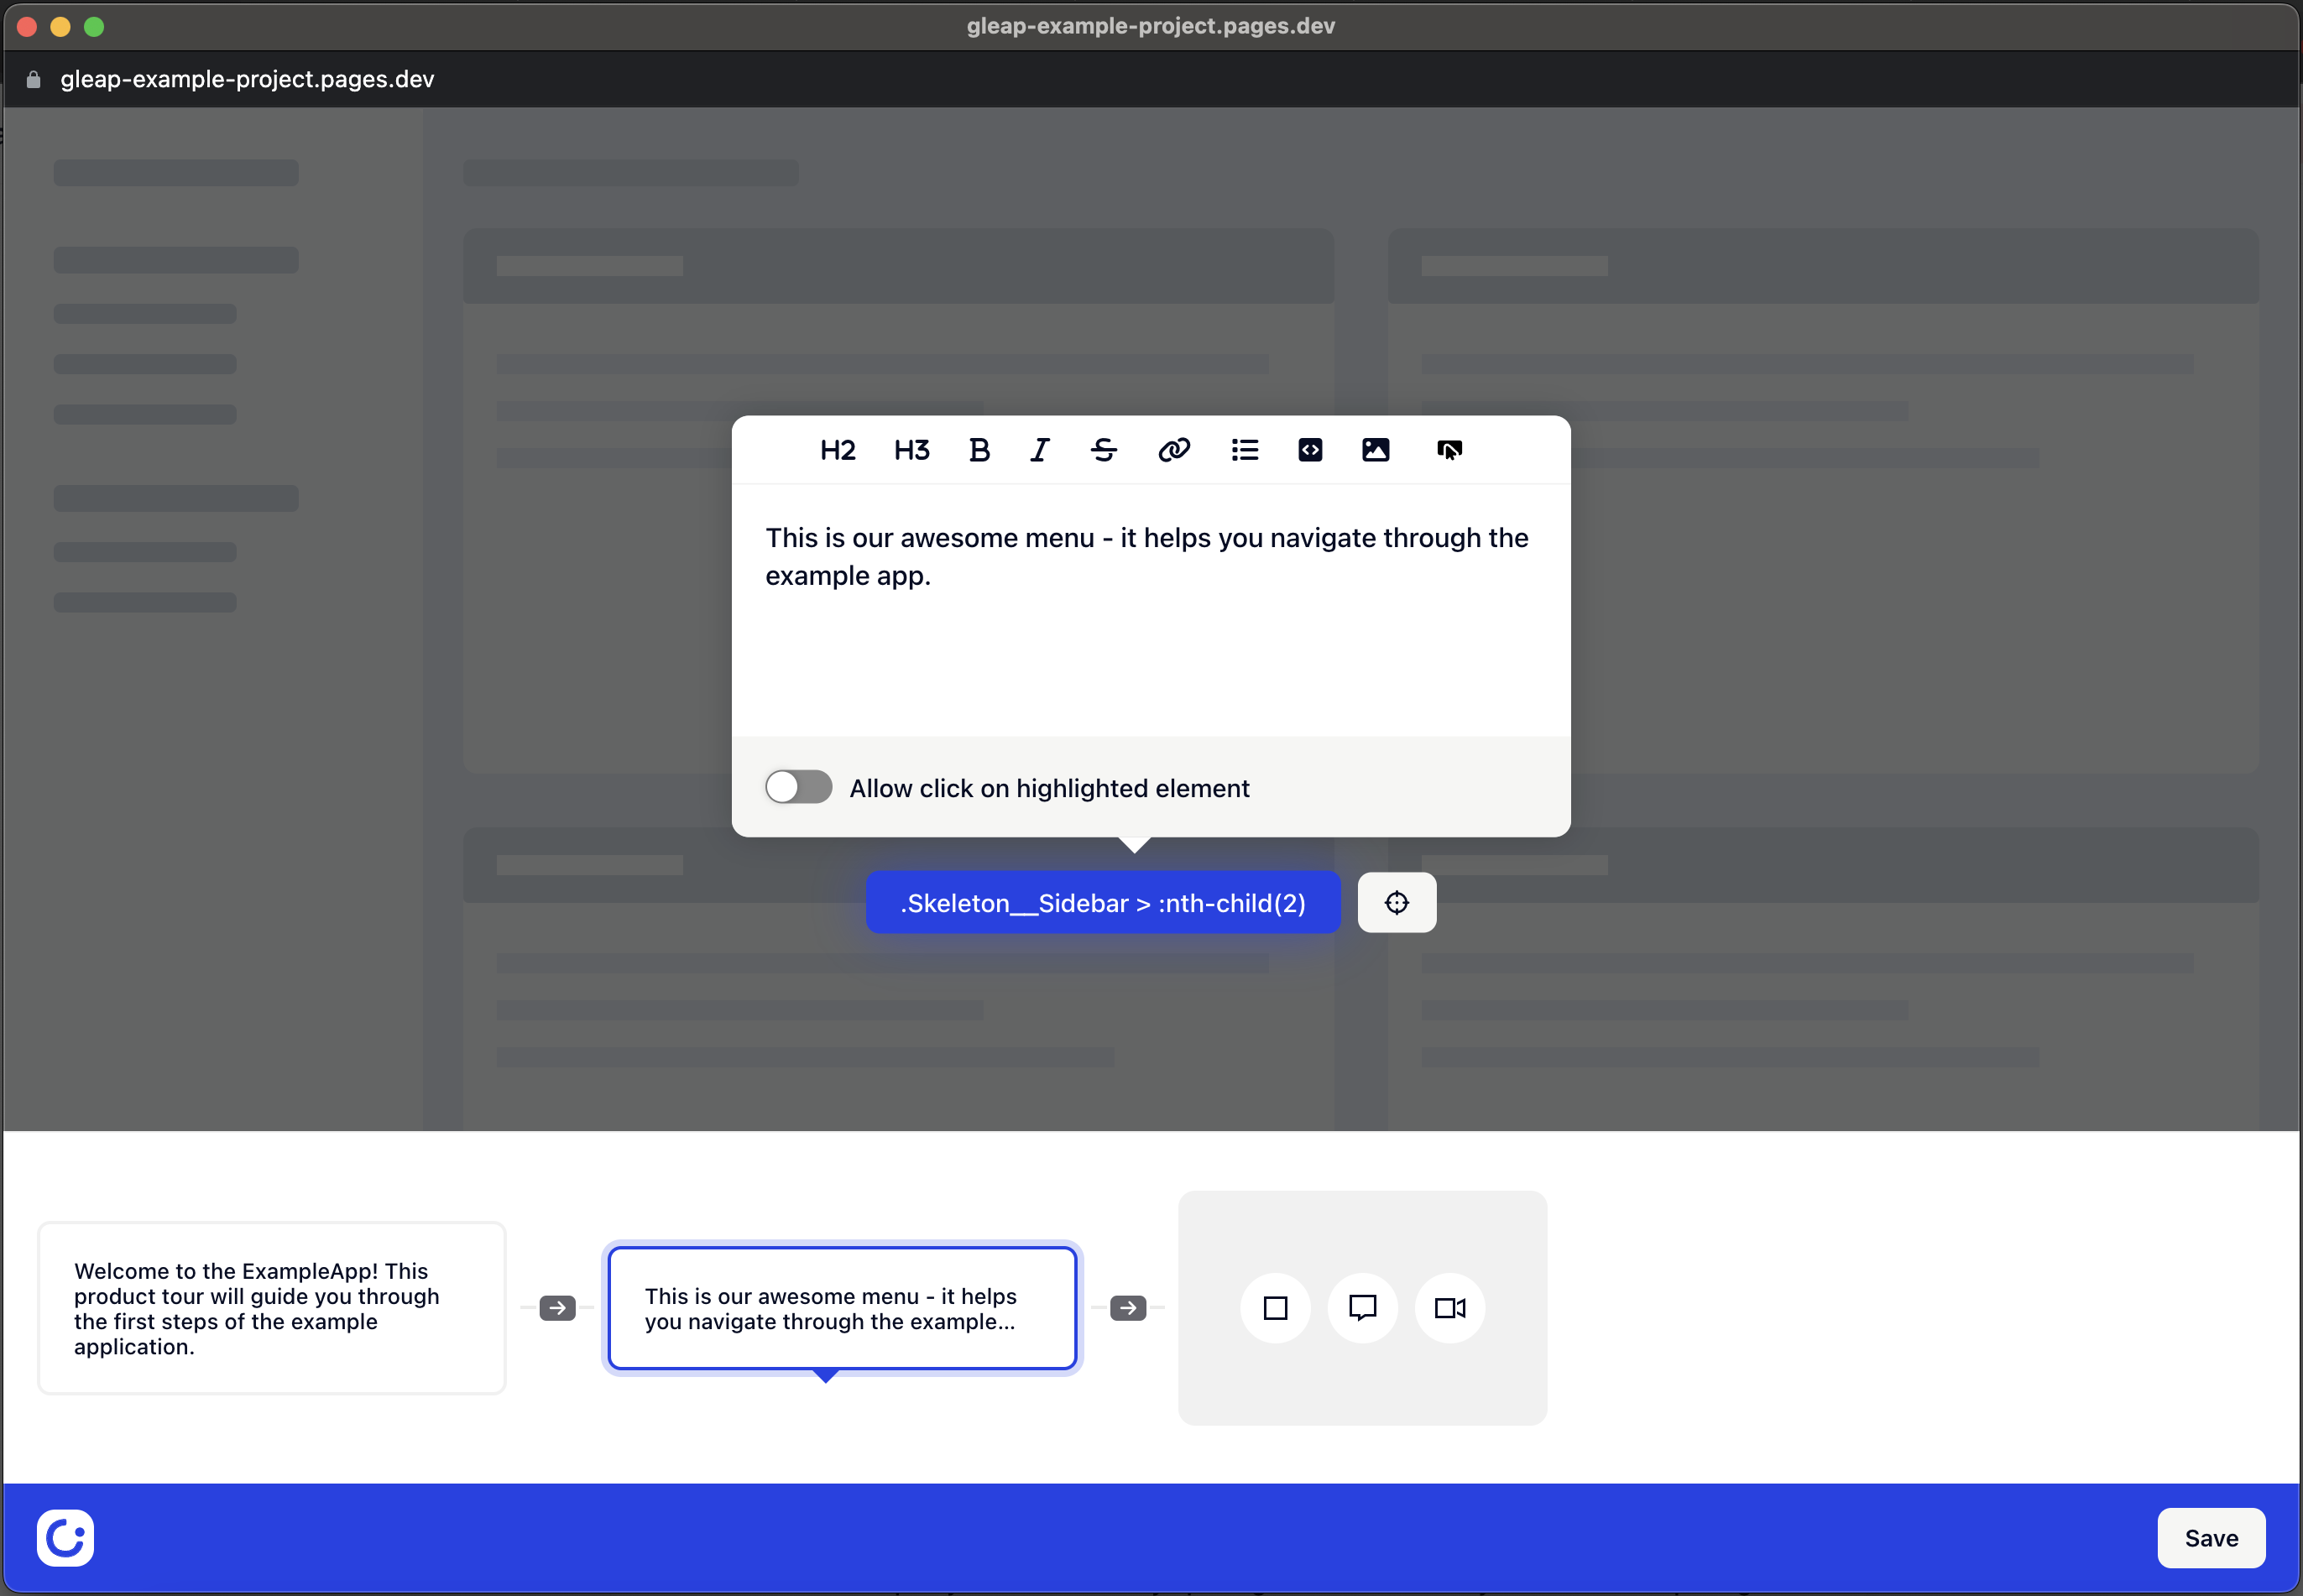
The product tour designer will now allow you to click on an element within your web app. The pointer will be assigned to the selected element. In our example app, we want to introduce the customer to our menu, which is why we selected the menu.
It's time to write the content of the pointer.

Last but not least we want to add a video pointer that allows us to interactively explain what our app is about. We will need to select an element again.
Once selected, simply upload the video you'd like to assign to the pointer.
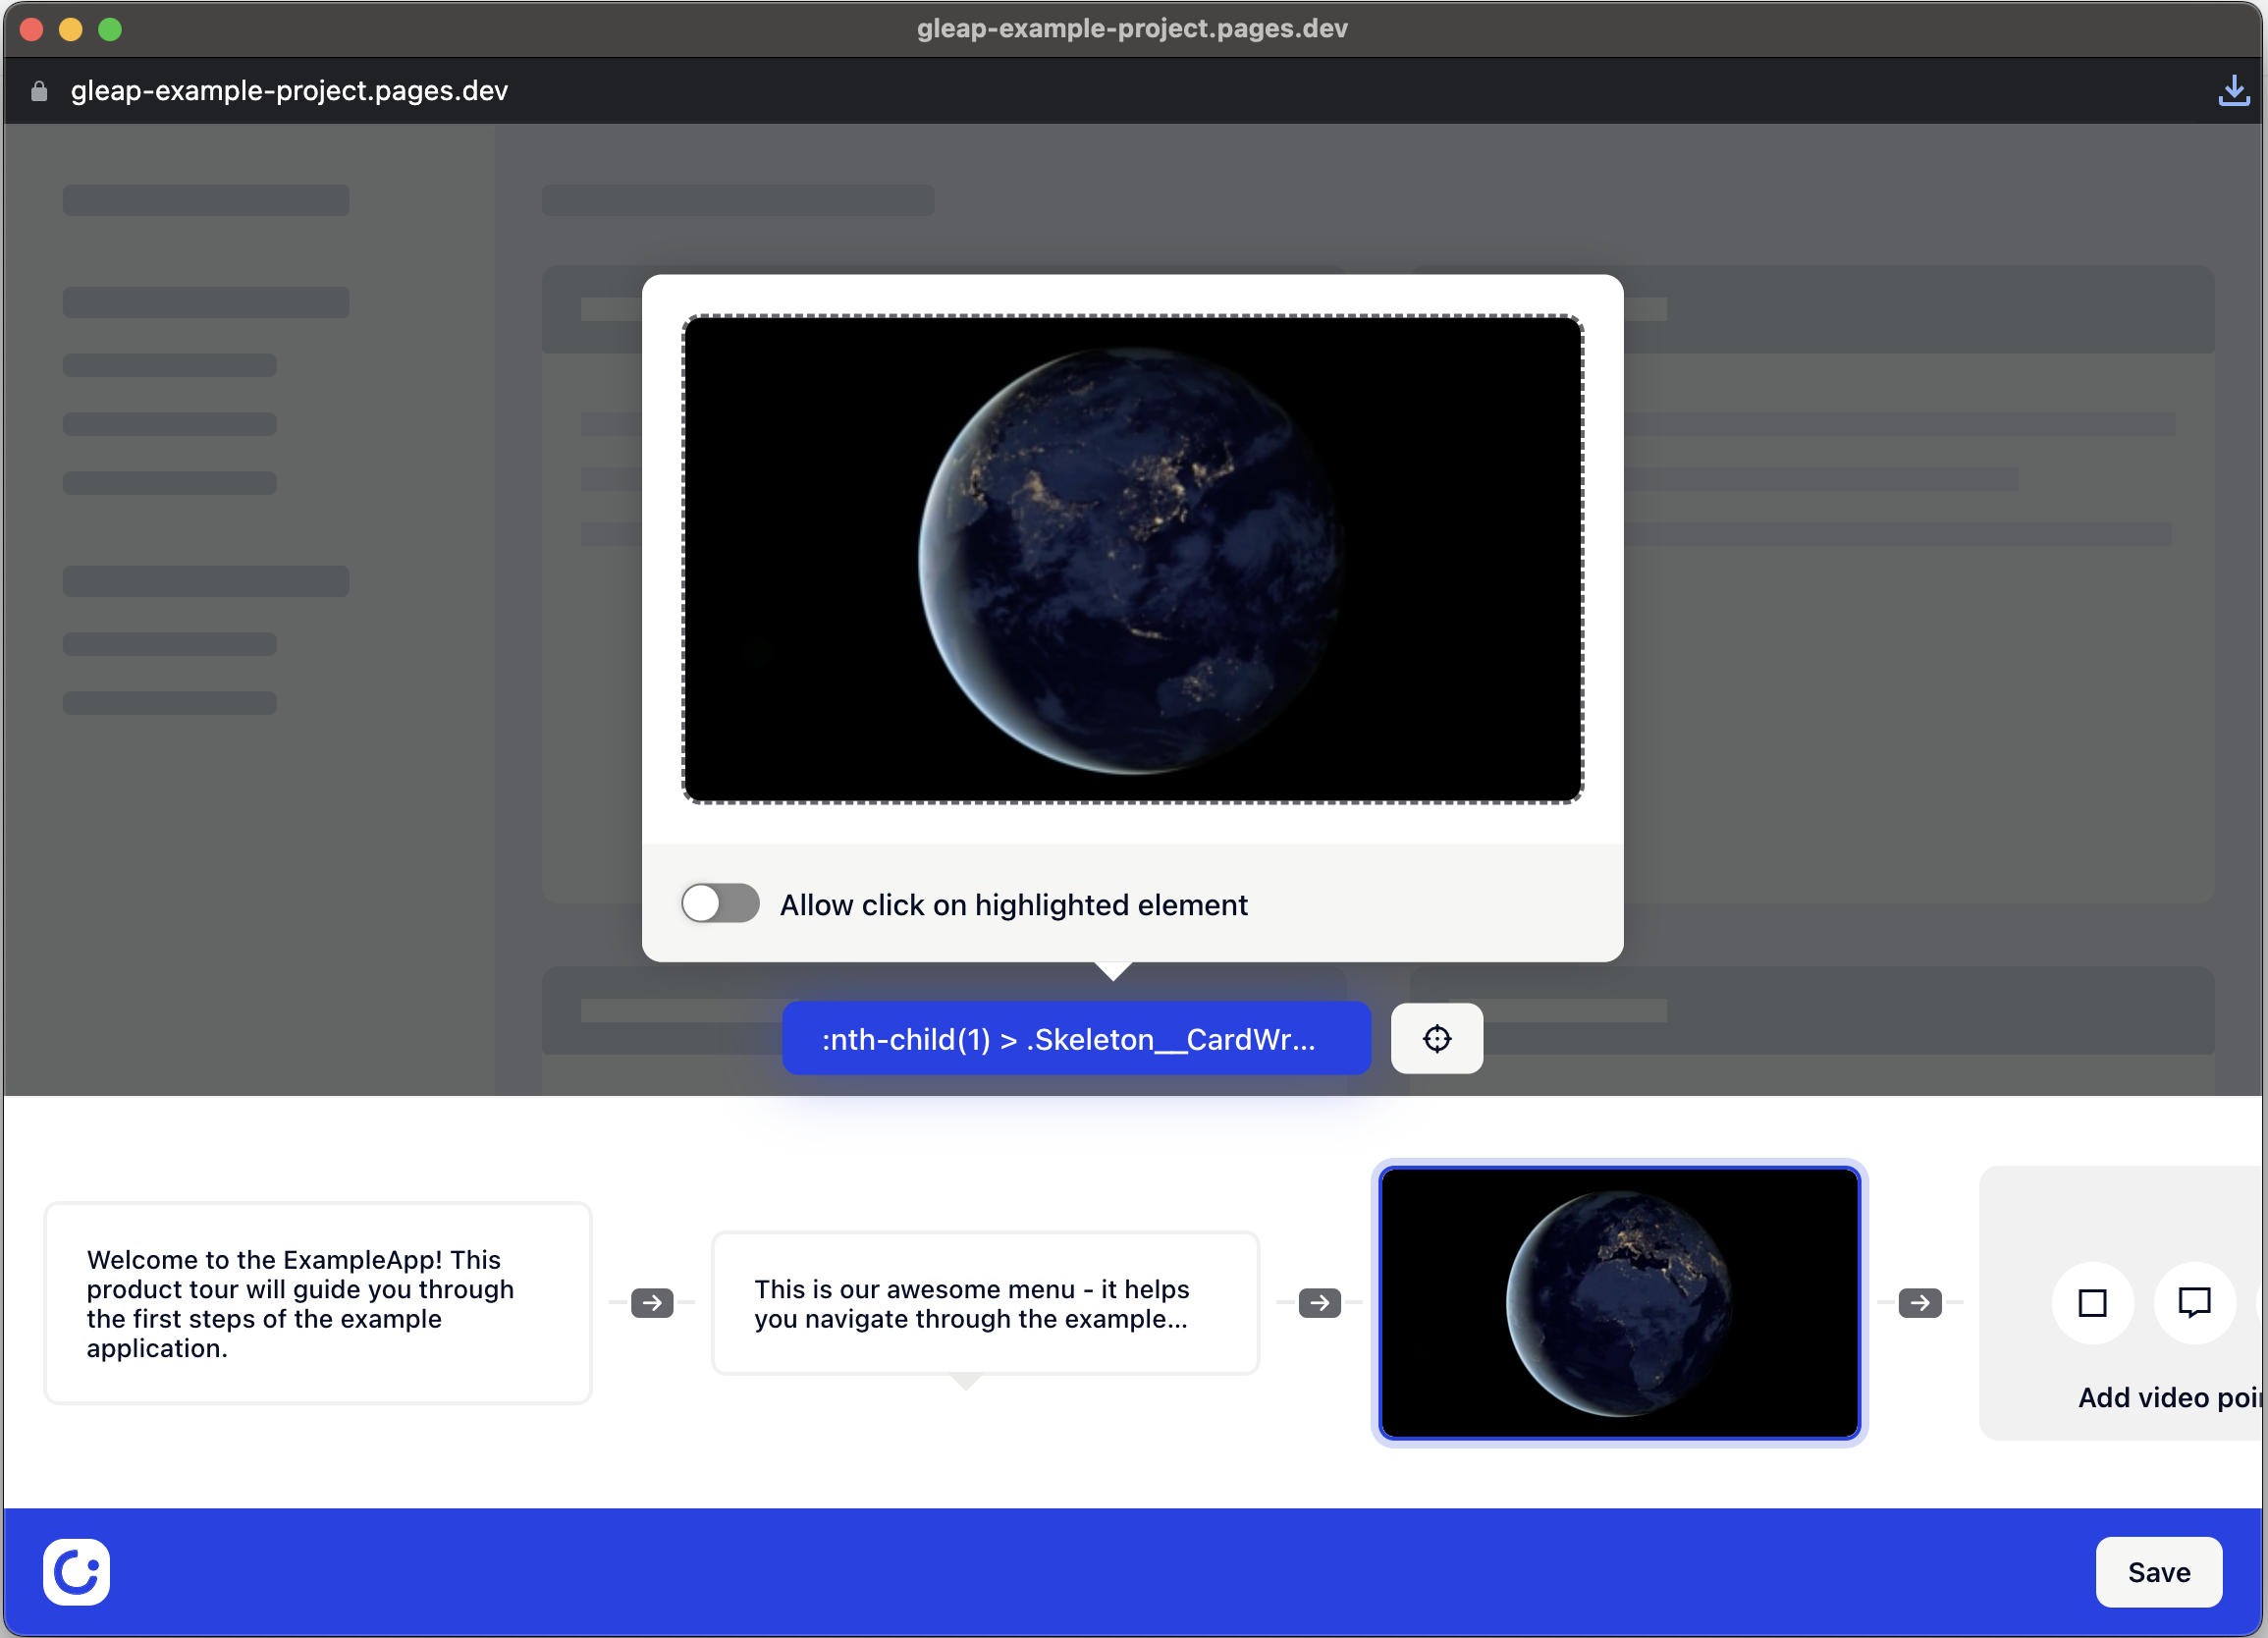
Awesome - that's it. Now save the workflow by clicking on "Save".
Product tours can be started automatically with rules, by code or with URL parameters.
Product tours must be sent on the page on which you designed them. This ensures that the selected elements are available. Gleap automatically sets the page rules for that.
Dynamic URLs
If you are building a product tour for a page with a dynamic URL, you will need to replace any dynamic parts of the url with a placeholder.
An example: https://yourapp.tld/user/1234. You can replace the user id with a placeholder like this: https://yourapp.tld/user/{userId}
This will ensure that the product tour will also be sent on dynamic URLs.

You can start your product tour by code. This is useful if you want to have full control over it.
Gleap.startProductTour("YOUR_PRODUCT_TOUR_ID");You can trigger the product tour with URL parameters. This allows you to start the product tour from a link, which you can send to your users.
https://gleap-example-project.pages.dev/?gleap_tour=655e0beea5fcfd3b369b5f1d&gleap_tour_delay=3Check out our full documentation on how to start product tours by url params.