What to consider when setting up Kai Tasks
Setting up Kai Tasks and using AI Tools takes a blend of technical awareness, process thinking, and collaboration. While the experience is becoming easier over time, here are the key areas to focus on:
Choose high-impact processes to automate: Start by identifying 1–2 workflows where automation could meaningfully reduce support volume. Look for repeatable processes that currently rely on human intervention. Your Gleap analytics dashboard is a great place to spot trends and uncover common issues being routed to your team.
Understand your API requirements: Many Tasks depend on connecting to APIs to fetch or update data (i.e AI Tools). Make sure you know which APIs are needed, what they return, and how they'll be used within the Task.
Test and iterate: Building great Tasks is rarely a one-shot effort. Expect to test different approaches with Task instructions, debug edge cases, and refine as you go to improve reliability and end-user experience.
Getting these fundamentals right will help you launch faster and build more effective Kai-powered Tasks.
Navigate to AI agent → Tasks and click on “Create new Kai task”.
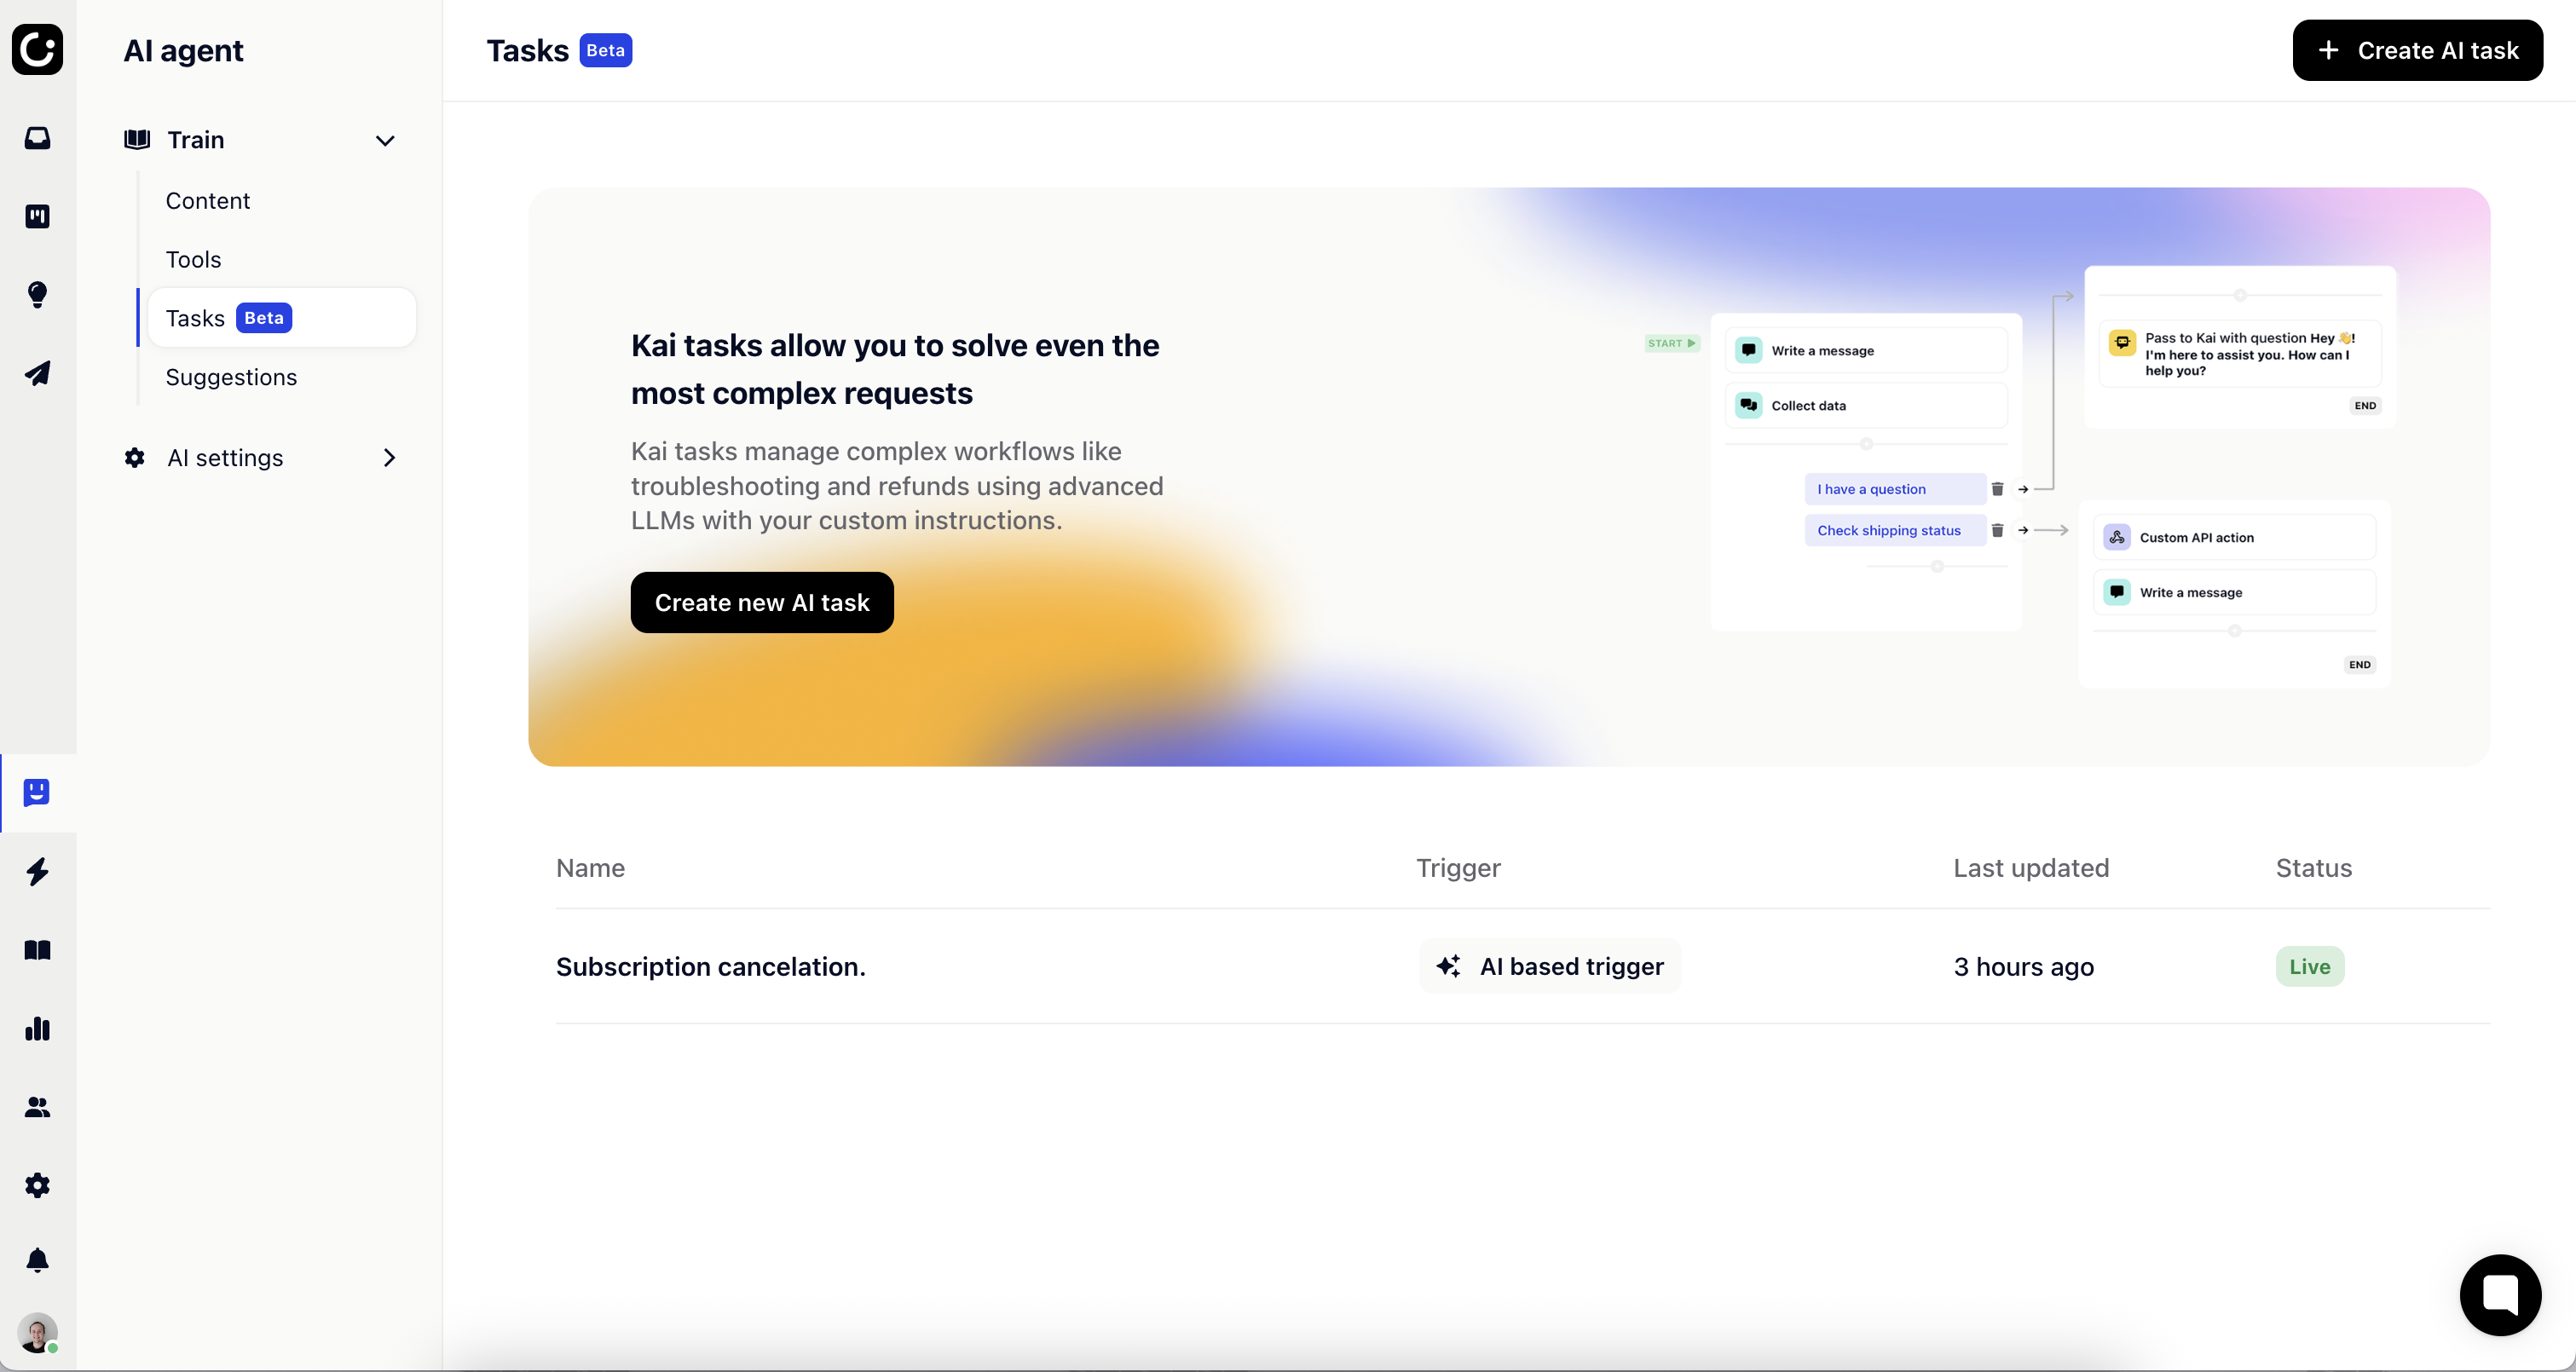
Every Kai task should be given a description telling Kai when to trigger the task. This is very important, so that Kai triggers it at the right time.

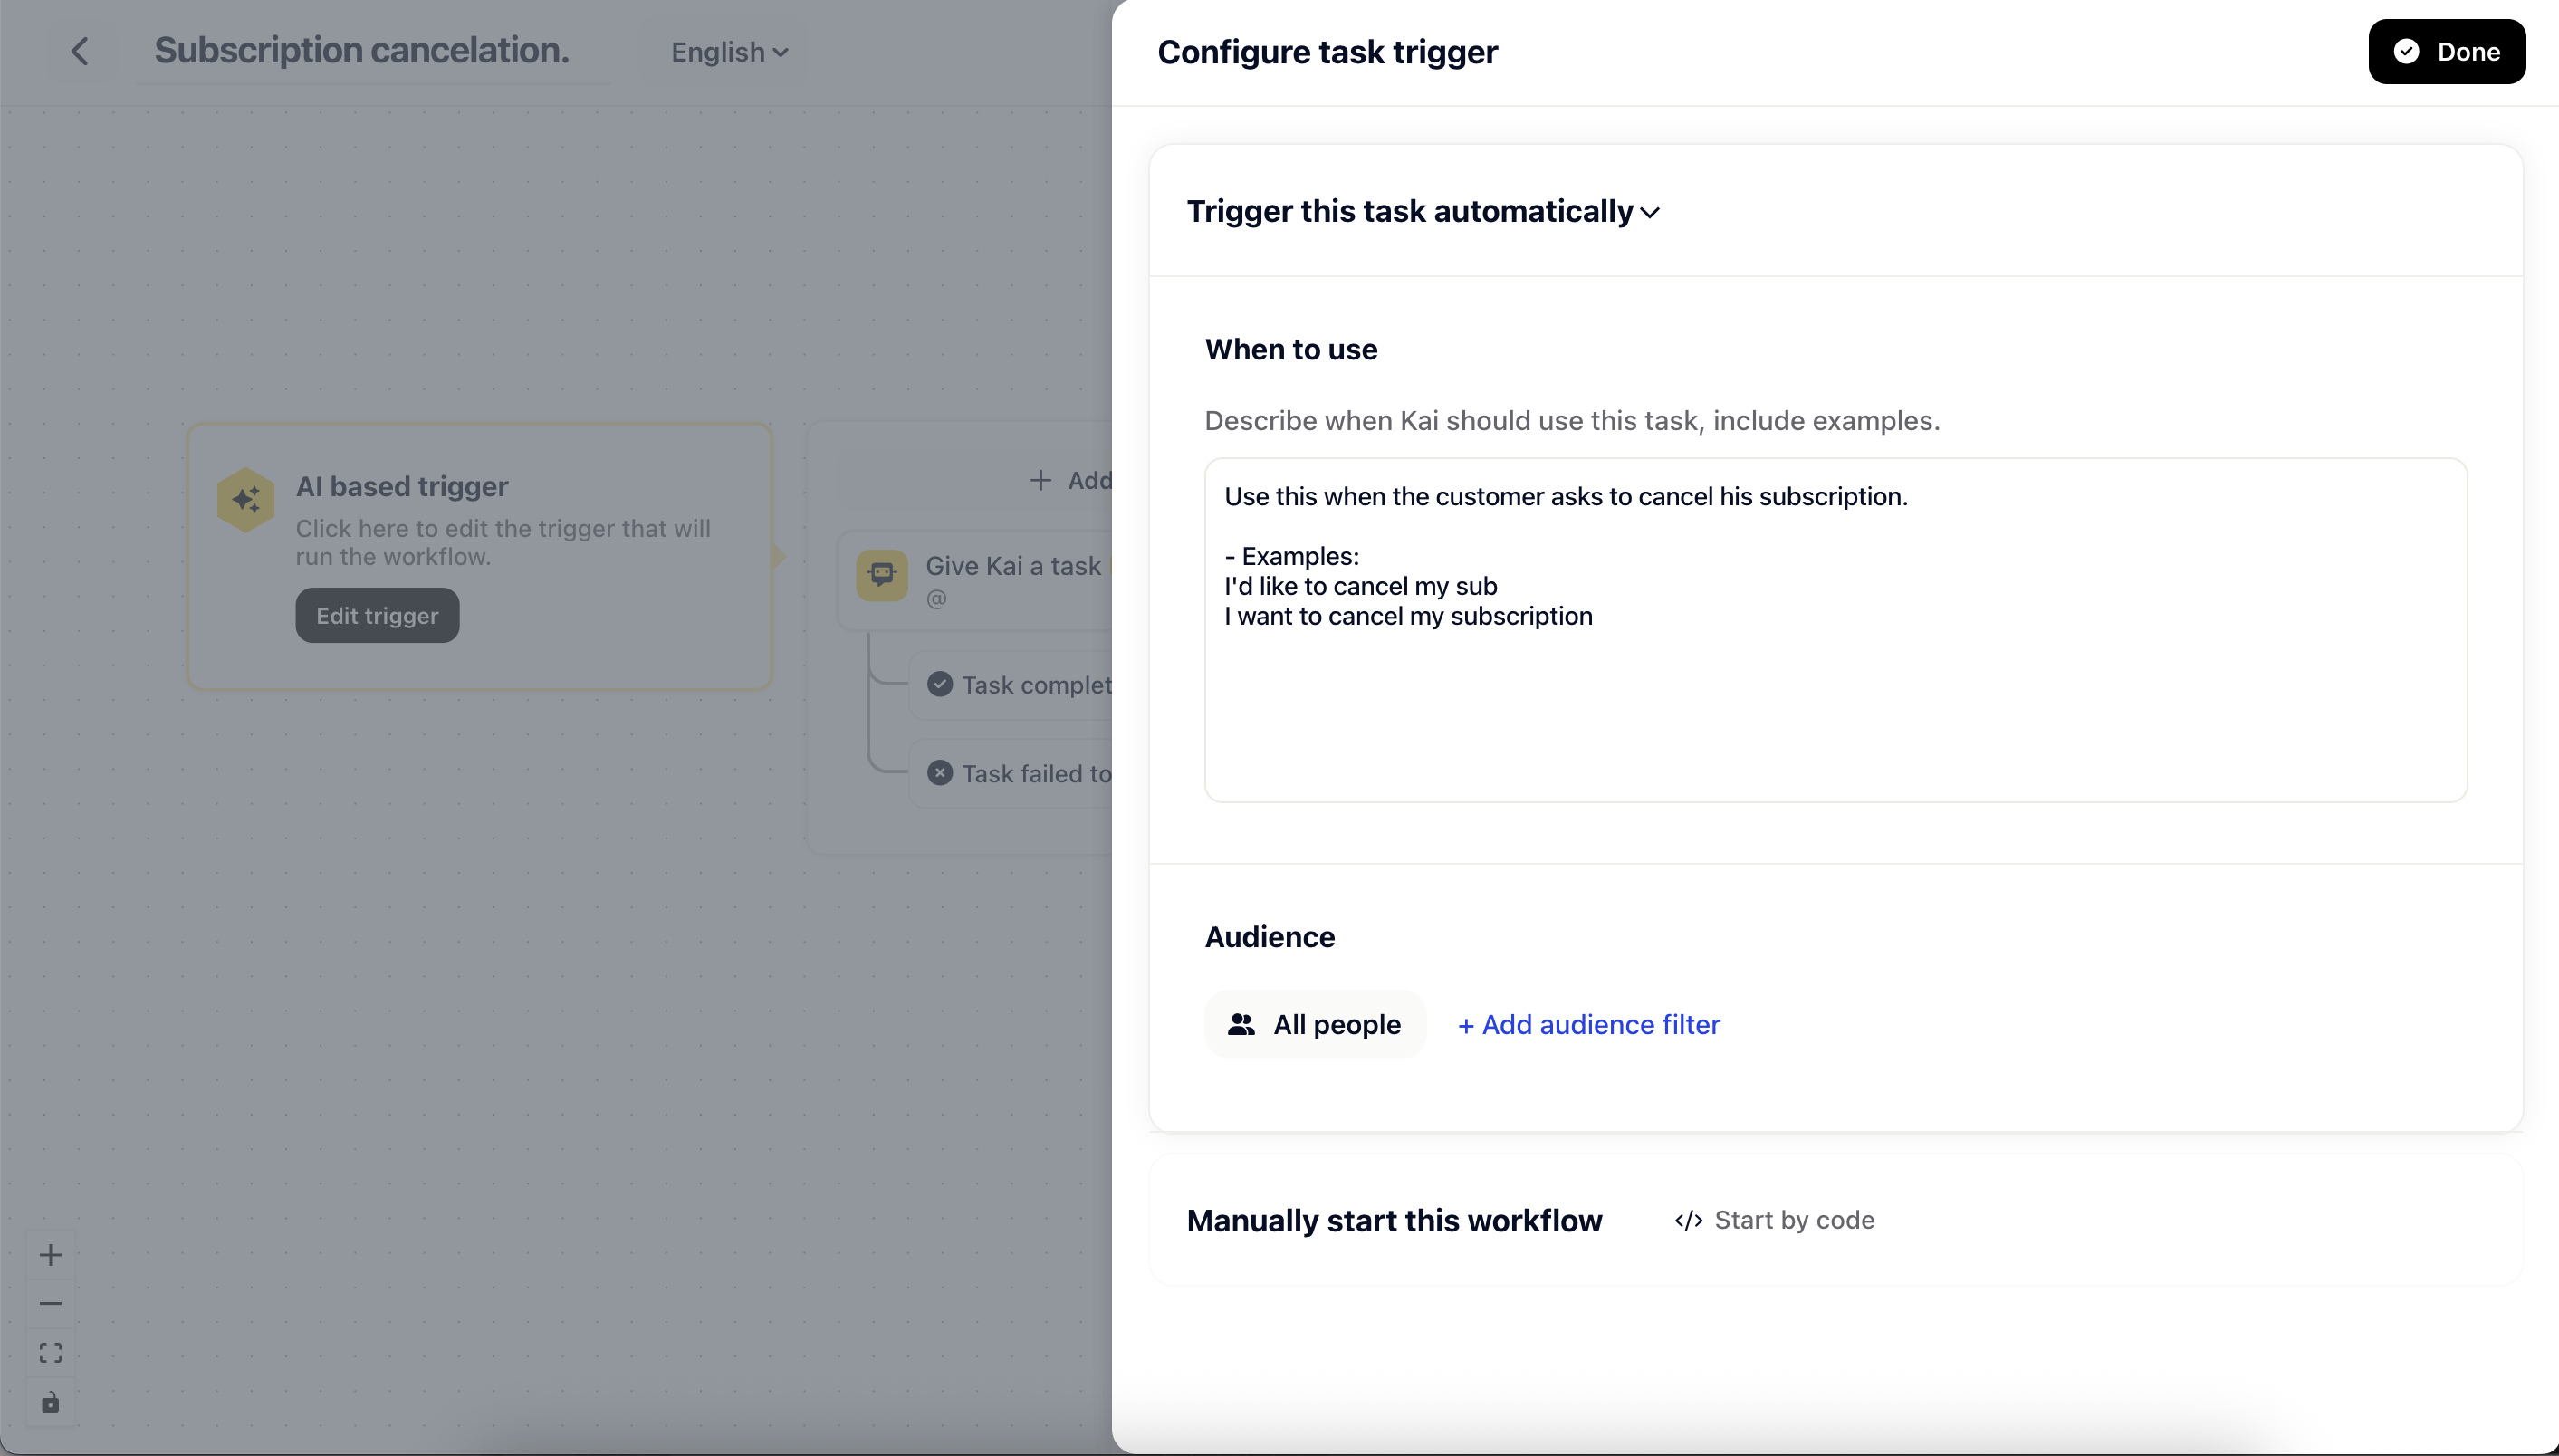
In our example we created a “Subscription cancelation” task with a trigger description and some examples.
To recap: we now created a new task that Kai can start to solve a specific issue. The great part is that this task acts like a regular workflow - you can now combine structured flow with AI tasks all in one place.
One of the new workflow building blocks is the “Give Kai a task” action. It allows you to build small agents that perform all sorts of complex, multistep tasks with the help of AI tools, other workflows and your knowledge base.
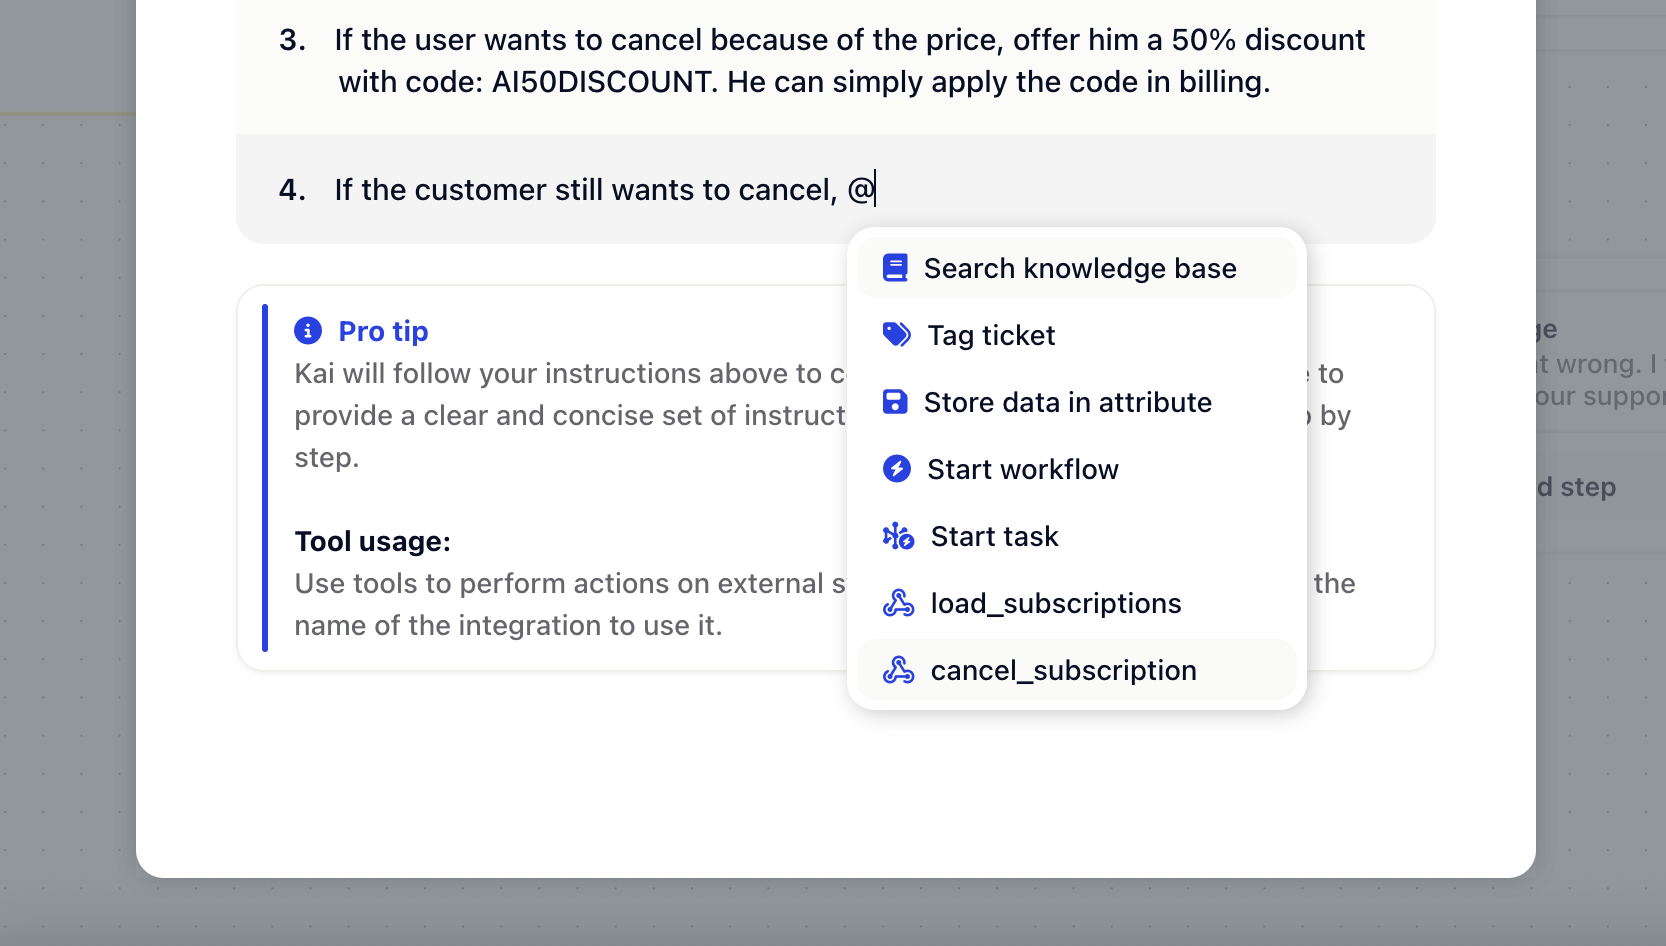
For our example task we want to instruct Kai to perform a subscription cancelation. This involves a few different steps along the way:
1.) Fetch the subscriptions and make sure the right one gets canceled
2.) Ask for the cancelation reason
3.) Offer a discount
4.) Cancel with the help of an AI tool
The final AI task description looks like this:


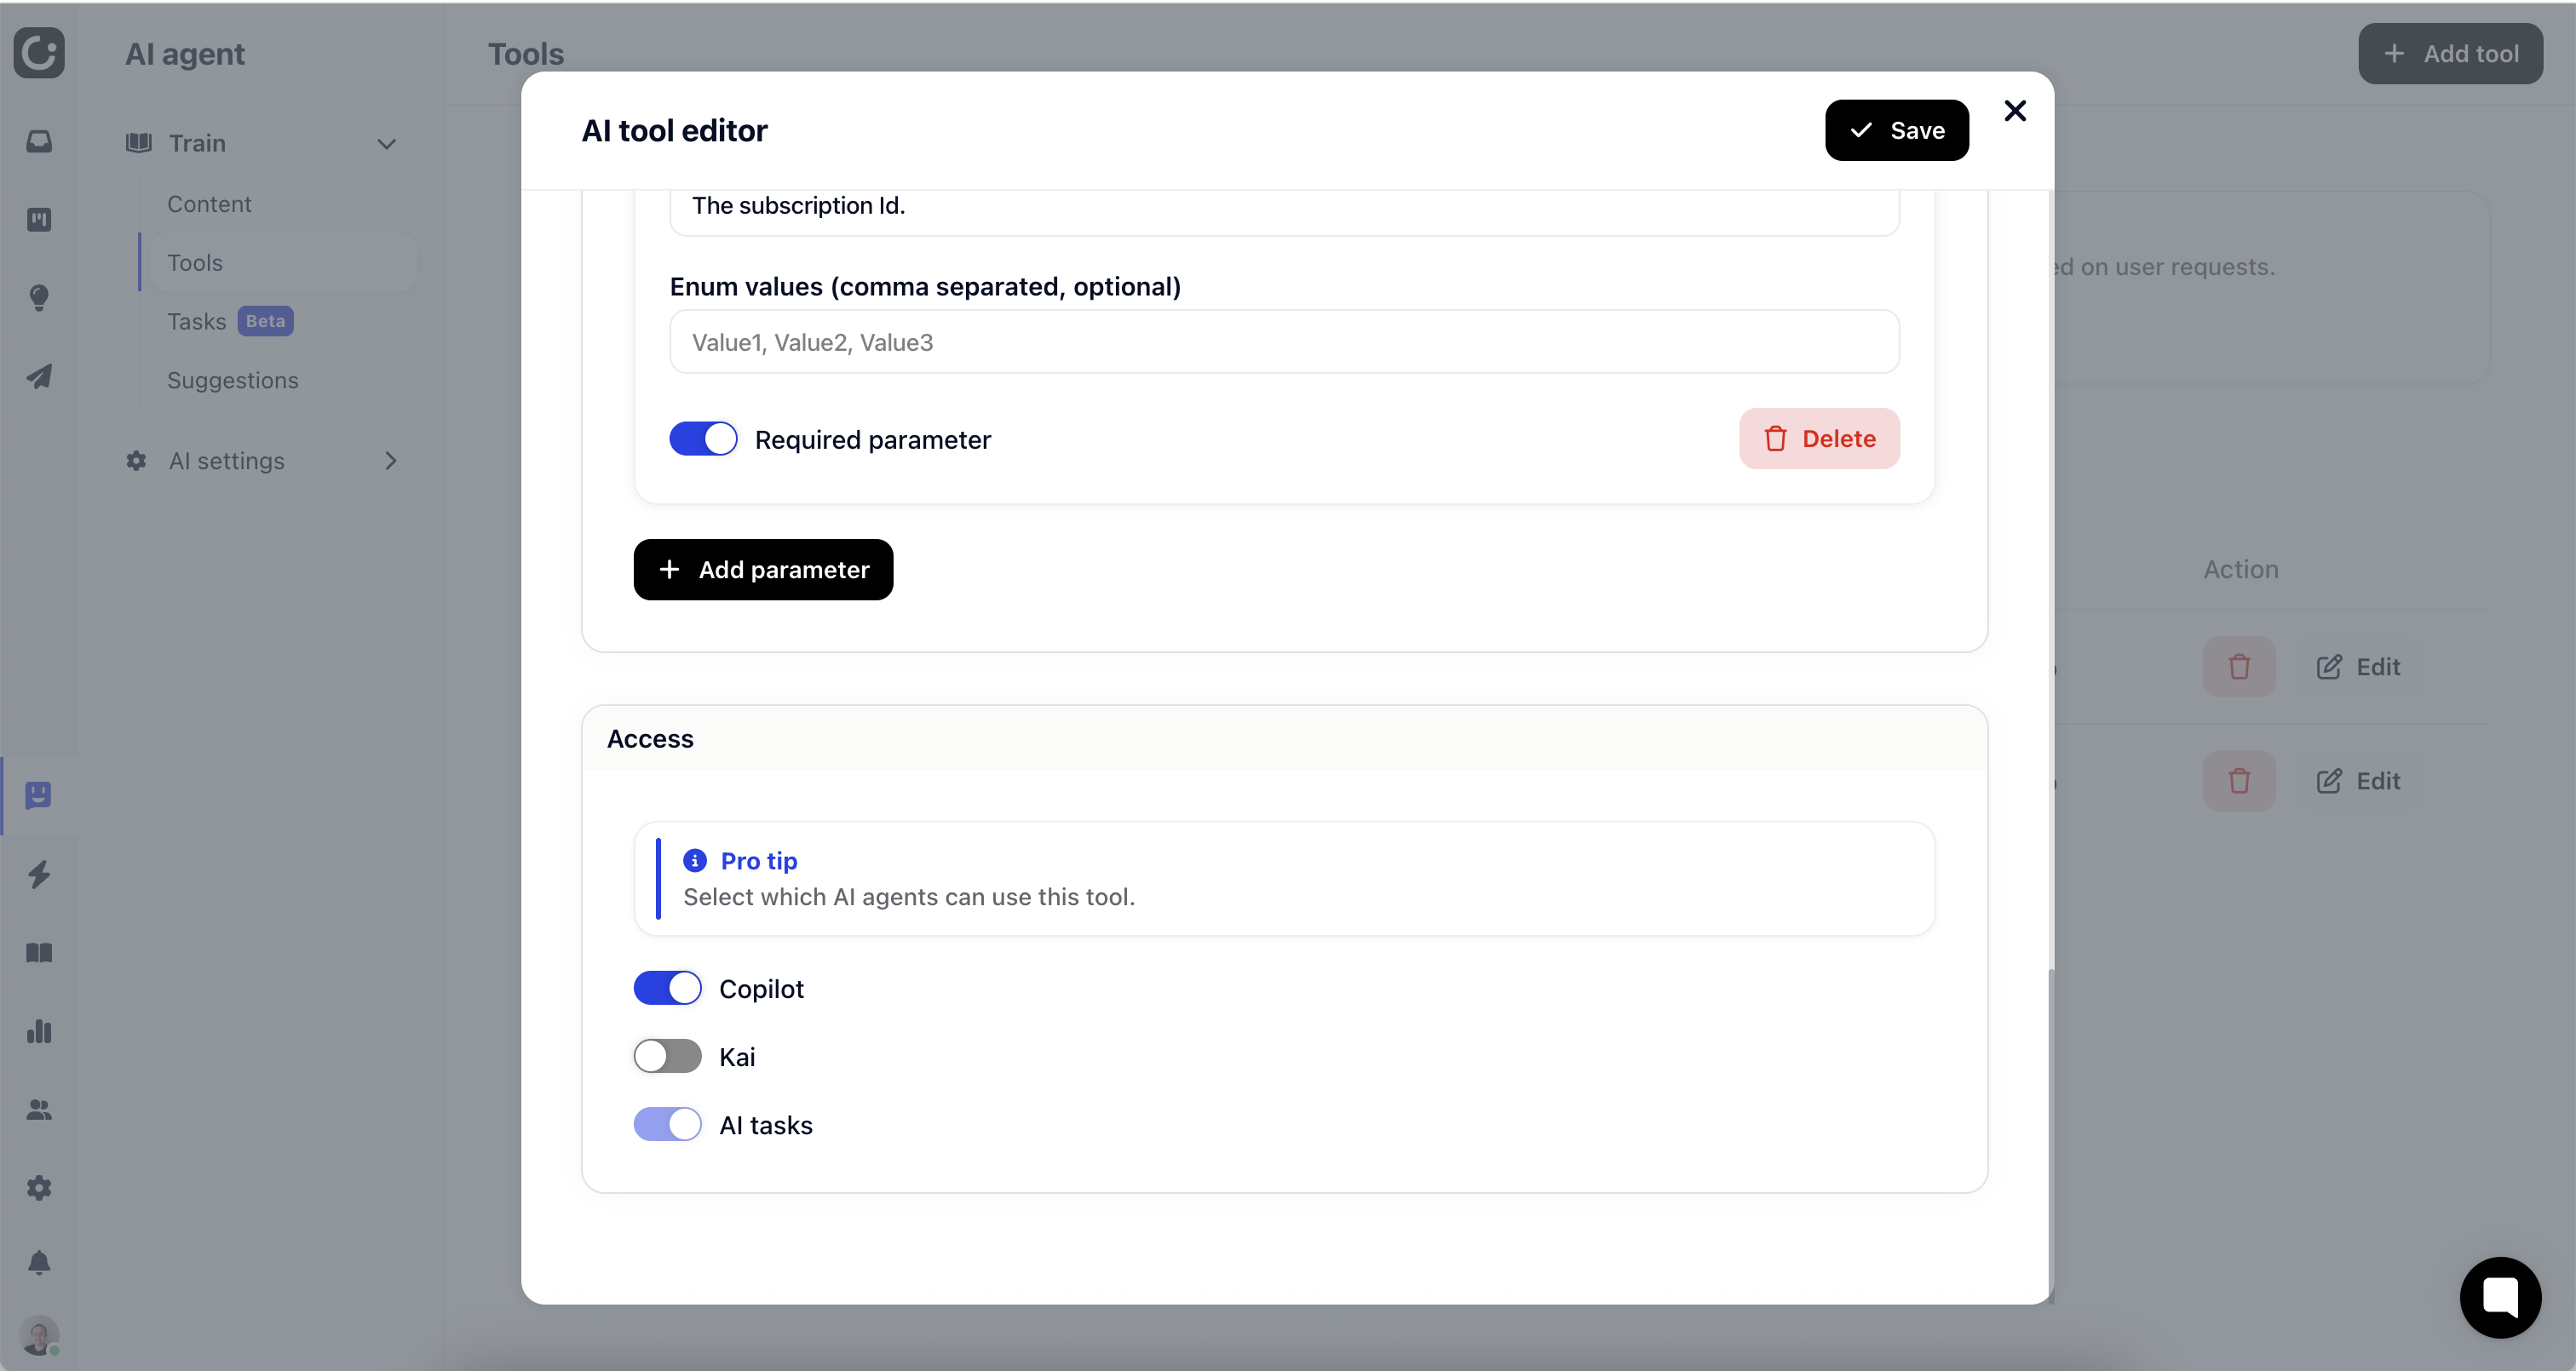
The following tools are offered by default:
Search knowledge base
Tag ticket
Store data in attribute
Start workflow
Start task
As mentioned before, you can also connect your own APIs through AI tools.
After creating your first AI task it’s time to test it. Navigate to Settings → Widget → Preview and start a new conversation. Now ask a question that triggers your new AI task.
As with our example we do have a AI tool called “cancel_subscription” - this might confuse the LLM as there is a tool and a task, both doing the same. For our use-case we only want the AI task to be used. This can be achieved by disabling access for Kai from the AI tool.
Happy AI task automation!