Every custom AI Agent starts with a few core settings: who it is, what it should do, which model powers it, and how it behaves in conversation. You'll find all of these in the Settings panel of your agent.
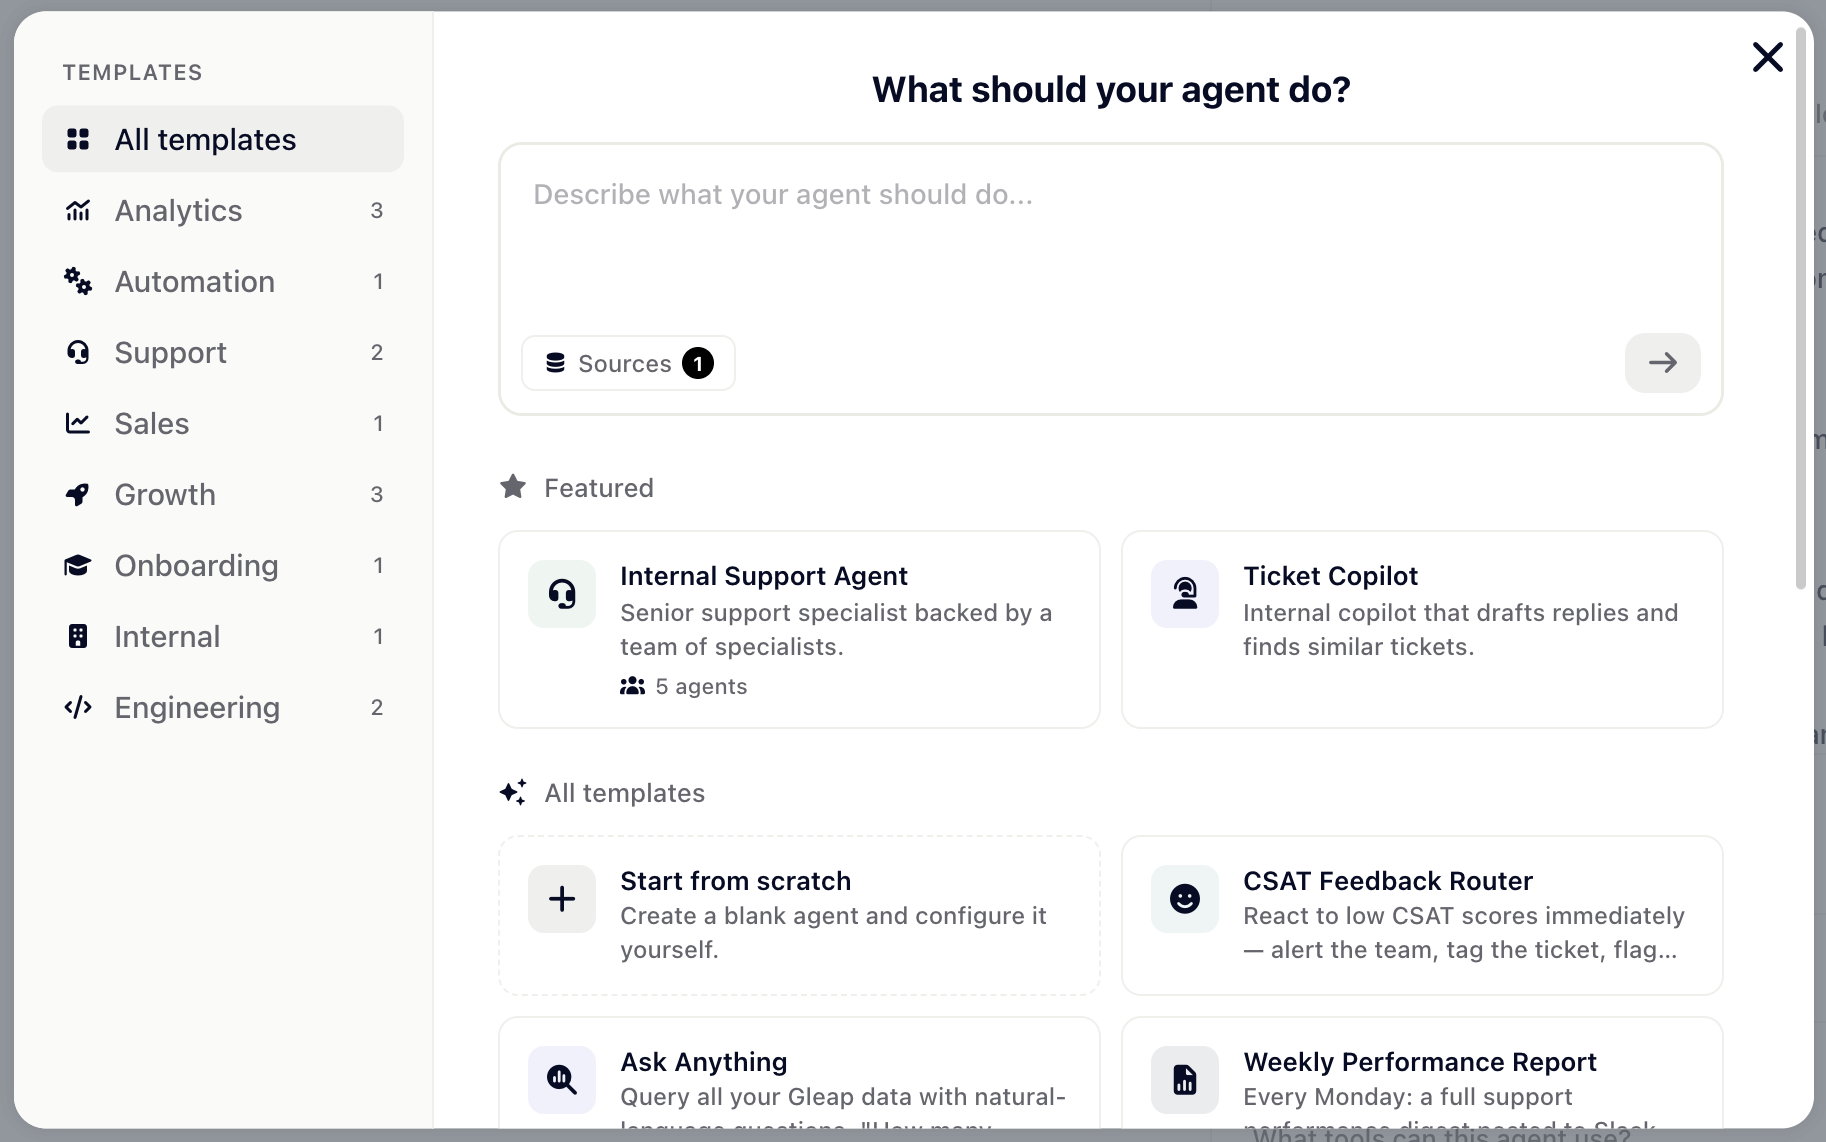
From the AI Agents page, click New agent. You can:
Start from a template — pick a pre-built template by category (Support, Automation, Sales, Onboarding, and more) to bootstrap an agent with sensible defaults.
Generate from a prompt — describe what your agent should do in plain language and Gleap drafts the configuration for you. You can include sources (your knowledge base or connected code repositories) to ground the generation.
Start from scratch — create a blank agent and configure every setting yourself.
Once created, you'll land on the agent's detail page with the Settings panel on the right.
At the top of the Settings panel, give your agent:
An icon and color — click the icon picker to choose any icon and accent color. This is how users recognize the agent.
An agent name — short and descriptive, e.g. Billing Assistant, Release Notes Drafter, Onboarding Coach.
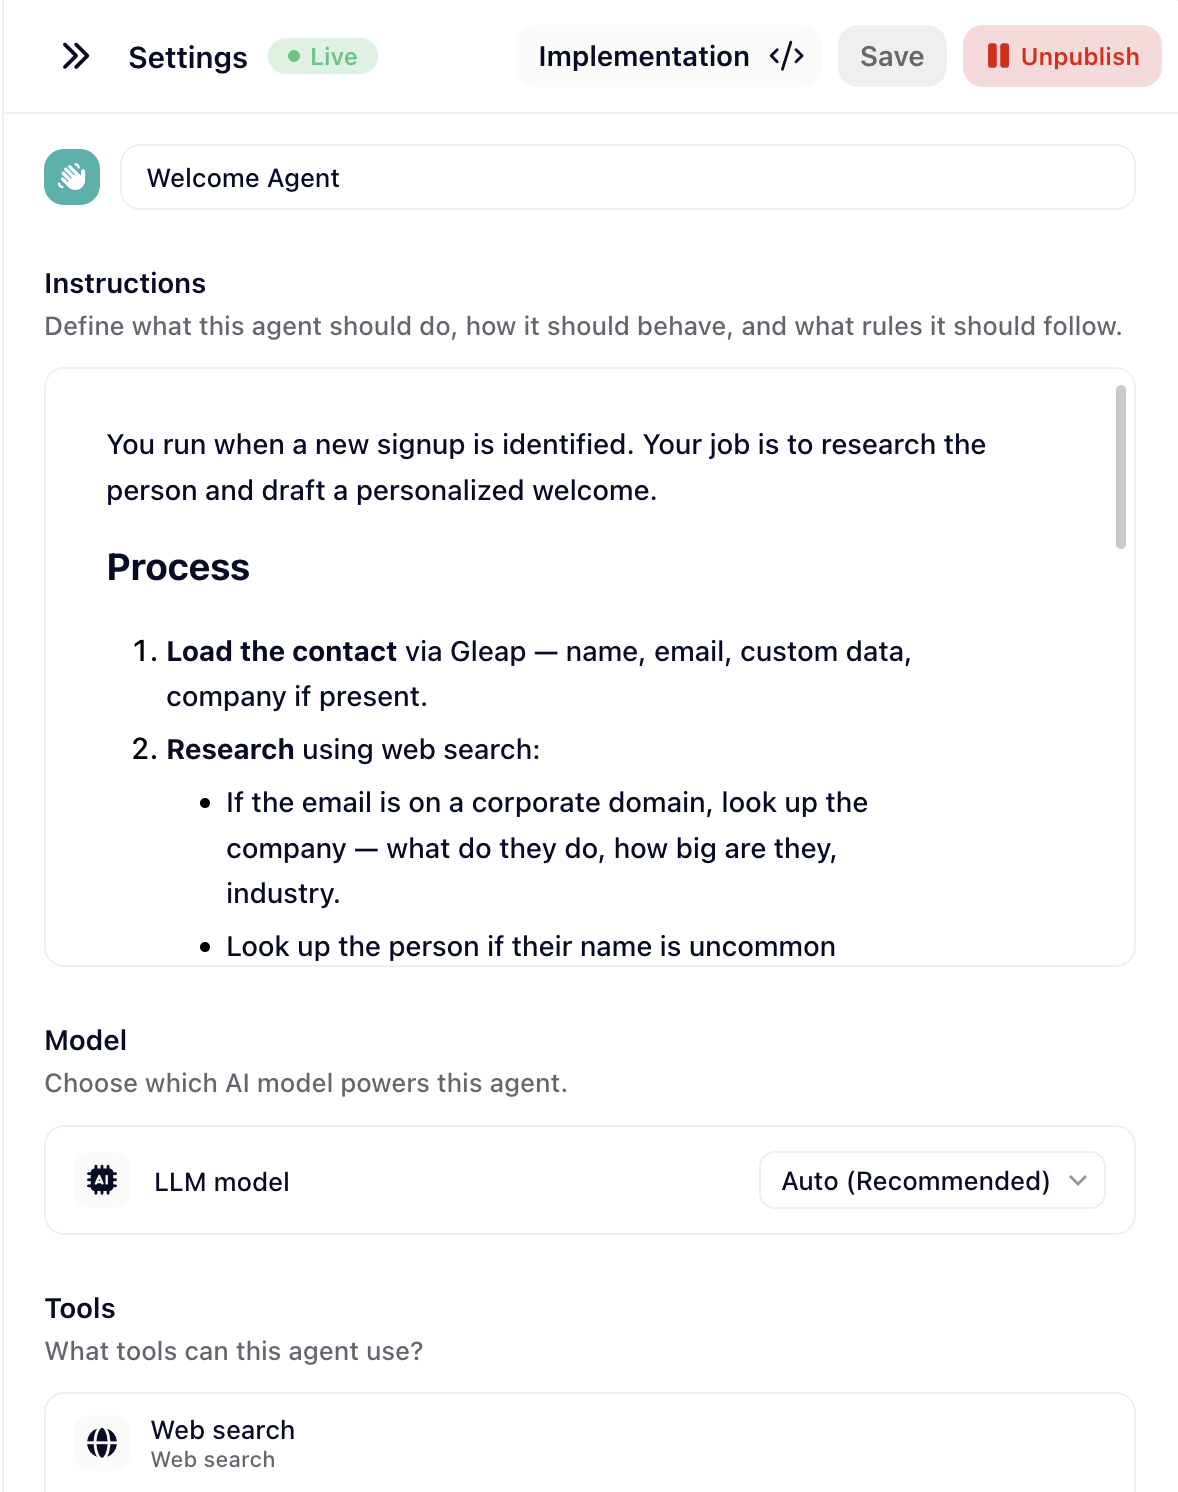
The Instructions section is the most important part of building an agent. It's the system prompt — the text that defines what the agent should do, how it should behave, and what rules it should follow.
A good instructions block usually covers:
Role — who the agent is and what job it does.
Behavior — tone, formality, length of replies.
Rules — what it must always do, what it must never do (e.g. never share refund amounts above $200 without escalation).
Examples — short examples of ideal answers if the task is nuanced.
Click the expand icon to open the editor in a larger window for longer instructions.
In the Model section, choose which LLM powers your agent. The dropdown lists all available models — pick the one that fits your trade-off between quality, speed, and cost. Leave on Auto if you want Gleap to choose the best model for the job.
By default, your agent responds as fast as the model produces tokens. If your agent is customer-facing and you want it to feel more human, enable Response delay to add a small random pause before each response.
Enable response delay — turn it on.
Min delay (seconds) — minimum pause (default 20).
Max delay (seconds) — maximum pause (default 60).
Each response uses a random delay between min and max. Recommended for support and outbound agents; usually unnecessary for internal tools.
Quick actions are predefined prompts that show up as clickable buttons in the agent's chat UI. They give users a one-click shortcut to common tasks instead of typing everything from scratch — for example, "Summarize this conversation", "Open a ticket", or "Check my subscription".
Add a quick action by giving it a label, an icon, and the prompt that gets sent when a user clicks it.
Two buttons in the top-right control your agent's lifecycle:
Save — saves your changes. The agent stays in Draft until you publish it.
Publish — moves the agent from Draft to Live. It's now active for everyone in its access scope.
Tip: If your agent has tools that require authorization (e.g. an OAuth-protected API or an MCP server), Gleap will show a Setup required banner at the top of the Settings panel. You won't be able to publish until those tools are connected.
Your agent has an identity, instructions, and a model. Now teach it to do things:
Tools — giving your agent capabilities — connect APIs, web search, MCP servers, and more.
Triggers — when and how agents run — control when the agent activates.