Out of the box, an agent can chat. Look up customer data, trigger automations, search the web, or call a CRM. You give it just tools. Each tool is a capability you wire up once and the agent decides when to use during a conversation.
You'll find tools in the Tools section of your agent's Settings panel. Click Add tool to choose a type.
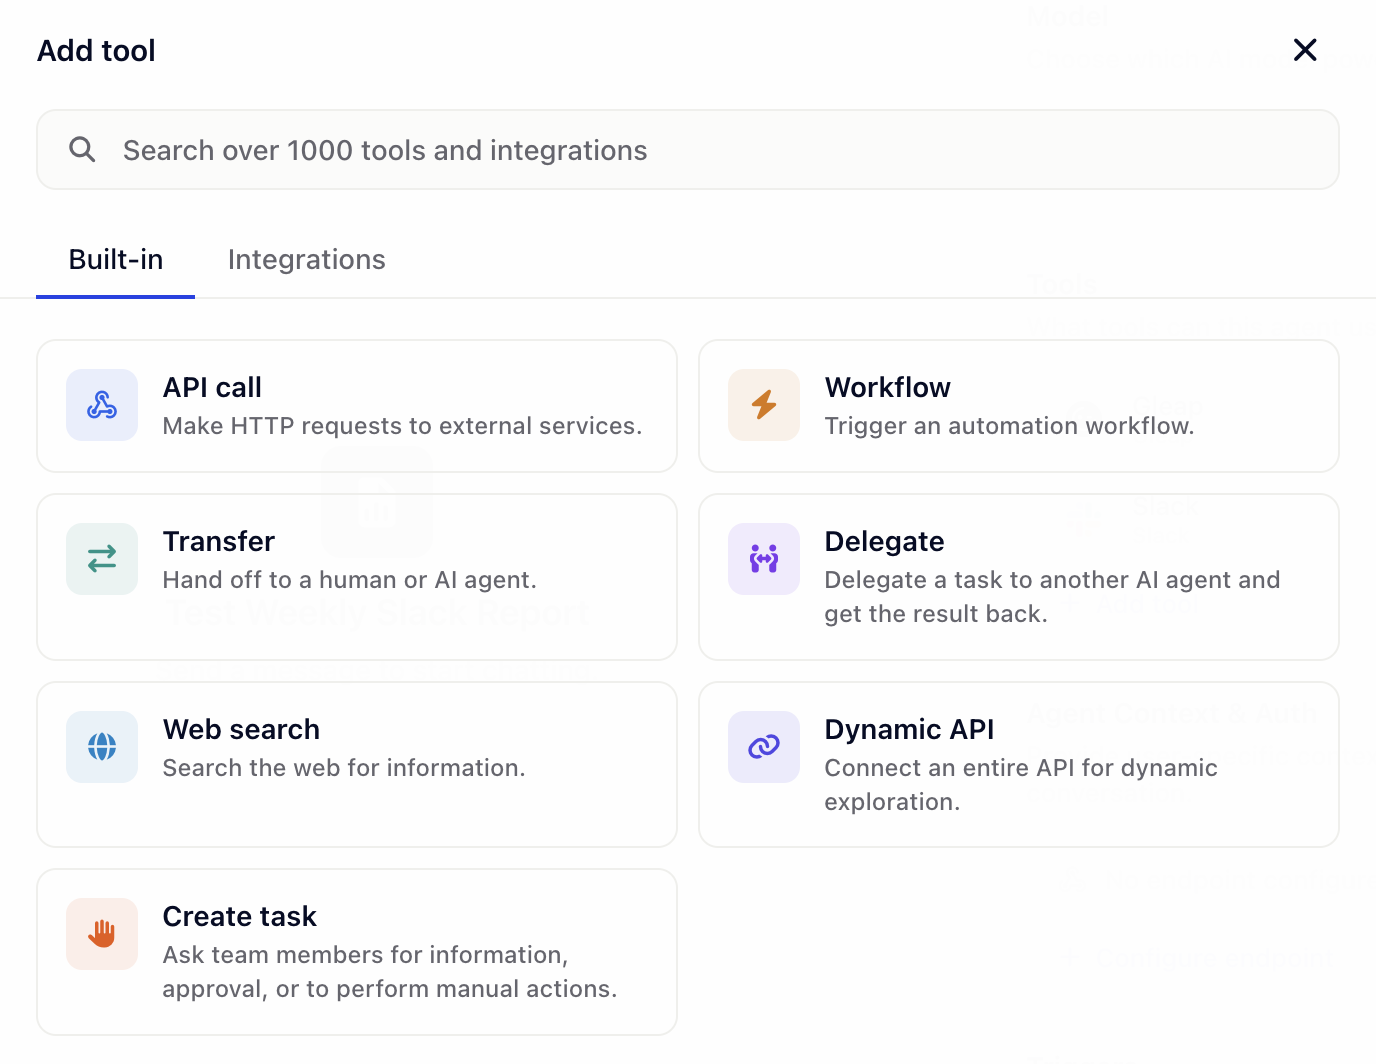
This article covers the five general-purpose tool types. Transfer, Delegate, and Create task are also tool types, but they're about handing work off to other agents or humans — see for those.
The API call tool lets the agent make HTTP requests to your own endpoints. It's the simplest way to connect an agent to your backend.
When to use it: You want the agent to look up or send data through a single, well-defined endpoint — e.g. get the customer's subscription status, create a ticket in our system, log this event.
What you configure:
URL — the endpoint, e.g. https://api.example.com/customer/{{context.customerId}}.
Method — GET, POST, PUT, PATCH, or DELETE.
Headers — key/value pairs for auth and content type.
Parameters — values the agent will fill in from the conversation. Each parameter has a name, type (string, number, boolean, array, object), description, and required flag. The description is what the agent reads to decide when and how to use it.
Templating: Use {{context.key}} in the URL or header values to inject data passed through the SDK via additionalContext. This is how you safely pass things like customerId or tenantId without putting them in the prompt.
The Workflow tool lets the agent trigger an existing automation from your project. (In the data model this is the Action tool type; in the UI it's labeled Workflow.)
When to use it: You've already built a workflow in Gleap that does something — escalate a ticket, send a notification, update a record — and you want the agent to be able to fire it.
What you configure:
The workflow to trigger.
A description of what the workflow does, so the agent knows when to use it.
If you don't have a matching workflow yet, build it in your project's Workflows section first, then come back here to wire it up.
The MCP server tool connects your agent to a Model Context Protocol server. MCP is an open standard for exposing tool sets to AI agents — one connection gives the agent access to many tools at once.
Two ways to add an MCP tool:
Pick a preset — Gleap ships with one-click presets for Gleap, Slack, Attio, Linear, HubSpot, Jira, GitHub, and Stripe. Click the preset, authorize via OAuth, and the agent gets the full tool set.
Custom MCP — bring your own MCP server. You provide the MCP URL and choose an auth mode: No authentication, Headers (manual), or OAuth 2.0.
Powered by Composio. Several integrations — including Linear, HubSpot, Jira, GitHub, and Stripe — connect through under the hood. That's why you'll see the Composio logo and consent screen in the OAuth flow when you authorize them. This is expected behavior — Composio handles the OAuth handshake and tool routing, and the resulting connection is private to your Gleap project.

1,000+ integrations. The presets above are just the most common starting points. Through Composio, your agent can connect to over 1,000 third-party tools — CRMs, ticketing systems, calendars, marketing platforms, dev tools, payment providers, and more. If a service you need isn't in the preset list, search for it when adding a new MCP tool — chances are it's already supported.
When to use it: You want broad coverage of a third-party system (e.g. give the agent access to all of Linear) without configuring each endpoint as a separate API call.
For a deeper dive on Gleap's own MCP server, see .
The Web search tool lets the agent search the live web for up-to-date information.
When to use it: Your agent needs current information that isn't in your knowledge base — e.g. check the latest pricing on a competitor's site, look up a recent event, find docs for an external library.
What you configure:
Restrict to domains (optional) — a comma-separated list like gleap.io, docs.gleap.io. Leave empty to search the whole web. Restricting domains is recommended when you want predictable, on-brand sources.
The Dynamic API tool gives the agent access to an entire API through a single tool. Instead of pre-defining each endpoint as an API call, the agent dynamically chooses which path, method, and payload to use based on the conversation.
When to use it: You want the agent to explore a large API surface — e.g. the agent should be able to call any GET endpoint on our public API. Especially powerful with an OpenAPI spec for auto-discovery.
What you configure:
Base URL — the API's root, e.g. https://api.example.com/v1.
Headers — static headers (auth, content type). Use {{variable}} for dynamic values.
Runtime parameters — values the agent extracts from the conversation and passes through. Each parameter is referenced as {{runtime.parameterName}} in URLs or headers — for example, define customerId and use {{runtime.customerId}} in the base URL.
OpenAPI spec URL (optional) — a link to your OpenAPI/Swagger spec. The agent uses it to auto-discover endpoints, parameters, and response shapes.
API documentation (optional) — free-form text describing the API if you don't have an OpenAPI spec.
Allowed methods — restrict which HTTP methods the agent can use. Lock to GET only if you don't want the agent to mutate data.
Gotcha: Dynamic API is more powerful than API call but harder for the agent to use well without good documentation. If you find the agent making the wrong calls, tighten the spec, restrict methods, or fall back to defining specific API calls.
A quick decision guide:
One specific endpoint, well-defined | API call |
Trigger an existing Gleap workflow | Workflow |
Whole product (Slack, Linear, GitHub, etc.) | MCP server preset |
Live web research | Web search |
Free-form access to a whole API | Dynamic API |
Hand off to another agent or a human | See |
Some tools need authorization before the agent can go live — typically MCP presets that use OAuth. If anything is unauthorized, you'll see a Setup required banner at the top of the Settings panel with a button to connect each tool. The Publish button stays disabled until everything's authorized.
Triggers — when and how agents run — control when the agent activates.
Multi-agent collaboration — Transfer, Delegate, and Create task tools.