Message variables are a great way to personalize automated outbound messages.

You can find message variables in all message editors that support them. Simply look for the variable icon in the editor toolbar.
Once opened, you can either choose one of our default variables, or start typing to add a custom variable (read more on custom variables below).
The fallback value allows you to define a text that is being used when the variable is either empty or not defined at all.
A good example for a fallback value with the "Name" variable is "there". Instead of "Hey ,", it would produce a "Hey there," if no user name is set.
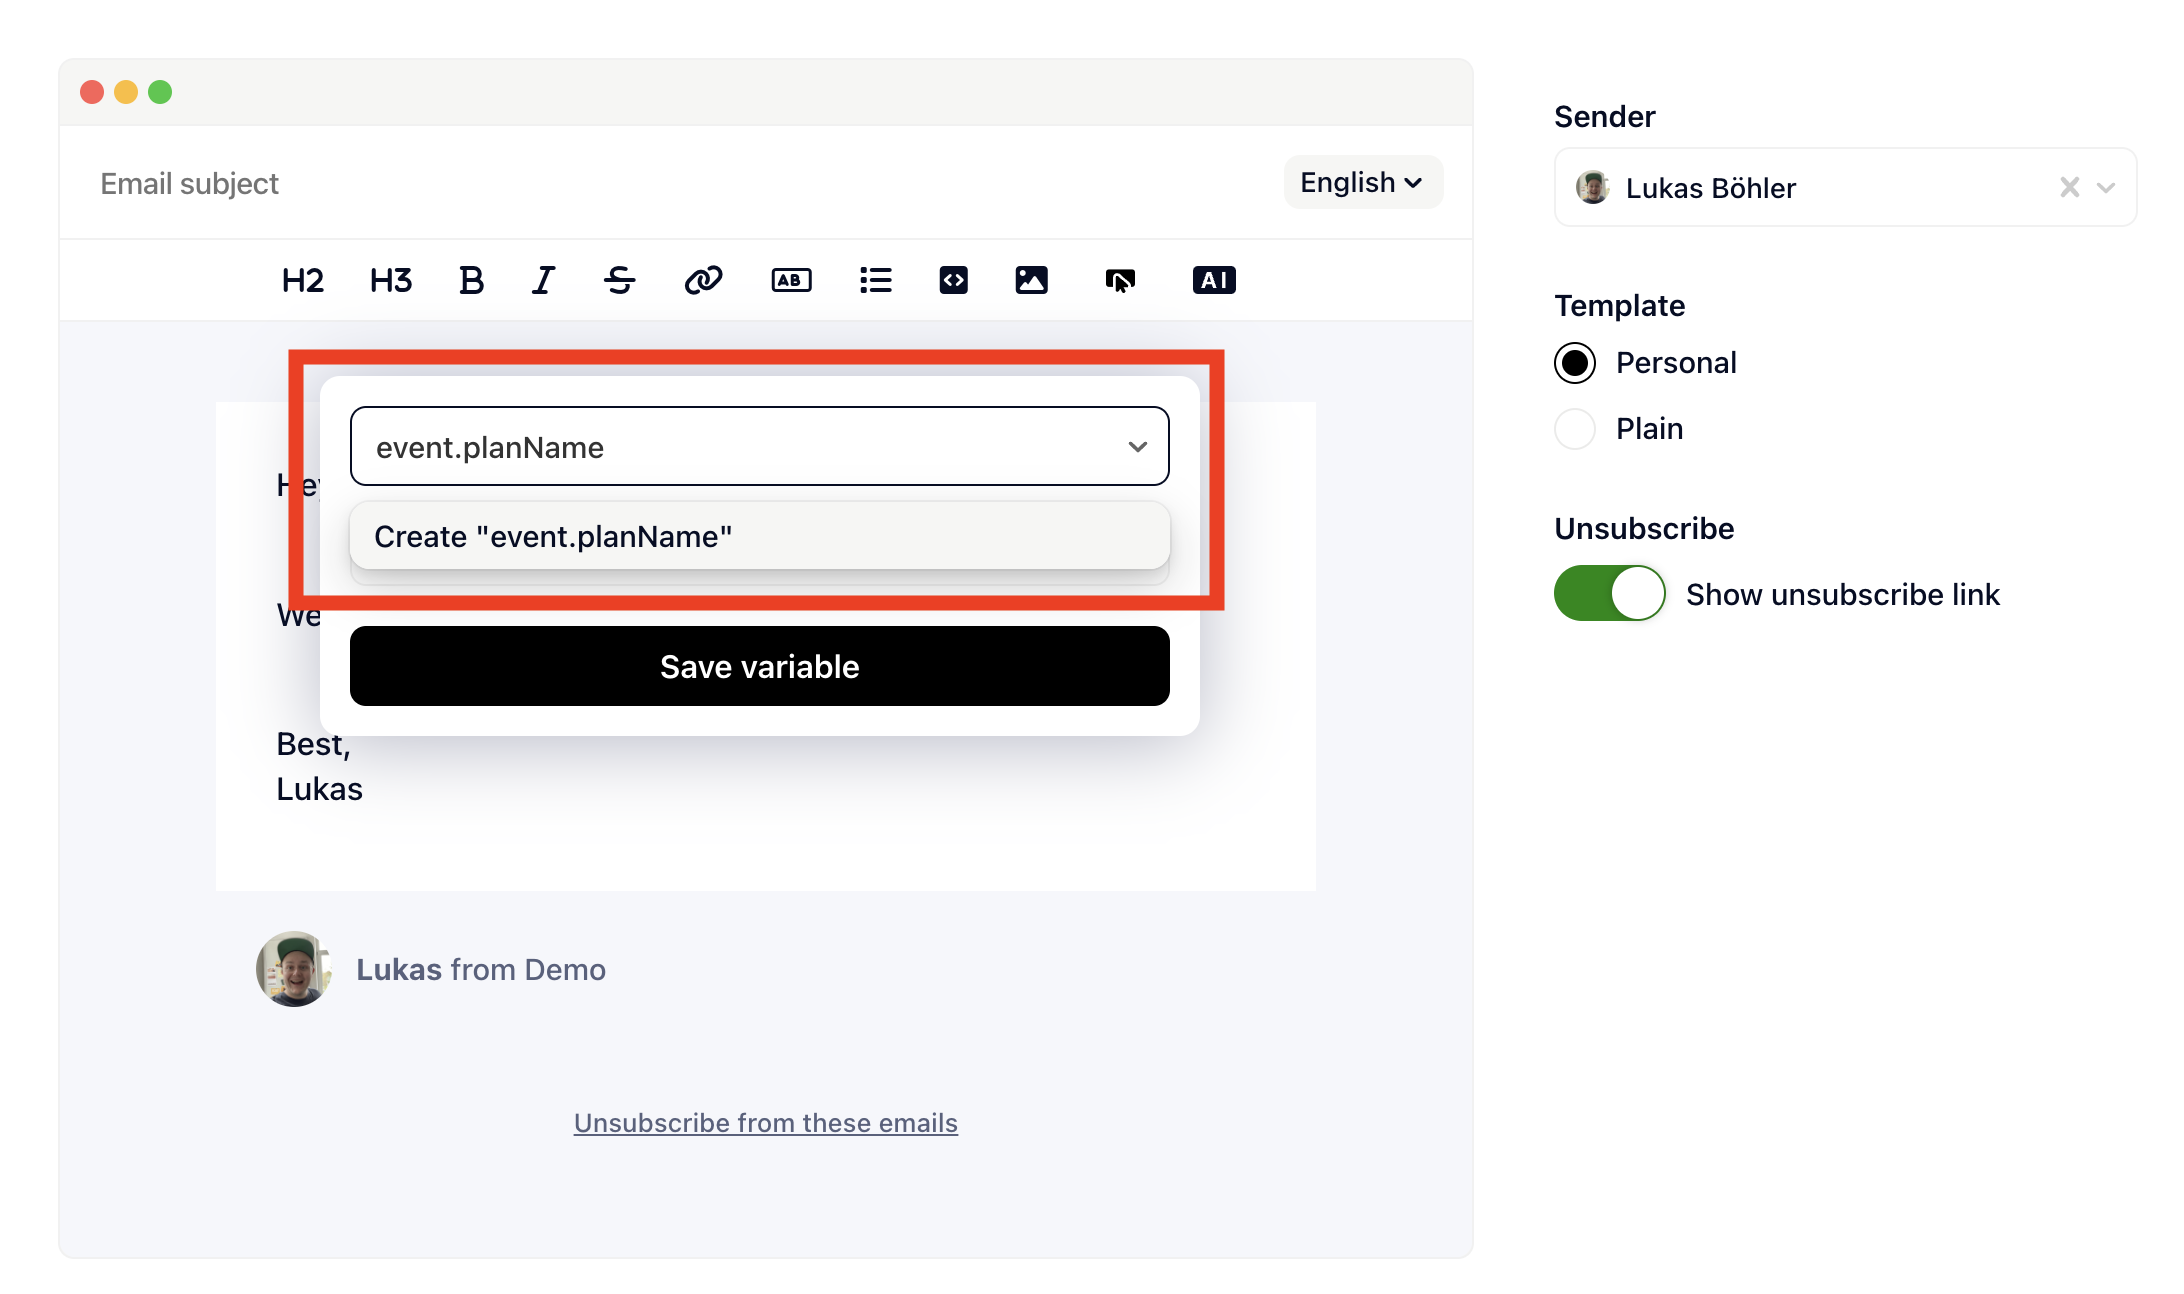
If you set an event trigger, to trigger an outbound message, you can now also access the custom data of the event and incorporate that data in your message templates.
For the example below, we are using the following event as trigger:
Gleap.trackEvent("Canceled Subscription", { planName: "Pro",});You can then access the variable planName by typing event.planName in the variable dropdown. Confirm by either hitting Enter or "Create ...".
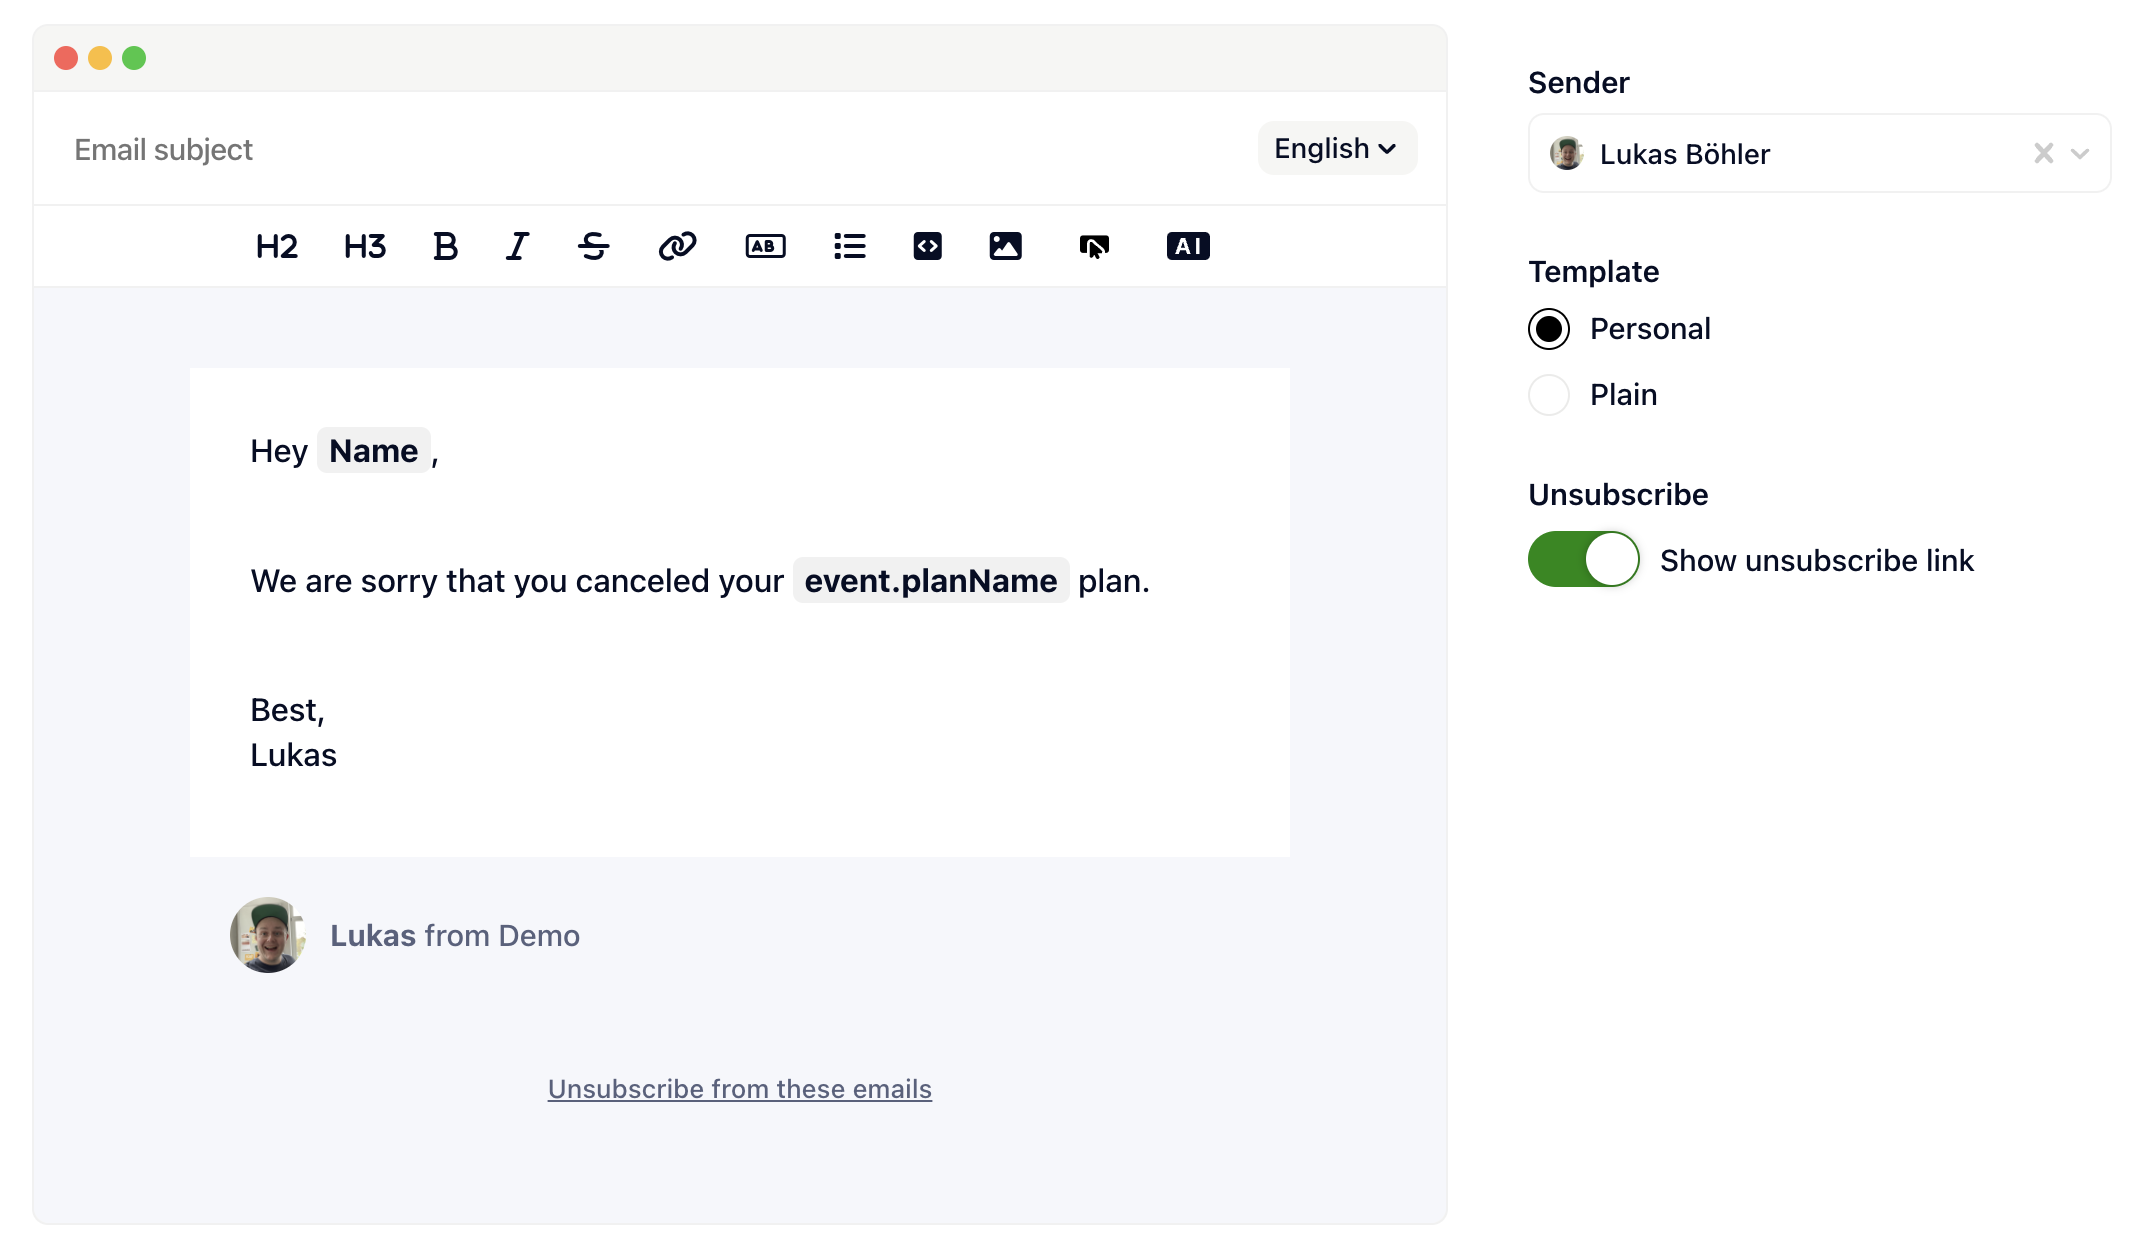
That's it, you have now successfully used your own custom event variable. The result looks like this:
The supported message variables vary based on the application of use.
event (only available when triggered by an event with custom data. The custom data can be accessed with event.yourDataKey)
project (name)
session (name, email, lang, phone, value, customData, gleapId)
project (name)
session (name, email, lang, phone, value, customData, gleapId)
ticket (bugId, formData, screenshot)
organization (name)