Before importing, ensure that your CSV file is formatted correctly. It should include clearly labeled columns for each piece of contact information you wish to import. Common fields include name, email, phone number, and any custom fields relevant to your services.
Log into your Gleap dashboard and head over to Contacts. Then click on Importer and choose Import from CSV.
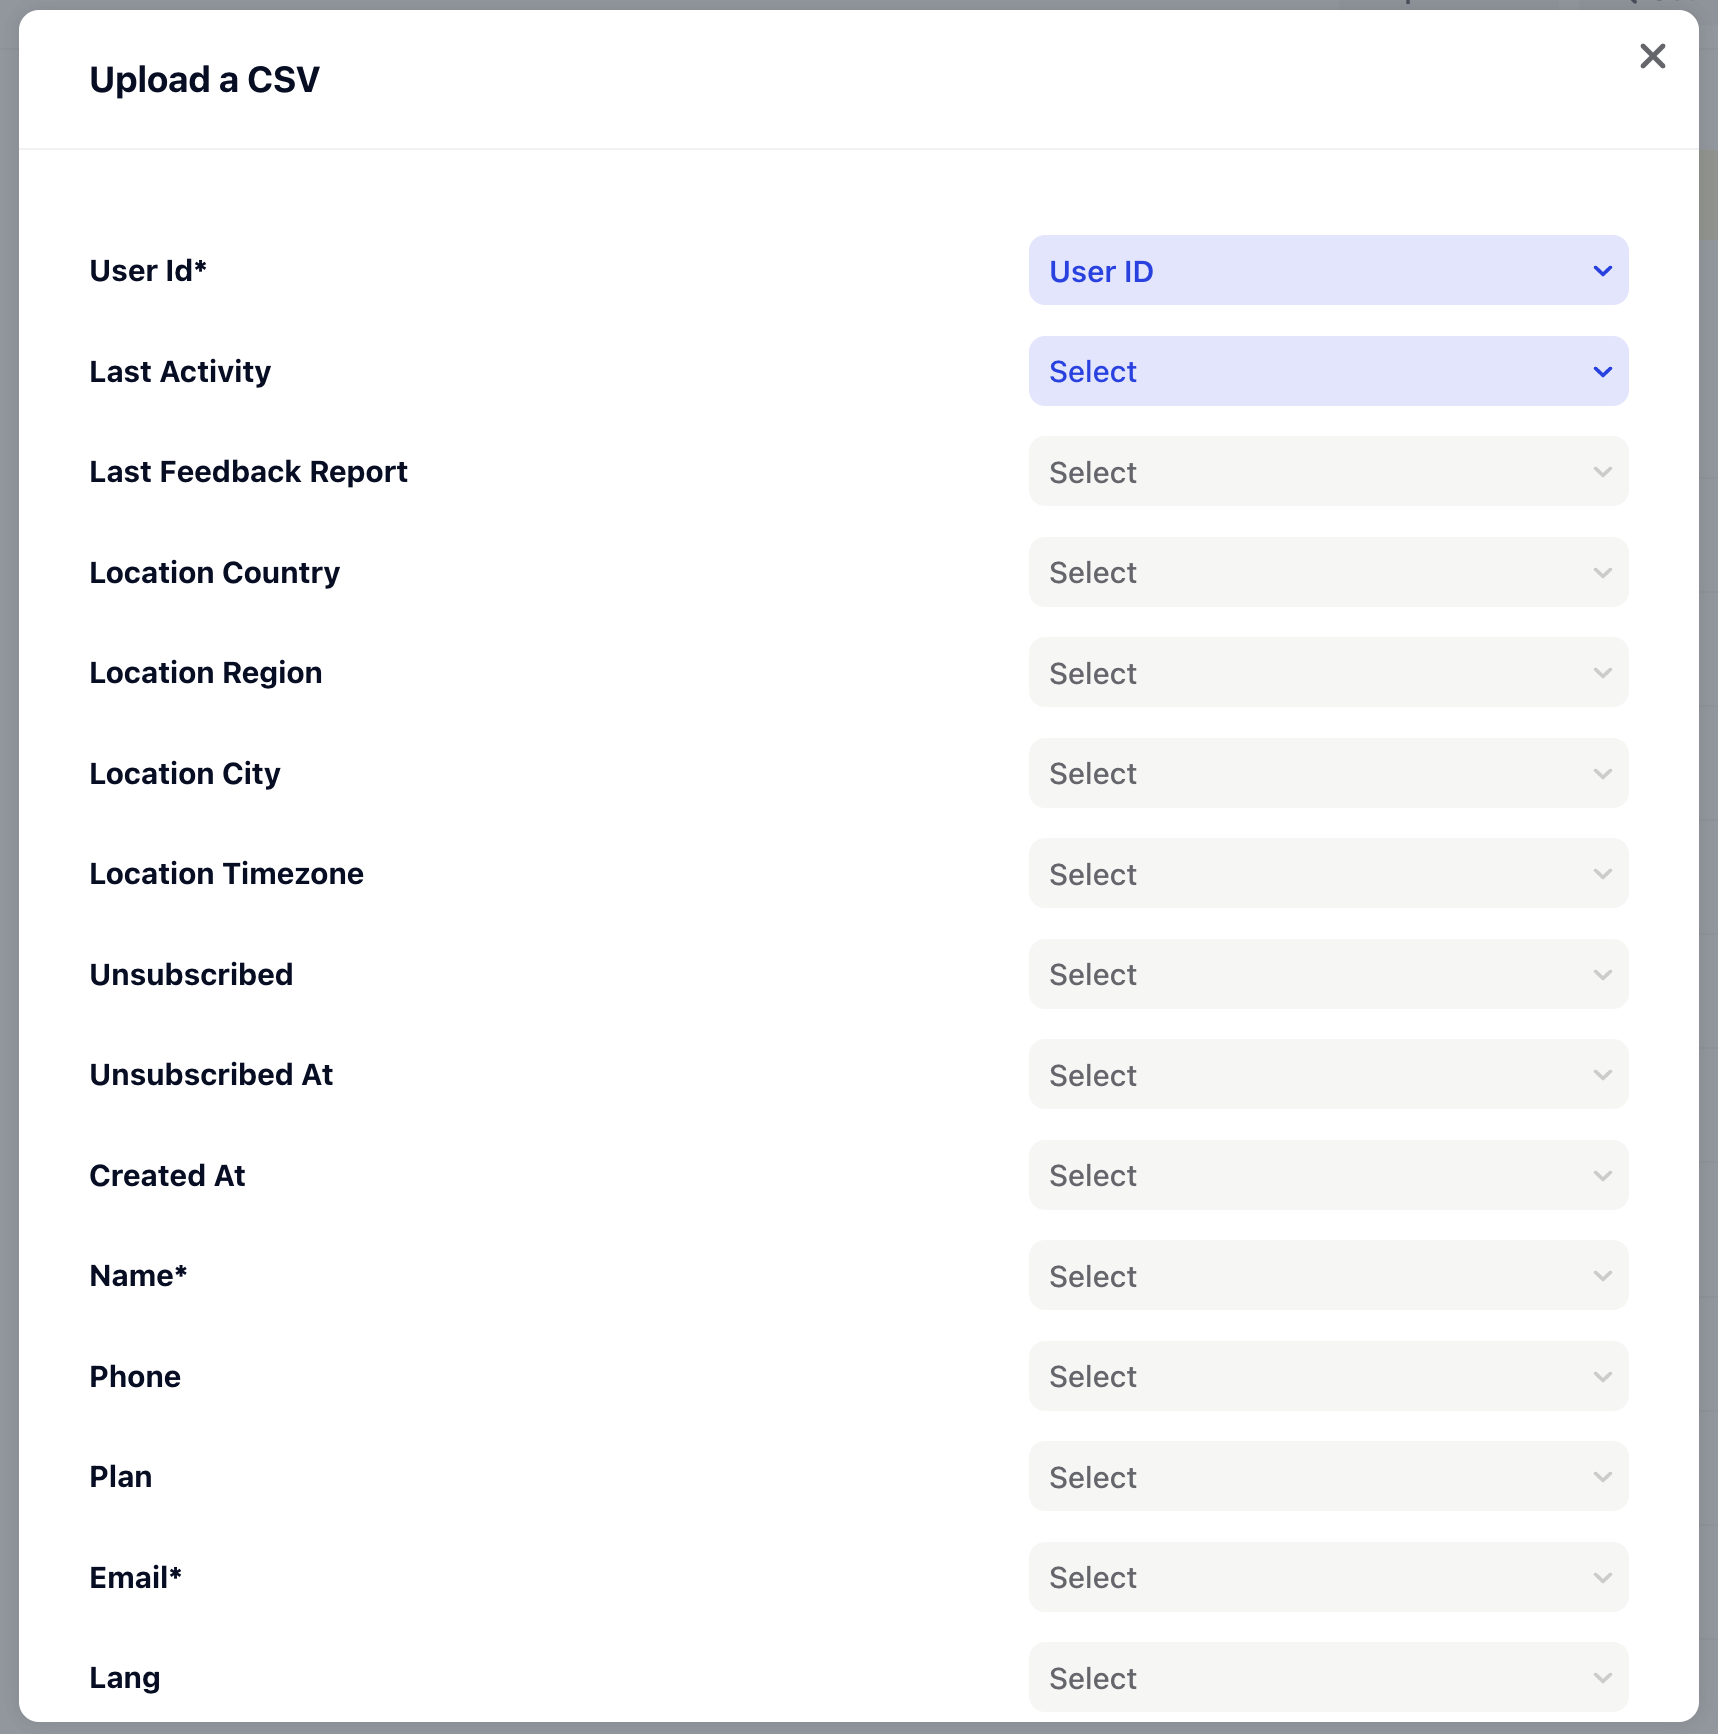
Click on 'Upload a CSV' to select your file. Once uploaded, you'll be presented with a field mapping interface, as shown in the accompanying screenshot. This interface is designed to match your CSV columns to the corresponding fields in Gleap.
For each field in your CSV, use the dropdown menus to assign it to a Gleap field. Ensure that all necessary fields, especially those marked with an asterisk (*), are mapped to maintain data integrity.

After mapping all fields, proceed to finalize the import. Our backend will automatically convert the entire document into the format compatible with Gleap, based on your mapped fields. This transformation is done while preserving the original data structure and ensuring that all the information translates accurately into your dashboard.
Should you encounter any issues or require further assistance, please reach out to our support team for help. We're here to ensure that your transition to Gleap is as smooth as possible.